


Print Profile(1)

Bill of Materials


Description
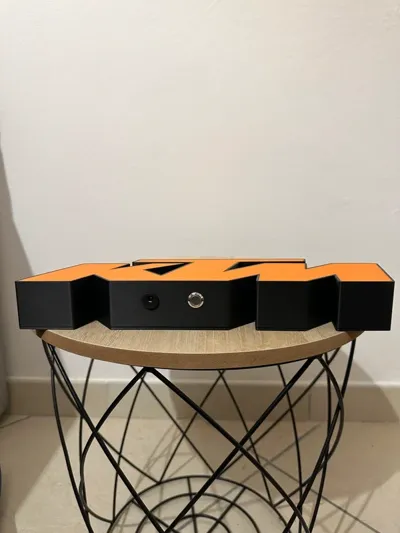
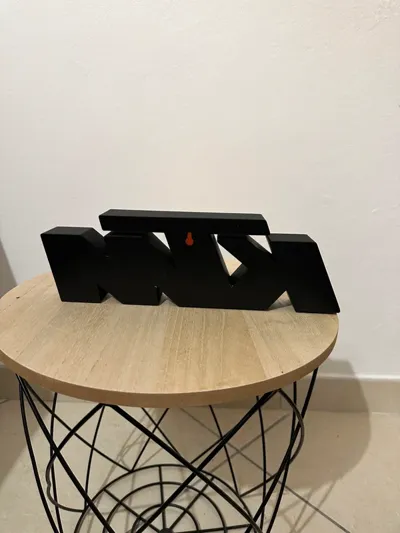
Questa è un’insegna luminosa realizzata con stampa 3D e illuminazione LED a 12V, progettata per essere utilizzata sia appesa al muro (grazie all’aggancio posteriore) sia appoggiata su una scrivania o mensola.
Il modello è stato progettato per ottenere un’illuminazione uniforme tramite diffusore interno, evitando zone d’ombra e punti luce visibili.
L’insegna è composta da più parti:
- frontale con logo
- struttura posteriore
- diffusore interno
- supporti per elettronica
- foro per pulsante
- foro per connettore alimentazione
Il modello è stato progettato e testato su Bambu Lab H2S, ma può essere stampato su qualsiasi stampante con volume sufficiente.
Impostazioni consigliate:
- Materiale: PLA
- Layer: 0.2 mm
- Infill: 10–15%
- Pareti: 3 perimetri
- Supporti: NON necessari
- Tempo di stampa: ~7 ore (dipende dalla scala)
Ridimensionamento
Il modello può essere scalato uniformemente per adattarlo a stampanti più piccole.
⚠️ Dopo lo scaling è importante ricontrollare e adattare i fori per:
- pulsante
- connettore DC
- passaggi cavi
in modo che restino compatibili con i componenti scelti.
💡 Elettronica utilizzata
L’insegna funziona interamente a 12V, quindi è sicura e semplice da alimentare.
Componenti:
✅ Striscia LED
- Tipo: LED warm white
- Tensione: 12V
- Posizionata dietro al diffusore per illuminazione uniforme
✅ Pulsante
- Pulsante metallico circolare
- Diametro: 12 mm
Link:
https://www.aliexpress.com/item/1005007186658147.html
✅ Connettore alimentazione
- Tipo: DC-022
- Dimensione: 5.5 x 2.5 mm
Link:
http://it.aliexpress.com/item/33016631649.html
✅ Alimentatore
- Uscita: 12V – 1A
Link:
https://www.aliexpress.com/item/1005005763465796.html
🔌 Collegamenti
Schema semplice:
Alimentatore 12V → Connettore DC → Pulsante → Striscia LED
Il pulsante interrompe il positivo della striscia LED, permettendo l’accensione direttamente dall’insegna.
I cavi vengono instradati all’interno del corpo dell’insegna tramite le guide predisposte nel modello.
🧱 Montaggio
- Inserire striscia LED dietro al diffusore
- Montare pulsante nel foro frontale
- Inserire connettore DC nel retro
- Collegare i cavi e saldare
- Chiudere il retro con le viti / incastro (a seconda della versione)
- Test prima della chiusura definitiva
Sul retro è presente l’aggancio per il fissaggio a parete, ma la base permette anche l’appoggio su superfici piane.
Questo progetto nasce per unire stampa 3D ed elettronica in qualcosa di semplice ma d’effetto.
Se lo modifichi, lo personalizzi o lo migliori, mi fa solo piacere vedere le tue versioni!
This is a LED sign made with 3D printing and 12V LED lighting, designed to be used both wall mounted (thanks to the rear hanging mount) and placed on a desk or shelf.
The model is designed to achieve uniform lighting using an internal diffuser, avoiding shadow areas and visible light spots.
The sign is made of multiple parts:
- front panel with logo
- rear structure
- internal diffuser
- electronics supports
- button hole
- power connector hole
The model was designed and tested on a Bambu Lab H2S, but it can be printed on any printer with sufficient build volume.
🖨️ Print Settings
Recommended settings:
- Material: PLA
- Layer height: 0.2 mm
- Infill: 10–15%
- Walls: 3 perimeters
- Supports: NOT required
- Print time: ~7 hours (depends on scale)
📏 Scaling
The model can be uniformly scaled to fit smaller printers.
⚠️ After scaling, it is important to recheck and adjust the holes for:
- button
- DC connector
- cable passages
so they remain compatible with the selected components.
💡 Electronics Used
The sign runs entirely on 12V, making it safe and easy to power.
Components:
✅ LED Strip
- Type: Warm white LED
- Voltage: 12V
- Placed behind the diffuser for uniform lighting
✅ Button
- Round metal push button
- Diameter: 12 mm
Link:
https://www.aliexpress.com/item/1005007186658147.html
✅ Power Connector
- Type: DC-022
- Size: 5.5 x 2.5 mm
Link:
http://it.aliexpress.com/item/33016631649.html
✅ Power Supply
- Output: 12V – 1A
Link:
https://www.aliexpress.com/item/1005005763465796.html
🔌 Wiring
Simple wiring scheme:
12V Power Supply → DC Connector → Button → LED Strip
The button interrupts the positive wire of the LED strip, allowing the sign to be turned on and off directly from the sign.
The wires are routed inside the body using the built-in cable guides in the model.
🧱 Assembly
- Place the LED strip behind the diffuser
- Install the button in the front hole
- Insert the DC connector in the rear hole
- Connect and solder the wires
- Close the back using screws or snap-fit (depending on the version)
- Test before final closure
There is a wall mounting hook on the back, but the base also allows the sign to be placed on flat surfaces.
This project was created to combine 3D printing and electronics into something simple but visually impactful.
If you modify it, customize it, or improve it, I’d really enjoy seeing your versions!
License
You may create derivative works based on this object, provided that all such derivative works are published exclusively on the MakerWorld platform and include proper attribution to the original creator. You may not share, upload, host, distribute, or publish this object—or any derivative work of this object—on any other digital platform, marketplace, or distribution channel. Commercial use of this object and any derivative works is strictly prohibited. This includes, but is not limited to, selling, renting, sublicensing, or using the object in any context in which you receive monetary compensation or other financial benefits.
Comment & Rating (1)