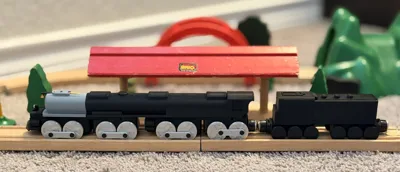
New Upgraded Big Boy 4014 Train Brio compatible


Print Profile(3)

Description
This is the Upgraded version of my Union Pacific Big Boy 4014 steam locomotive, now improved with better fitment, stronger connections, multicolor-friendly parts, and functional motion details.
Designed to be compatible with Brio, IKEA, and other wooden train track systems, this model captures the iconic look of one of the most powerful steam locomotives ever built while keeping a compact, toy-like aesthetic that fits naturally into wooden railway playsets.
What’s New in This Upgraded Version!!
- Updated peg/connector design for stronger, more reliable coupling
- Improved pivot plates for smoother turning and better track handling
- Multicolor printing support (parts can be printed in different colors for a premium look)
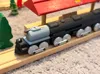
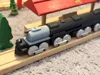
- Working driving rods that move with the wheels for a true steam locomotive feel
This upgraded Big Boy is built for both display and real play, delivering an authentic steam-engine vibe while remaining sturdy and track-friendly.
Instructions (Assembly)
I have special supports for each individual object to print as well as a plate set to print per object.
Step 1 — Boiler
- Glue the Front boiler to the main engine body.
Step 2 — Wheels + Driving Rods
- Attach one Wheel to one end of each axle.
- Feed Axle through holes in the bogies and attach the partner wheel.
- Locomotive note: the pins holding the driving rods to the silver wheels must be rotated 90° from each other to allow smooth operation.

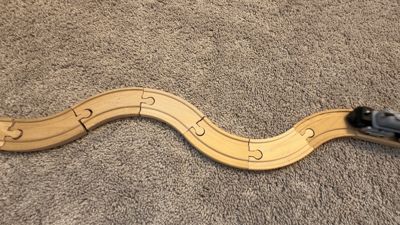
Step 3 — Bogies + Pivot Plates
- Use bogie pegs to secure bogies to pivot plates.
- The tender has no pivot plates — attach bogies directly to the tender using the tender peg.
- ⚠️ Use the smallest amount of super glue possible and confirm the plates/bogies still rotate freely.
Step 4 — Mount Pivot Plates
- Secure pivot plates to the engine using the plate-to-engine peg.
Step 5 — Bell
- Glue the bell to the bell attach bar, then glue the assembly into the slot on the front of the engine.
Step 6 — Whistle
- Cut a 1 cm piece of filament in your desired color and glue it into the slot on top of the engine.


Loose Peg Fix (If Needed)
If pegs are loose, add a small amount of super glue inside the hole, then insert the peg and ensure the plates/bogies still rotate freely.
Magnets / Connectors
I included guide holes that can be drilled out to fit whatever magnets or connectors you prefer.
Boost Me (for free)
I love making these things for my kids and seeing others enjoy them as well, supports with a boost are wonderful! Thank You
License
You shall not share, sub-license, sell, rent, host, transfer, or distribute in any way the digital or 3D printed versions of this object, nor any other derivative work of this object in its digital or physical format (including - but not limited to - remixes of this object, and hosting on other digital platforms). The objects may not be used without permission in any way whatsoever in which you charge money, or collect fees.
Comment & Rating (44)