Parametric Angled Support Column


Print Profile(1)

Description
Boost Me (for free)
Liked this model? A quick Boost goes a long way 👍 It helps me keep making and sharing new designs. Thanks for checking it out!
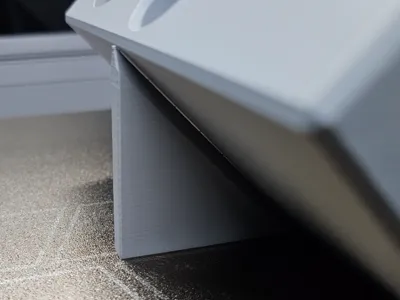
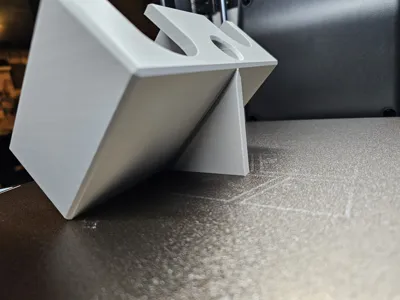
Whether it's to reduce supports, overhangs, or strengthen a functional part, sometimes you want to print something at an angle and not ruin the aesthetic with brim supports. If the models were created by someone else, it can be a pain to create a one off support column to keep the part stable while printing. Well not anymore!
Using the MakerLab Parametric Model Maker (or downloading the f3d file and importing to Fusion), you can instantly create a custom angled support that doesn't ruin the surface of the part. Just enter your model's parameters and download the support column for use in your print.
PARAMETERS:
Mandatory
length - the distance from the part touching the build plate to the furthest area needing support
Optional
angle - the angle of the part from the build plate (default: 45°)
layerH - layer height of the print (default: 0.2mm)
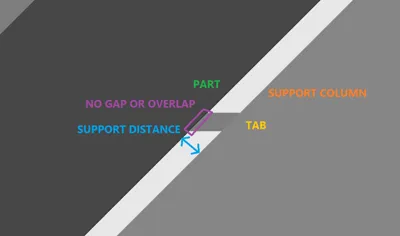
supportW - width of the support column (default: 7mm)
supportDistance - spacing from the support to the part perpendicular to the ‘angle’ axis (default: 0.25mm)
tabSpacing - distance between support tabs (default: 10mm)
Note: The first two tabs are spaced at 25% and 50% spacing respectively to assist the start of the print
taperAngle - angle of the column as it approaches the part (default: 30°)
INSTRUCTIONS
- Set print to angle used for the support column (recommended: 45°)
Using the Measure (U) tool, get the length (X or Y depending on part orientation)

- Using the ‘length’ to generate the support column
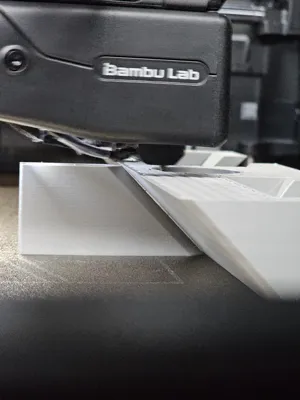
- After generating the support, import into Bambu Studio
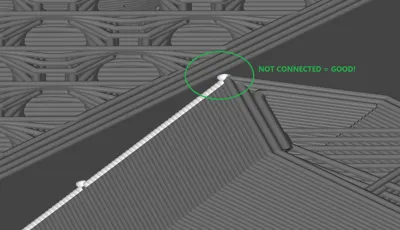
Orient and move support against part (should just be kissing the part but not overlapping)

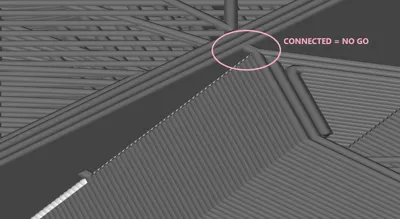
Slice and make sure the support isn't connected to the part at the tabs


- If the support is connected, make sure the support is not an assembly with the part.
- If that doesn't fix it, try moving the support slightly away
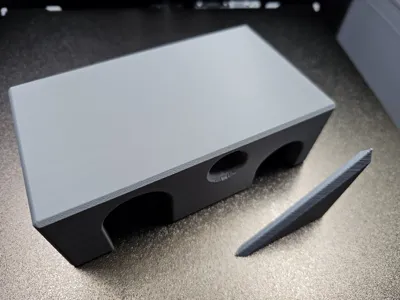
- Print and enjoy a blemish free part surface
Comment & Rating (0)