Snowboard-Binding Disk for AirTag 96mm w. Offset


Print Profile(1)

Description
German
for English description scroll down
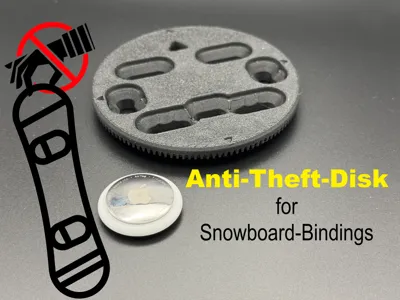
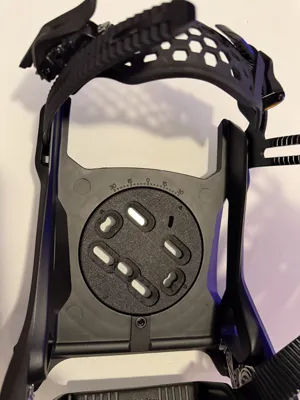
This disc is modeled after Nidecker's offset multi-disc and fits my Supermatic-LT binding perfectly. However, it should also work with all other bindings that use a 96mm disc, especially Nidecker or Flow. It can be used on all boards with 4x4, 3HP or Channel mounting points. The offset design makes it even more flexible to use than a normal multi-disc. A video on the possible mounting options can be found here Nidecker:
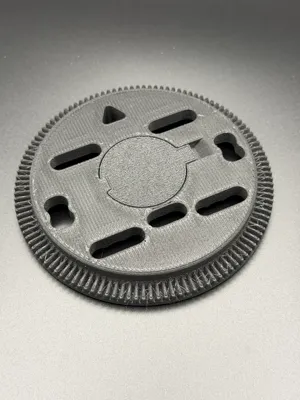
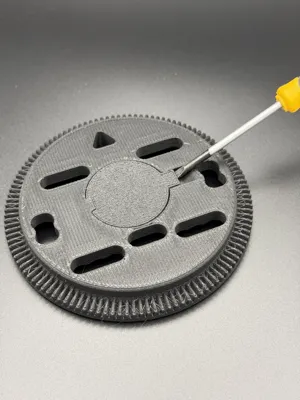
The special thing about this disc is that an AirTag can be hidden inside it. To do this, insert the AirTag on the underside so that the white side of the AirTag is visible. Then insert the cover and let it snap into place. The cover can be opened again later with a screwdriver, key or similar.
Notes for printing
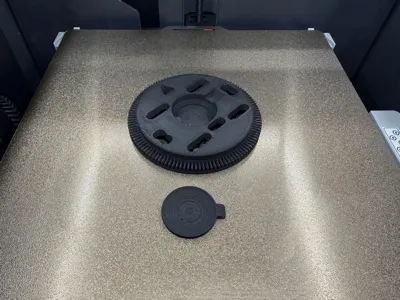
I printed the disc in PLA-CF. However, I made my test prints in PLA. These were already very stable and would probably hold up. Nevertheless, I would recommend choosing fiber-reinforced material. In my printing profile, I use a 0.6mm nozzle, 7 walls and a triple infill. With a 0.4mm nozzle, you should therefore use at least 10 walls. Support is required, but it can be easily removed with my settings.
Disclaimer
Use at your own risk! I assume no responsibility or liability for any property damage or personal injury resulting from the use of the disc.
Boost Me (for free)
I would be very happy about a boost! 🤗
English
This disk is based on Nidecker's offset multi-disk and fits my Supermatic LT binding perfectly. But it should also work with all other bindings that use a 96mm disk, especially Nidecker or Flow. It can be used on all boards with 4x4, 3HP or Channel mounting points. The offset design means it can be used a little more flexibly than a normal multi-disk. A video about the possible assembly options you can see above.
The special thing about this disk is that you can hide an AirTag in it. To do this, insert the AirTag on the bottom so that the white side of the AirTag can be seen. Then insert the cover and let it snap into place. The cover can be opened again later using a screwdriver, key or similar.
Notes for printing
I printed the disc in PLA-CF. But I made my test prints with normal PLA. These were already very strong and would probably last. Nevertheless, I would recommend choosing fiber-reinforced material. In my printing profile I use a 0.6mm nozzle, 7 walls and a triple infill. With a 0.4mm nozzle you should use at least 10 walls. Support is required, but it can be easily removed with my settings.
Disclaimer
Use at your own risk! I assume no responsibility or liability for any damage to property or persons resulting from the use of the disc.
License
You shall not share, sub-license, sell, rent, host, transfer, or distribute in any way the digital or 3D printed versions of this object, nor any other derivative work of this object in its digital or physical format (including - but not limited to - remixes of this object, and hosting on other digital platforms). The objects may not be used without permission in any way whatsoever in which you charge money, or collect fees.
Comment & Rating (2)