Tears of the Storm: A Rain Stick Scepter


Print Profile(1)

Bill of Materials
- Coin x 1: Compatible with a quarter, euro or gbp coin.
- Lentils x 200: I filled up about 200ml of dry lentils. Bearings, beads, seeds, beans, etc. also work.
Description
Tears of the Storm
Forged where myth collides with motion, Tears of the Storm is equal parts relic and machine: a scepter that listens to gravity, remembers rain, and answers movement with sound.
At its heart, a rain-stick shaft whispers like a gathering storm. As the scepter tilts, beads cascade along a hidden helix, echoing the ancient thorn-lined rain sticks of the world with a clean, mechanical rhythm. Every motion becomes weather.
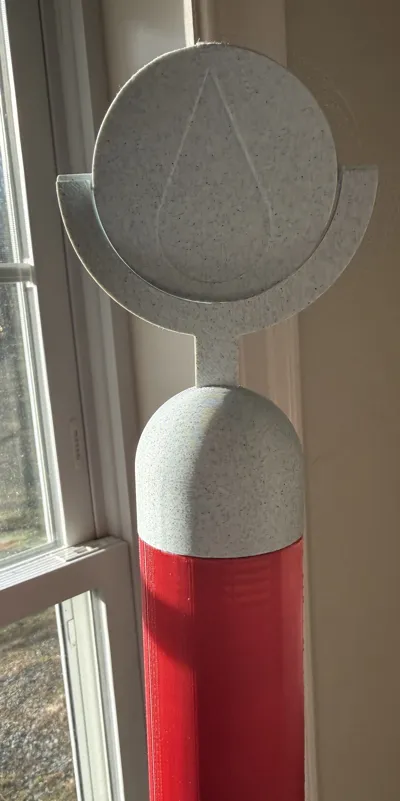
Crowned above it all, a suspended medallion hangs within a precision gimbal, a single tear that refuses to fall. Weighted and balanced, it remains upright no matter how the world turns around it — a quiet nod to moments that endure even as everything else shifts. The motion is slow, deliberate, inevitable.
This is not decoration for decoration’s sake. Every feature serves a purpose: balance, sound, motion, and story. The gimbal speaks to truth and gravity. The rain speaks to time and memory. And when raised, the staff feels less like an object and more like an instrument of control — of storm, of calm, of the space between thunder and silence.
A scepter for a modern god.
A storm, held in your hands.
Features
Self righting gimbal: the medallion stays upright
Rain stick sound maker: designed to be a rainstick. Fill with beads (or beans) to make the sound of falling rain when inverted.
Flat bottom for easy filling
Extensible: the shaft can be printed multiple times to create a very long scepter
Assembly summary

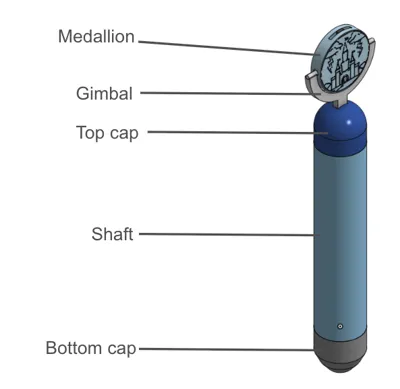
Parts:
Medallion (coin-weighted), Gimbal, Top Cap, Shaft (rain helix), Bottom Cap
Gimbal Assembly
• Lightly sand gimbal pins
• Hand-ream medallion holes with ¼″ bit (use 15⁄64″ if tight)
• Snap medallion into gimbal and confirm free rotation
Add Weight
• Insert a coin fully into medallion slot
• Install retaining plug (removable with screwdriver)
Assemble & Fill
• Gently thread bottom cap onto shaft (work threads in)
• Stand upright and fill with small, round material
Finish
• Thread top cap onto shaft
• Optional: add shaft sections to extend length
See attached documentation for detailed instructions.
Documentation (1)
License
You may create derivative works based on this object, provided that all such derivative works are published exclusively on the MakerWorld platform and include proper attribution to the original creator. You may not share, upload, host, distribute, or publish this object—or any derivative work of this object—on any other digital platform, marketplace, or distribution channel. Commercial use of this object and any derivative works is strictly prohibited. This includes, but is not limited to, selling, renting, sublicensing, or using the object in any context in which you receive monetary compensation or other financial benefits.
Comment & Rating (0)