


Print Profile(5)


Description
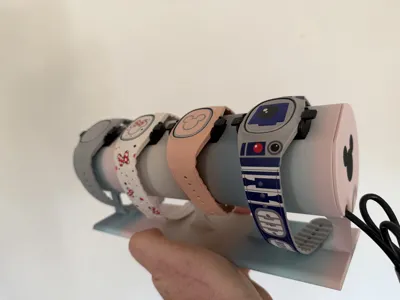
These end caps with a Mickey Mouse silhouette work with several models of Disney Magic Band Holders/Chargers/Docks available here. I have tested these on the following models:
https://makerworld.com/en/models/141392-disney-magic-band-stand-and-charging-dock
https://makerworld.com/en/models/1788610-another-magic-band-charger-stand-for-4-bands
https://makerworld.com/en/models/141392-disney-magic-band-stand-and-charging-dock
Note that my design is for the end caps only. You will need to print the holder itself from one of the above links.
About this Design
I designed these end caps to be extra sturdy to stay in place. The end cap fits snuggly into place and the three clips add additional friction so the cap doesn't become dislodged. The clips are relatively sturdy, but if one happens to break it shouldn't matter - it will still remain secure
Printing Material
This prints perfectly in PLA. I have not tried any other materials, but PLA should be sufficient.
The primary version of the model uses AMS in order to print the Mickey silhouette in a different color (also in PLA) from the end cap itself.
Installation
This should be pretty straight forward, but make sure you are installing the end caps on the correct side as the end caps are mirror images of each other. It is easiest to start with the portion near the wire cut-out (where there are no clips) and start pushing in from there, working your way around the circle, slightly pushing the clips in if needed. You may here a click when if falls into place.
Removal
The flat each of the circle is chamfered a bit in case you need to pry this out. You may be able to do so with your fingers. If not, a screwdrivers can do the trick.
Boost Me (for free)
If you enjoyed this print, please Boost Me!
Comment & Rating (9)