Search models, users, collections, and posts
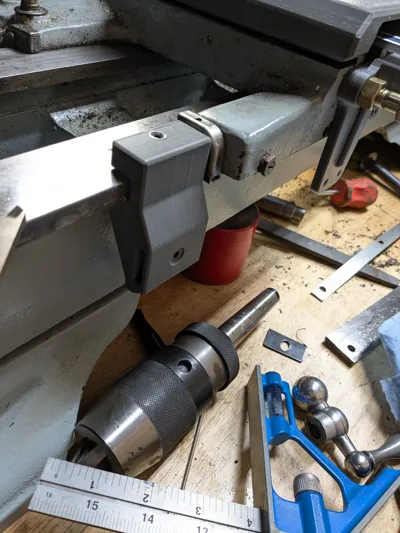
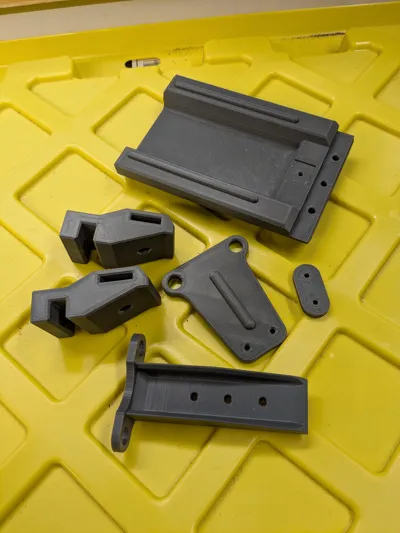
Atlas TH42 Lathe DRO Mounting Brackets
IP Report


Print Profile(1)

0.2mm layer, 6 walls, 15% infill
Designer
6.8 h
3 plates
Open in Bambu Studio
Boost
3
14
0
0
6
3
Released
Description
PLEASE NOTE: Designed and confirmed to fit an Atlas TH42 Lathe, this may fit others but there is no guarantee!!!
---Print Settings---
- Printer = BambuLabs P1S
- Filament - Sunlu High Speed Matte PETG
- Infill = 15%
- Infill Type = Adaptive Cubic
- Perimeter Walls = 6
- NOTE: Recommend Printing the DRO Scale Mount vertical separately to prevent layer shifts.
- NOTE: Recommend Printing the DRO Scale Bed Mounts on their side.
---Hardware Used---
- NOTE: Recommend using Button Head Cap Socket Screws for maximum clearance and best looks.
-- Item -- --- QTY ---
- 3/8-16"x 1" Bolt -- x2
- M5x20 Bolt -- x1
- M5 Washer -- x2
- M4x25 Bolt -- x1
- M4x16 Bolt -- x2
- M4x8 Set Screw -- x2
- M4 Acorn Nut -- x1
- M4 Nut -- x4
- M4 Washer -- x4
- M3x12 Bolt -- x2
- M3x16 Bolt -- x2
- M3 Washer -- x4
----Assembly Notes---
- M5 Bolt is used to secure Way cover to the Cross Slide, there is no factory hole so you will need to drill and tap the machine cross slide or use another way to secure it.
- M4 Nuts are press fit into the DRO Scale Bed Mounts, flat head screw driver works good for pressing them into place, if needed use a M4 screw to seat them fully into place.
- M4 Set screws may be replaced with Brass/Brass Tipped Set screws to prevent marring the machine ways.
- Carriage Encoder Mounting Plate MUST BE placed directly against the carriage, followed by the DRO Scale Mount.
- Carriage Encoder Spacer goes between mounting plate and the encoder on the rail.
- Use Caution when drilling through the scales, they do have glass on the front side, so watch for shards!
License
This user content is licensed under a
Creative Commons Attribution-Noncommercial-Share Alike
Comment & Rating (0)