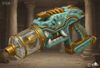
Zonai Vortex Emitter


Print Profile(2)

Description
I used "Fuse" on a Zonai Cannon and a Vacuum. The result is satisfying. 🛠️✨
Forget saving the Princess, I'm just trying to clean my house. 🧹 Finally finished my 3D printed Zonai Vortex Emitter! Link's new ability: "Ultra-Suction". Who needs Master Hand when you have this?

📜 Zonai Vortex Emitter - Assembly Blueprint
🛠️ 1. Preparation
- Core Components: 3D Printed Shell , Clear Tube(100mm*63mm*2mm)
- Electronics: Vacuum Motor, 12V Li-ion Battery Pack, DC Charging Port, Switch.
- Tools: Phillips Screwdriver, Electrical Tape (or Zip Ties), Super Glue/Hot Glue.
- M5 Screw 65mm (Through the dragon's eye, connect to the dragon's head (my initial design intended to use a 63mm round pipe for connection, with two green LEDs inserted inside as power indicators).
⚙️ 2. Front Canister Assembly
(Ref: Copper frame and clear tube parts)
- Filter Installation: Attach the white filter/mesh to the front intake of the black motor unit. Note: Ensure a tight seal to prevent dust from bypassing the filter and damaging the motor blades.
- Tube Docking: Insert the clear acrylic tube into the copper-colored metal frame and dock it securely with the motor unit.
Airtightness (Optional): It is recommended to wrap a layer of Teflon tape around the joint between the tube and the motor to improve vacuum suction.

🧩 3. Internal Layout & Cable Management
(Ref: Internal structure image)
- Motor Placement: Slot the motor assembly (with the front canister attached) into the corresponding grooves in the middle of the left shell. Ensure it sits firmly and does not slide.
- Battery Placement: Place the green battery pack into the compartment at the very bottom of the handle base. Use a drop of hot glue to secure it and prevent rattling.
- Port Installation: Mount the DC charging port and the switch into the pre-cut holes on the back of the handle and tighten the nuts.
Cable Management (Very Important): Organize the loose wires. Use zip ties or tape to bundle the wires and tuck them into the empty spaces along the shell walls. Avoid the screw posts, otherwise, the wires might get pinched or cut when closing the shell.

- Use a 65mm M5 screw to pass through the dragon's eye and connect to the dragon's head, securing both ends with nuts (my initial design intended to use a 63mm round pipe for connection, with two green LEDs inserted inside as power indicators). The back is connected using the dragon's horn. The dust suction fan is fixed to the bronze-colored frame with adhesive; the fan I used has a diameter of 45mm.
Boost Me (for free)
Forget saving the Princess and Just have Fan,
License
You shall not share, sub-license, sell, rent, host, transfer, or distribute in any way the digital or 3D printed versions of this object, nor any other derivative work of this object in its digital or physical format (including - but not limited to - remixes of this object, and hosting on other digital platforms). The objects may not be used without permission in any way whatsoever in which you charge money, or collect fees.
Comment & Rating (5)