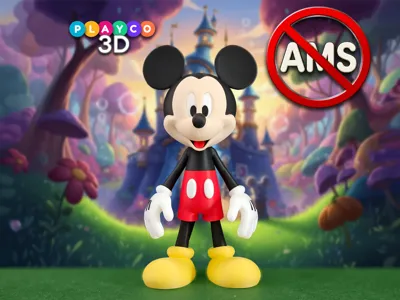
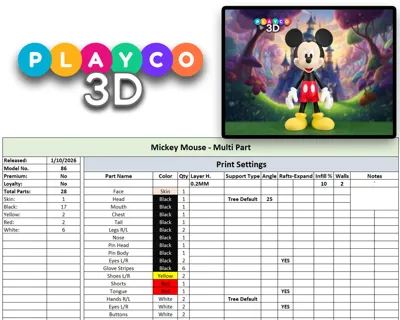
Mickey Mouse - Multi Part - No AMS


Print Profile(2)

![[Optimized for AMS] 0.2mm layer, 2 walls, 10% infill](https://makerworld.bblmw.com/makerworld/model/USb24754b9a15dc9/560255706/instance/2026-01-11_2beada6bcb13a8.jpg?x-oss-process=image%2Fresize%2Cw_100%2Fformat%2Cwebp)


Description
Bring the magic of Disney to your desk with this Mickey Mouse 3D print! Capturing his iconic look and cheerful personality, this model is perfect for fans of all ages and makes a fun, display-ready piece for any collection.
Dimensions:
- At 100% scale, Mickey stands approximately 8.75 inches (222 mm) tall. Scaling up should work fine, but scaling down may tighten tolerances and make assembly more difficult.
Colors Used:

- Bambu Basic: White, Black, Red
- Bambu Matte: Lemon Yellow
- Esun PLA+: Beige
Assembly Tips
• The legs have specific pins to help line up. The right leg has the top triangle pin pointing backwards, and the left leg has the pin pointing forward.
• Press the tongue into the black inner mouth before slideing the black inner mouth from the back of the face.
• The black eyes print upside down. The left eye has a notch cut out on its bottom side.
•The black stripes on the gloves are named L1, L2, L3 and R1, R2, R3. The 1s go on the outside of the gloves, while the 3s sit on the inside near the thumb.
Assembly Steps
- Attach the legs to the shoes, then connect them to the shorts, making sure the pins are aligned correctly.
- Attach the buttons to the shorts.
- Attach the chest to the body using the pin.
- Build the gloves with the stripes, then attach them to the arms.
- Insert the tongue into the black inner mouth, then slide it into the face from the back, and attach the face to the head.
- Insert the white eyes first, followed by the black pupils.
Attach the nose, and then tail, and youre all done!
That’s it—your Mickey Mouse is fully assembled and ready to bring a little Disney magic to your shelf! Thank you so much for building this model and supporting Playco3D. Be sure to share your finished print and tag @Playco3D, and don’t forget to check out my Patreon for premium models—you won’t want to miss what’s coming next!
License
You shall not share, sub-license, sell, rent, host, transfer, or distribute in any way the digital or 3D printed versions of this object, nor any other derivative work of this object in its digital or physical format (including - but not limited to - remixes of this object, and hosting on other digital platforms). The objects may not be used without permission in any way whatsoever in which you charge money, or collect fees.
Comment & Rating (90)