Status Magnet (Refrigerator, Dishwasher)


Print Profile(2)


Description
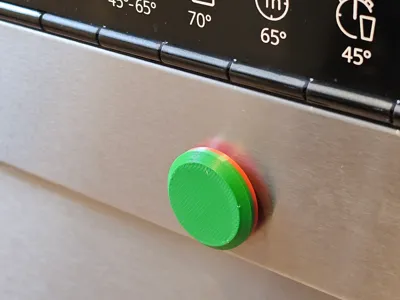
🧲 Status Magnet (Red/Green) – 18x5 mm (Internal Magnet)
This functional 3D print is the ideal household helper for displaying the status of your dishwasher (Clean/Dirty) or other appliances. The special feature of this design is that the magnet is completely enclosed inside during the printing process.
Features:
- No Glue Required: The magnet is securely sealed within the housing and cannot fall out.
- Perfect Dimensions: Optimized for a round magnet with an 18 mm diameter and 5 mm thickness.
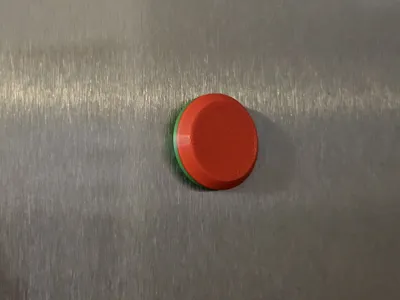
- Smooth Surface: Since the magnet is located internally, there are no scratches on sensitive surfaces like stainless steel fronts.
Printing & Assembly Instructions (Important!)
To successfully enclose the magnet, the print was prepared with a specific pause:
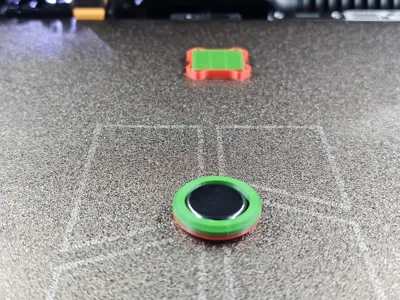
- Insert Magnet (Layer 37): A programmed pause is inserted at the 37th Layer.
- Procedure: Once the printer pauses at Layer 37, simply place the 18x5 mm magnet into the designated recess.
- Resume: After insertion, continue the print. The printer will overprint the magnet and permanently seal it within the component.
Tip: Make sure the magnet lies flat in the recess and does not protrude over the edge before you continue the print, so that the print head does not get stuck.
__________________________________________________________________________________________________________________________________________________________
🧲 Mag-Status Indicator (18x5 mm) – Embedded Magnet
This functional 3D print is a smart household helper designed to track the status of your dishwasher (Clean/Dirty) or other appliances. The standout feature of this design is that the magnet is completely enclosed within the part during the printing process.
Key Features:
- No Glue Required: The magnet is permanently sealed inside the housing and cannot fall out.
- Precision Fit: Specifically optimized for a round magnet with an 18 mm diameter and 5 mm thickness.
- Surface Friendly: Since the magnet is fully encased, there is no risk of scratching sensitive surfaces like stainless steel fronts.
Printing & Assembly Instructions (Crucial!)
To successfully embed the magnet, the print includes a pre-programmed pause:
- Insert Magnet (Layer 37): A programmed pause is set at Layer 37.
- Procedure: Once the printer pauses at Layer 37, simply place the 18x5 mm magnet into the designated cavity.
- Resume: After inserting the magnet, resume the print. The printer will bridge over the magnet, sealing it permanently inside.
Pro Tip: Ensure the magnet sits perfectly flat in the cavity and does not protrude above the edge before resuming to avoid the print head catching on it.
License
You shall not share, sub-license, sell, rent, host, transfer, or distribute in any way the digital or 3D printed versions of this object, nor any other derivative work of this object in its digital or physical format (including - but not limited to - remixes of this object, and hosting on other digital platforms). The objects may not be used without permission in any way whatsoever in which you charge money, or collect fees.
Comment & Rating (0)