
BB Assassin Pen
Print Profile(4)




Description
Disclaimer:
Some parts may have durability issues and can be challenging to print. In certain cases, parts may break during or shortly after printing. Please take this into account before starting the project.
I am working on improvements and plan to release a more durable version in the future.
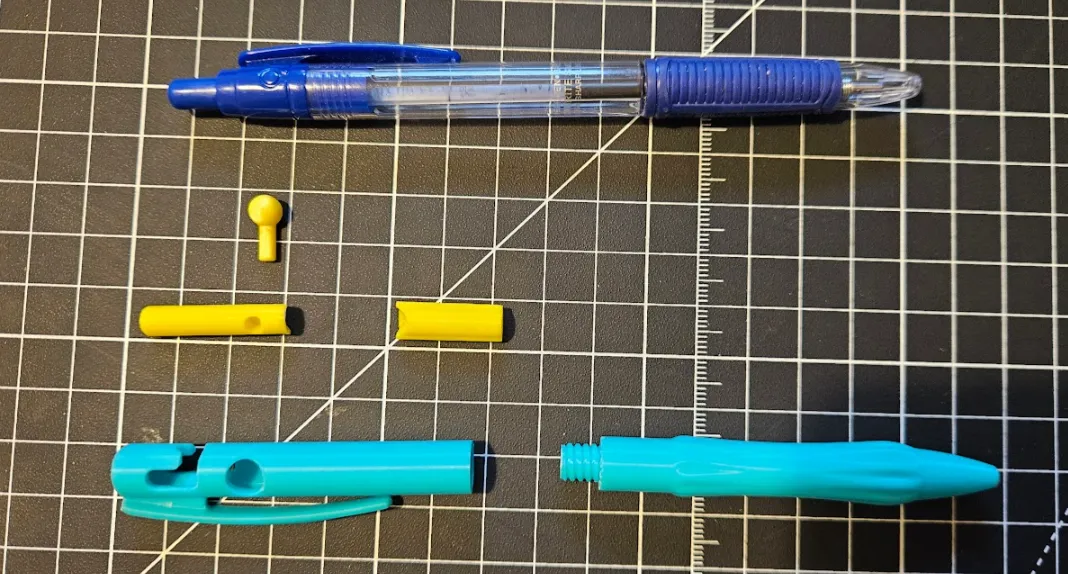
1. Pen disassembly and part preparation
Find a standard ballpoint pen with an ink refill (ink tube) that has an outer diameter of approximately 3 mm.
Most common ballpoint pens use this size.
Disassemble the pen and remove:
- The ink refill
- The internal spring
Note:
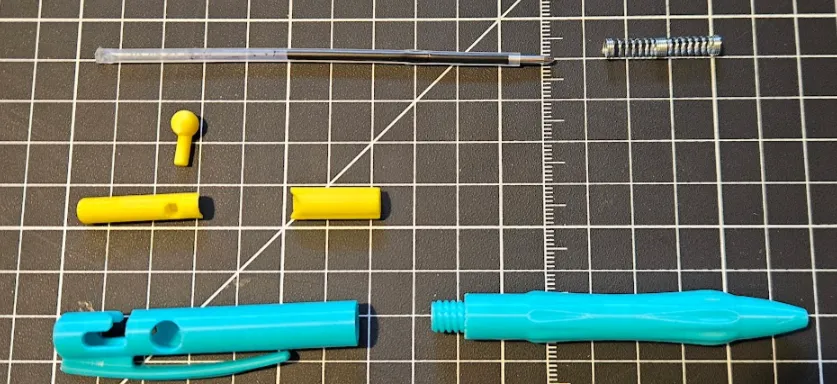
The total length of the ink refill should be around 107 mm, which is a standard length.
A longer or stiffer spring will result in a stronger firing force.
2. Attaching the ink refill to the printed part
Insert the ink refill into the designated hole in the printed part (as shown in the image).
Important:
- The part must grip the ink refill securely
- You may glue the refill in place
- Alternatively, slightly crimp the end of the ink refill so it fits into the hole with a press fit
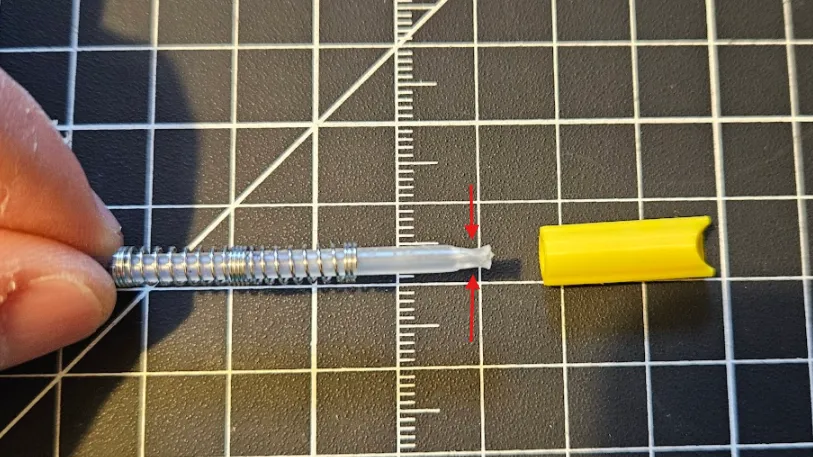
In many cases, the ink refill has small plastic bumps intended to retain the original pen spring.
If present, carefully remove these bumps with a knife so the refill can slide smoothly into the pen body.
3. Inserting the assembly into the upper pen housing
Insert the ink refill with the attached printed part into the upper pen housing, following the orientation shown in the image.
Make sure that:
- The concave recess on the printed part faces the firing port in the pen housing
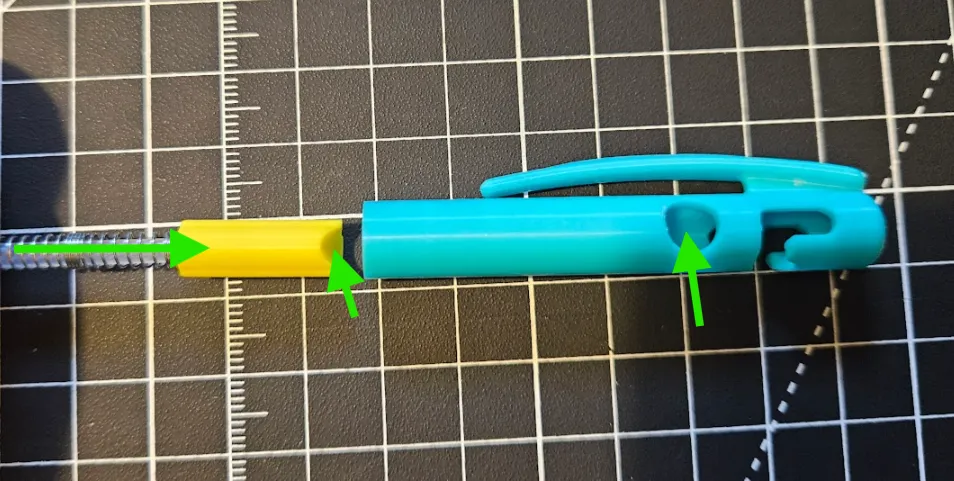
4. Closing the pen
Screw the pen grip / lower body onto the upper housing until fully tightened.
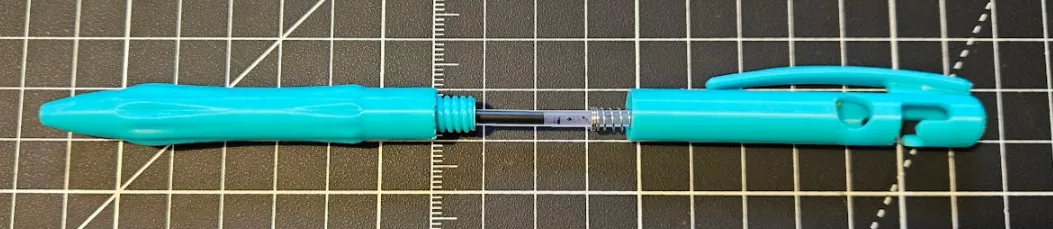
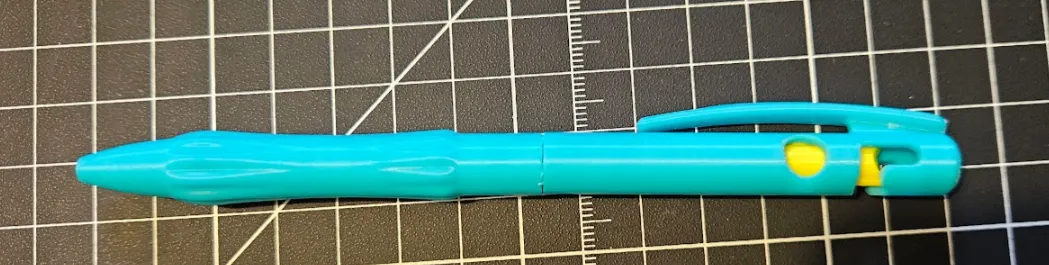
5. Installing the clicker
From the top opening, insert the clicker button so that the safety pin hole remains exposed.
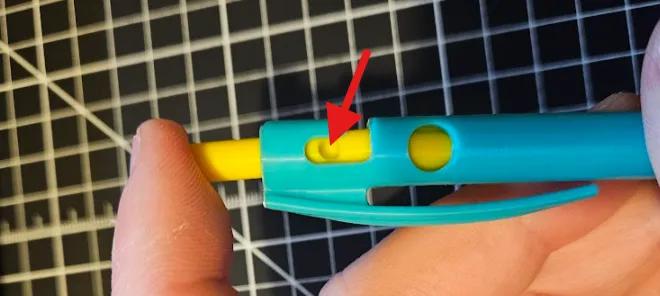
6. Installing the safety pin
Press the safety pin firmly into the hole in the clicker.
Note:
- This step requires force due to the press fit
- Proceed slowly and carefully
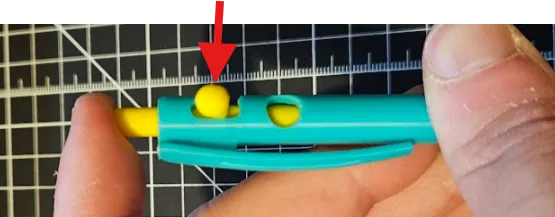
Operation and Use
- The pen is operated when the safety pin points toward the firing port
- To enable firing, move the safety pin to the opposite side of the firing port
Loading:
- Set the safety pin to the firing position
- Press the clicker fully
- Insert a BB through the firing port
If the spring is too weak:
- A -printed spacer can be added above the spring
- This increases spring preload and firing force
Warning ⚠️
There is a very high chance you will eventually shoot yourself in the eye.
This is not a possibility. It is a certainty.
Use with caution, keep it away from your face, and wear eye protection.
License

You shall not share, sub-license, sell, rent, host, transfer, or distribute in any way the digital or 3D printed versions of this object, nor any other derivative work of this object in its digital or physical format (including - but not limited to - remixes of this object, and hosting on other digital platforms). The objects may not be used without permission in any way whatsoever in which you charge money, or collect fees.


Comment & Rating (382)