


Print Profile(2)


Description
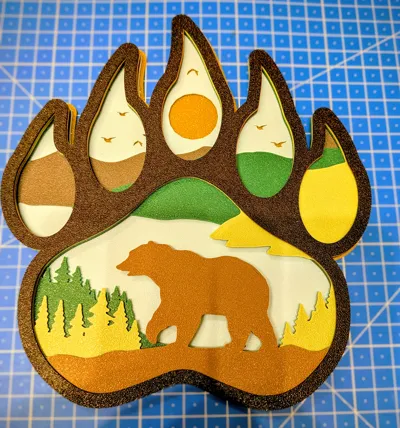
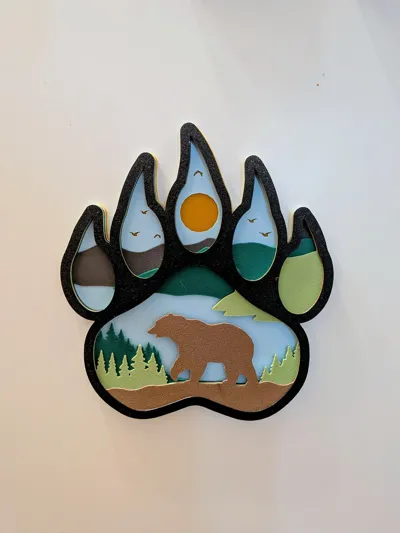
🐾🏞️ Layered Bear Paw Art
🌟 About the Model
This unique 3D printed artwork captures a picturesque forest scene within the outline of a mighty bear paw. By stacking multiple colored layers, an impressive 3D effect (Shadow Box Style) is created, bringing depth and vibrancy to your home.
The scene depicts a wandering bear against a backdrop of coniferous forests, rolling hills, birds, and the warm sun. This piece is perfect for nature lovers, animal enthusiasts, or as rustic decoration.
🎨 Colored Layers – No AMS Required!
This model is ideal for anyone who wants to create beautiful, multi-colored prints without owning an AMS or another multi-material system.
- All parts are printed individually in your desired color.
- The finished layers are simply stacked on top of each other and can be joined with a little superglue or craft glue to complete the artwork.
🛠️ Technical Details and Printing Recommendations
- Dimensions (Overall): [Please insert the exact size of the finished model here, e.g., approx. 180mm x 180mm]
- Number of Layers: [Count the layers in the finished image and insert the number here, e.g., 7 layers]
- Material Recommendation: PLA (Use a range of colors – Brown, Green, Yellow/Orange, Light Blue, and Black for the outer frame.)
- Layer Height: 0.20mm (Standard)
- Infill: 100% for all parts (To ensure a clean surface and easy stacking.)
- Print Time (per layer): Quick and easy
- Special Notes: The model requires no supports. All parts are flat and designed to be easily printed.
💡 Assembly
- Print each separate file in the desired color.
- Start with the largest, bottom (backmost) layer.
- Glue the subsequent layers one after another until you reach the top, black frame.
Boost Me (for free)
Thank you for the boost! This greatly motivates me to continue creating great designs. I really appreciate it!
License
You shall not share, sub-license, sell, rent, host, transfer, or distribute in any way the digital or 3D printed versions of this object, nor any other derivative work of this object in its digital or physical format (including - but not limited to - remixes of this object, and hosting on other digital platforms). The objects may not be used without permission in any way whatsoever in which you charge money, or collect fees.
Comment & Rating (0)