


Print Profile(2)


Bill of Materials
- LED Light Strip (1.64ft/0.5m) x 1: https://www.amazon.com/dp/B0C98ZJTXC?th=1
Description
Description
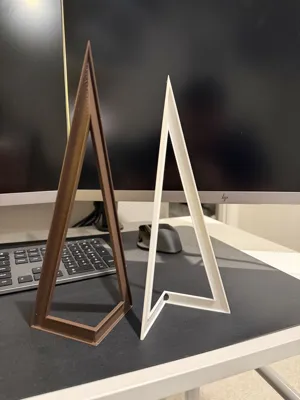
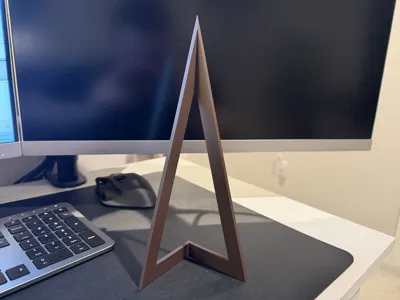
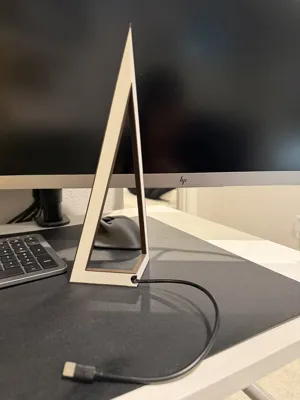
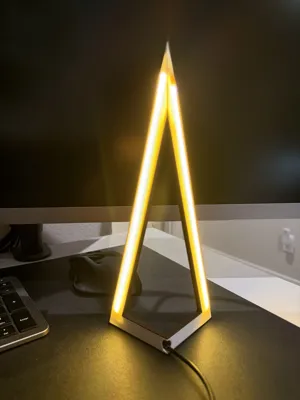
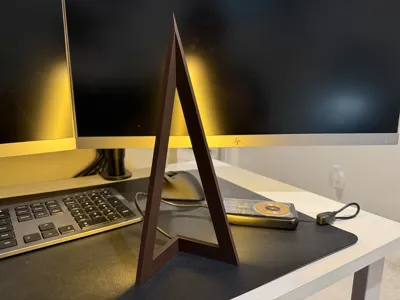
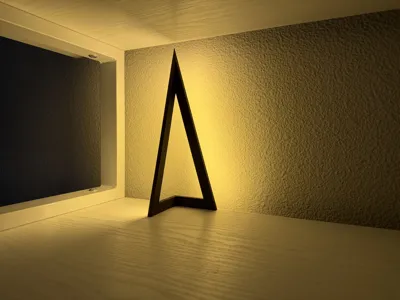
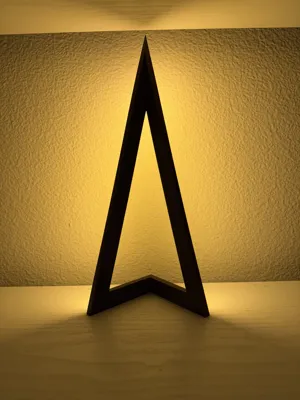
Now that I have a week of Fusion 360 experience under my belt, this is a revamped version of my original design: a simple, minimalist corner desktop LED lamp. It’s designed to sit neatly in a corner and cast a soft, indirect glow on the wall, making it great for desks, shelves, or ambient lighting setups.
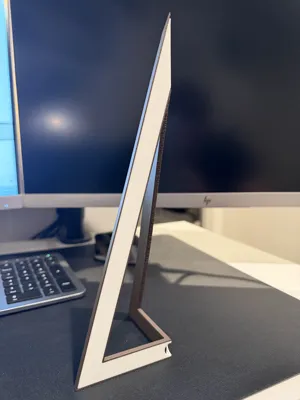
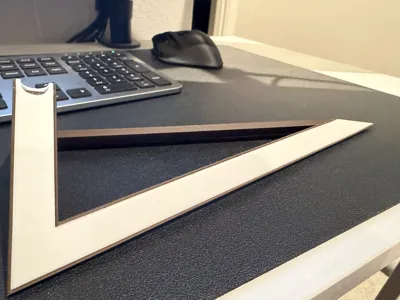
The lamp uses the same inexpensive LED strip and two part frame design. The shell is printed in a dark brown that doesn't bleed light and the backing is printed in white or off-white and is thin enough to act as a light box. This version looks clean from every angle and gives off a more diffused light. The cavity inside is also larger to accommodate up to a 10mm wide LED strip.
✨ Features
- Minimalist triangular frame
- Designed specifically for corner placement
- Soft indirect wall lighting
- Easy to print and assemble
- Beginner-friendly design (and remix-friendly!)
🔧 Hardware
This model is designed to work with the following LED strip (the one I used):
- LED Strip (1.64ft/0.5m):
https://www.amazon.com/dp/B0C98ZJTXC
(~$7 on Amazon at the time of purchase)
Any LED strip under 10mm in width should work, but fit may vary.
🖨️ Printing Notes
- PLA works fine
- Print orientation as uploaded, supports as uploaded for best quality and easy support removal.
- Dark filament looks best for hiding light bleed from the front, but experiment!
🛠️ Assembly
- Print the lamp shell
- Insert the LED strip inside the channel on the back.
- Route the cable out the back
- Print the insert, routing the cable through the cable hole.
- This should pressure fit together but applying a few dabs of super glue along the edges of the insert prior to assembling ensures it's not going anywhere
- Plug in and enjoy ✨
(Optional: a small dab of glue can help hold the strip in place as well.)
📌 Notes
- This is a simple, functional design, not a professional-grade model
- Tolerances may vary depending on your printer and LED strip
- I’d love to see remixes or improvements (better cable management, diffusers, mounts, or anything creative!)
Thanks for checking out my first design, and happy printing! 🚀
Comment & Rating (4)