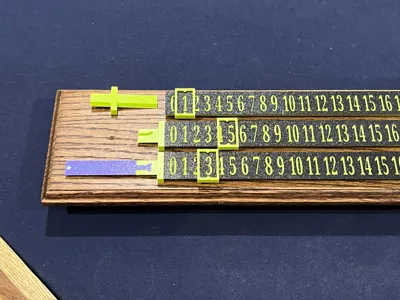
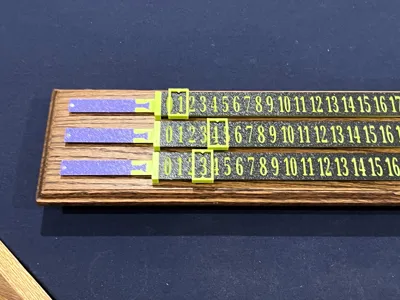
Multi-Player Sliding Scoreboard


Print Profile(8)
![[Base Connectors] 0.2mm layer, 2 walls, 15% infill](https://makerworld.bblmw.com/makerworld/model/US145d8a6ec8daec/553577619/instance/2026-01-06_ef8e0f98dc5d88.jpg?x-oss-process=image%2Fresize%2Cw_100%2Fformat%2Cwebp)
![[Counters - Thing1] 0.2mm layer, 2 walls, 15% infill](https://makerworld.bblmw.com/makerworld/model/US145d8a6ec8daec/553578728/instance/2026-01-06_fec9ff7ba95728.jpg?x-oss-process=image%2Fresize%2Cw_100%2Fformat%2Cwebp)
![[Counters - Thing2] 0.2mm layer, 2 walls, 15% infill](https://makerworld.bblmw.com/makerworld/model/US145d8a6ec8daec/553579828/instance/2026-01-06_1b601b1309e058.jpg?x-oss-process=image%2Fresize%2Cw_100%2Fformat%2Cwebp)
![[Counters - Thing3] 0.2mm layer, 2 walls, 15% infill](https://makerworld.bblmw.com/makerworld/model/US145d8a6ec8daec/553580655/instance/2026-01-06_67803b3d3047a.jpg?x-oss-process=image%2Fresize%2Cw_100%2Fformat%2Cwebp)
Description
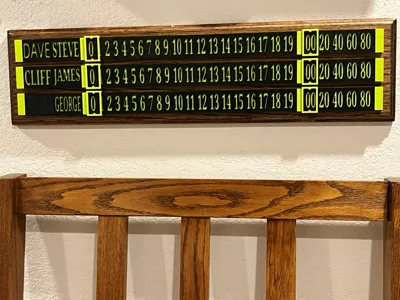
Multi-Player Sliding Scoreboard with changeable Name Plates.
I play pool regularly with 3-5 people and my standard two player scoreboard wasn’t working as we always had to keep one player’s score on a separate tracker so I came up with this.
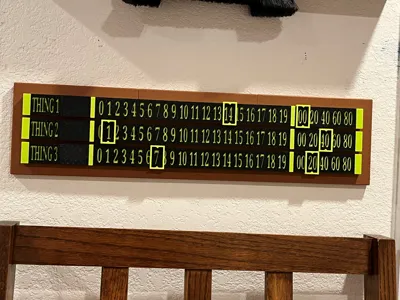
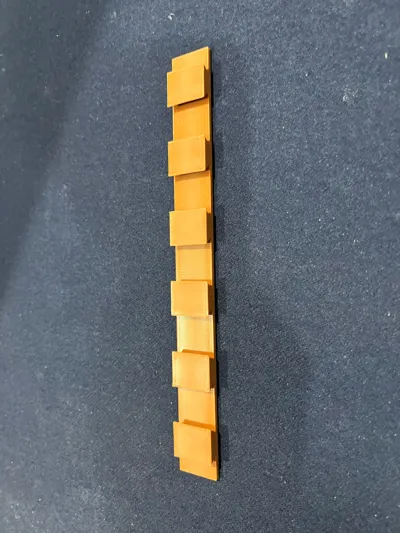
Mine has three score tracks with space to put two name plates on each track – the name plates are interchangeable and I have blank name plates to use when there are only three players.
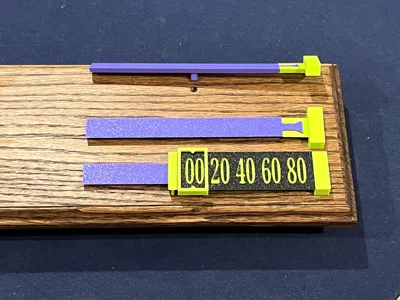
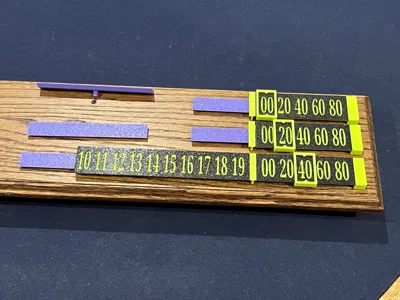
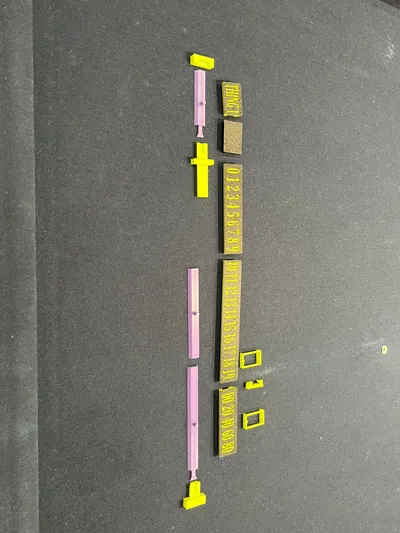
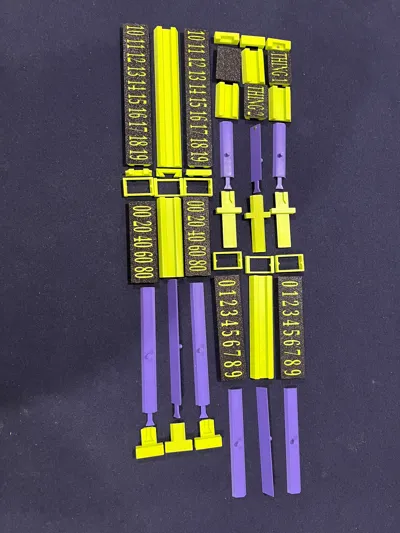
To create a single score track you will need to print the ‘Base Connectors’ print profile and one of the ‘Thingx - Counter’ print profiles.
I’m a woodworker and had a piece of scrap oak available so I designed this around attaching 3D printed score tracks to a wooden backboard. I subsequently created a 3D printed backboard for people who don’t do woodworking.
The wood backboard is 20 ¼” x 5” – the PLA backboard is 514.5mm x 127mm.
The holes in the wood board are made with a 3/16” drill bit and the pegs on the score track anchors are 4.82mm.
There are keyholes in the back of both boards which are 13 5/8” / 346mm apart – I attached my score board to the wall using screws and drywall anchors.
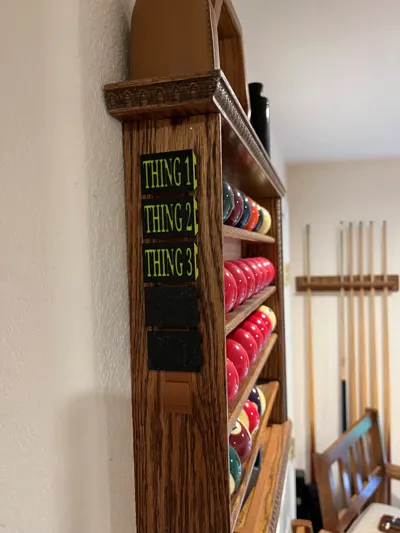
I made individual name plates for my regular players and a few generic ones for guest players. There is a ‘name holder’ rack which will holds 6 name plates and I attached this to the side of my ball rack to keep all the names handy.
The name plates have a color swap at layer 4 (when I originally made them on an A1 Mini it had a pause to swap filament). The text is embedded 1mm into the surface.
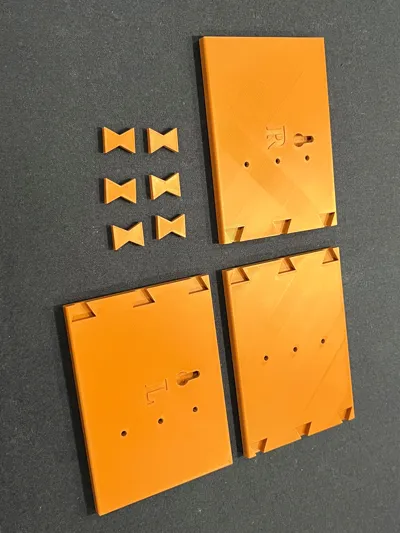
When printing the PLA backboard there are supports on the inside of the keyholes which are a bit of a pain to remove and the back of the end sections are marked L and R but this is marked assuming you are facing the scoreboard. The bowtie connectors should be glued in place.
I used 4mm x 2mm Small Round Neodymium Magnets I had spare from other projects to attach the left end cap for easy name plate swapping (there is a ‘Left End Stop No Magnet’ to replace the left end stop if you don’t want to use magnets – the holes are still there but will work without them).
The distance between the outer peg holes is 346mm – the position of the center peg holes need to be roughly in the middle of the outer pegs but does not have to be precise. When lining up the peg holes on a wooden backboard there is a ‘Peg Alignment Jig’ to make sure the vertical distances between the peg holes are consistent. The left peg hole is 60.25mm from the left board edge and the right peg hole is 106.25mm from the right board edge.
If you want to add more score tracks keep them 35mm apart on their centers as the slider is 33mm high and needs some clearance to slide by the other tracks.
License
You shall not share, sub-license, sell, rent, host, transfer, or distribute in any way the digital or 3D printed versions of this object, nor any other derivative work of this object in its digital or physical format (including - but not limited to - remixes of this object, and hosting on other digital platforms). The objects may not be used without permission in any way whatsoever in which you charge money, or collect fees.
Comment & Rating (5)