TIMMERFLOTTE Temperature Sensor 2U 10" Rack Mount


Print Profile(1)

Description
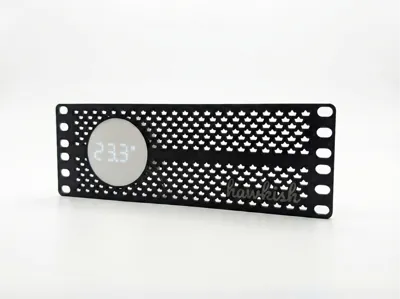
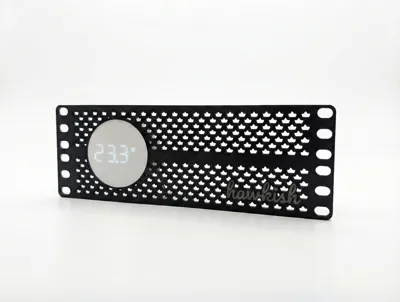
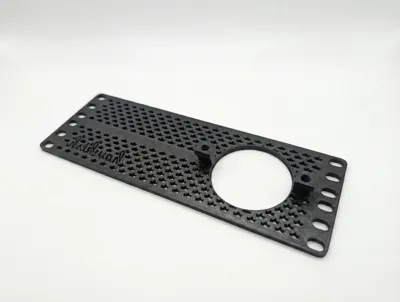
2U rack mount for IKEA TIMMERFLOTTE Temperature and Humidity Sensor, designed for 10-inch racks.
Designed as part of the Lab Rax series, this profile covers a 2U slot, providing essential environmental monitoring while maintaining a clean, professional aesthetic for your network equipment.
IKEA TIMMERFLOTTE is a matter enabled temperature and humidity sensor which enables remote monitoring for your server
Design Details
The faceplate features a crown vent structure for a unique look while providing airflow through the rack.
For users with AMS capabilities, the front lettering is designed to be printed flush with transparent/light filament. This allows for optional backlighting using flexible LED strips behind the letters illuminating hawkish logo for a distinct look.
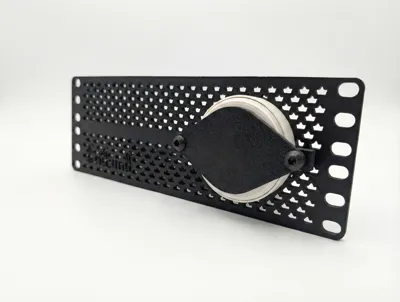
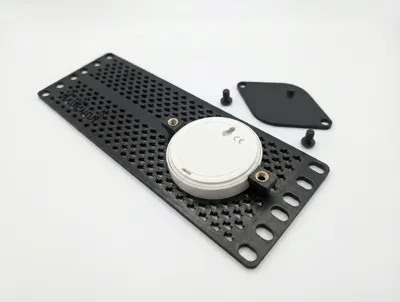
The rear assembly includes a dedicated alignment peg to lock the circular sensor in the correct orientation.
Features
- Precision Fit: Specifically designed for the IKEA TIMMERFLOTTE sensor with a friction-free drop-in installation.
- Secure Assembly: Features a screw-down backplate with heat-set inserts to keep the sensor rigid and secure.
- High Airflow: The custom crown-vent pattern for ventilation for rack components behind the panel.
- AMS Ready: Pre-configured for multi-color printing to create flush, translucent text for LED effects.
Print Settings
- Material: PLA, PETG
- Infill: 15-20%
- Supports: None
Installation
Hardware Required:
- 2x M6x10mm Screws
- 2x M6x8mm Brass Heat-Set Inserts (Max depth 7mm)
- Prep: Using a soldering iron, install the two brass inserts into the raised bosses on the rear of the main panel.
- Insert: Drop the IKEA TIMMERFLOTTE into the circular recess.
- Lock: Place the backplate over the sensor and secure it using the two M6 screws. Ensure the alignment peg on the print mates with the notch on the back of the sensor to lock rotation. Do not overtighten.
- Mount: Attach the assembled panel to your 10" rack.
Boost Me (for free)
If this print helped organize your homelab, a Boost is greatly appreciated and helps me bring more designs to the community.
Comment & Rating (0)