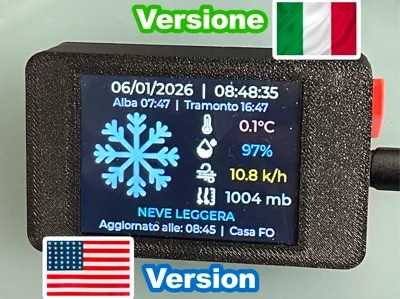
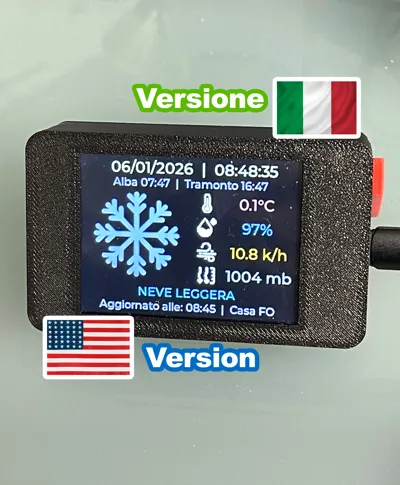
WEATHER STATION ESP32 LVGL 2432S028 2.8" ITA/ENG


Print Profile(2)


Description
Boost Me (for free)
I'd love to see your prints! Please share your photos in the comments, and don't forget to Boost if you like the results! Happy printing! 🚀 🙏
UPDATE 22/01/2026, ENG VERSION DOWNLOAD FROM STL FILE “File_STL_Arduino_Code_ENG_ITA”
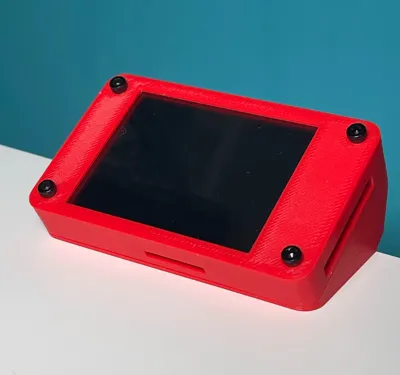
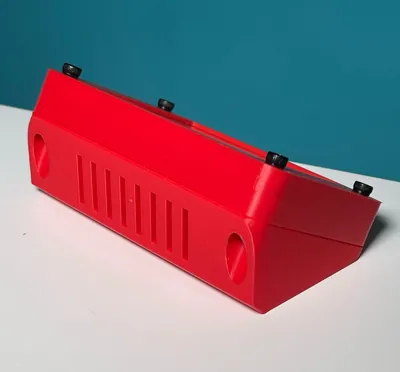
- NEW CASE
UPDATE 11/01/2026 (always download updated files from the “File_STL_Arduino_Code” file)
- Added graphical symbol for pressure trend “^” increasing, “=” stable, “v” decreasing, for the variation to be visible, there must be a change in pressure in the last 3 hours.
- Added more detailed textual descriptions of the current weather condition.

Weather Station with web update https://open-meteo.com/ from where it gets API data for Temperature, Humidity, Wind Speed, Atmospheric Pressure, Sunrise and Sunset
The Arduino code is downloaded along with the STL files in “File_STL_Arduino_Code.zip”
Hardware Components
ESP32 LVGL TFT 2.8", M3 Screws and nuts, the MicroSD is not needed
If purchased on Amazon pay attention to the model, the project's model has the USBC port and it is this one, component side


It is programmed with Arduino IDE, once the Sketch is uploaded, you need to manually enter the WiFi data and the GPS position of your City (it can also be obtained from the open-meteo API website or Google), as follows, on line 10
//WARNING IF THE WIFI DATA IS INCORRECT OR IT DOES NOT CONNECT FOR ANOTHER REASON AT BOOT THE SCREEN REMAINS BLACK!!!
// Replace with your network credentials
const char* ssid = "wifi name";
const char* password = "password";
// Replace with your latitude and longitude
String latitude = "with . before decimals";
String longitude = "example 12.0414";
String location = "city or other name";
String timezone = ; // Do not change if you are in Italy
Before programming, install the libraries for the ESP32 TFT Module


In the Tools Menu, Partition Scheme

In the Tools Menu, Upload Speed “460800”
Module Programming Setting search for “ESP32 Dev Module”
If you have difficulties, you can find the video explained very well step by step by Diego on YouTube at this address, from where I took the file containing only Temperature and Humidity, to then complete it and graphically modify it with all weather data
https://youtu.be/xtdW6SAy5s0?si=QrkChB42lA52qK9I
_______________________________________________________________________________
If you like my work, you can support me with a coffee ☕️

🙏 thanks!!!
License
You shall not share, sub-license, sell, rent, host, transfer, or distribute in any way the digital or 3D printed versions of this object, nor any other derivative work of this object in its digital or physical format (including - but not limited to - remixes of this object, and hosting on other digital platforms). The objects may not be used without permission in any way whatsoever in which you charge money, or collect fees.
Comment & Rating (5)