Franklin


Print Profile(1)

Description
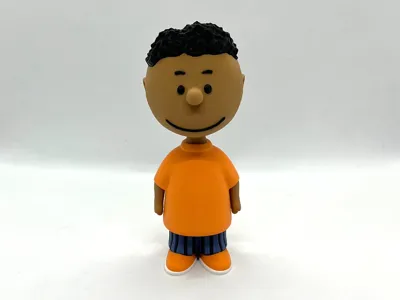
Franklin, from the comic strip Peanuts by Charles Schulz.
While his surname is never confirmed in the comic strip in some animated specials his name is Franklin Armstrong. He was the first black character in the Peanuts strip.
In his initial appearances, Franklin seemed confused by all the strange things in Charlie Brown's neighborhood, especially Linus and his obsession with the Great Pumpkin.
Supports are required on one part, head. See notes for specific very helpful printing and assembly tips.
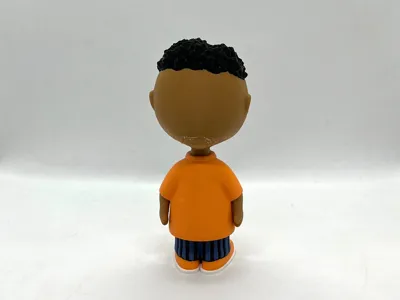
If you have the proper filament colors, no painting is needed.
The assembled model is 150mm tall and is in proportion to my other previously released Peanuts characters.
Enjoy!
...........................................................................................................
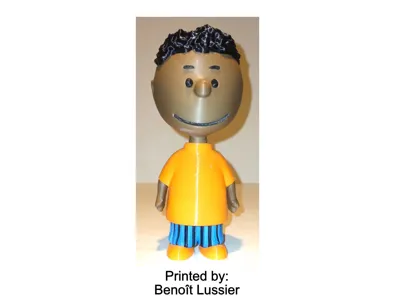
Special shoutout to maker Benoît Lussier for providing QA printing and quality feedback.
...........................................................................................................
Print Instructions:
Supports: YES on one part, see specific instructions below
Resolution: .2mm
Infill: 15%
Notes:**
Refer to the notes below for a few helpful printing and assembly instructions.
...........................................................................................................
Building the model
Colors
Black: (Devil Designs PLA - Black)
eye_right
eye_left
mouth
eyebrow_right
eyebrow_left
hair
pants_black
..
White: (Devil Designs PLA - White)
sole_right
sole_left
..
Blue: (Paramount3D PLA - Cadet Blue)
pants_blue
..
Dark Brown: (Paramount3D PLA - Dark Complexion)
arm_right
arm_left
head
..
Orange: (BambuLabs PLA - Orange)
shirt
shoe_right
shoe_left
..
Any Color (hidden piece)
pin_arms (file contains two identical pieces)
pin_shirt
..
...........................................................................................................
Printing and assembly tips
Printing tips
1 - Supports ARE required on one part.
(note: some slicers consider the support angle where 90deg is vertical and other slicers consider 0 deg as vertical. I use my suggestions based on 90 deg as vertical)
*supports: organic/tree supports with a reduced threshold of 29 deg were used on:
- head (there will be scarring on the back of the head. This can be reduced by using a lower layer height)
2 - There are some pieces that may need brims or rafts, use your discretion. When setting up my prints I prefer to be conservative to ensure the least chance of a print failure, especially since the base of many parts are hidden when inserted into another part. Rafts also ensure that the first layer of small parts will have a better fit for my models.
*I used a raft on the following parts and recommend it. Since the parts are all black, I printed them so the one raft covered all of them:
- eyebrow_right
- eyebrow_left
- eye_right
- eye_left
- mouth
*I used a brim, out of abundance of caution, on the following parts:
- arm_right
- arm_left
4 - When removing parts from the printer bed, it's a VERY good idea to place left/right parts into separate containers to help with the assembly process. Sometimes the difference between the left and right parts is very small but it is still worth keeping track of them and assembling them in their proper place.
..
Assembly tips:
1 - Take your time gluing the model together and enjoy the process. Give some thought into which parts to glue together as groups and then gluing the groups together. Let the glue for each group set completely before combining groups.
2 - I used 3D Gloop (strong fast drying) and E6000 (tacky slow drying) glues to put this model together. For both glues using a smaller amount is usually better than more glue.
3 - important for all my models, be sure to dry fit all parts before gluing.
4 - The pants_black fits cleanly into the pants_blue but only if positioned correctly. Be sure the hole for the pin is lined up first, then place the black part directly above the blue part and slide it straight down.
5 - Refer to the assembly diagrams in the pictures section as well as the uploaded pictures for putting the model together. The model is meant to be glued.
Do not hesitate to ask questions, feedback is essential to making better models.
Comment & Rating (40)