PAW Puzzle - The Fun Dog Food Feeder


Print Profile(3)


Bill of Materials
- 0.047 inch Wire Diameter Spring Steel Coil Extension Springs (1.2 x 20 x 50mm) x 1: Amazon: https://a.co/d/iMfnEGe
- M4 x 12MM Screws x 6: Any Source
- 5" adhesive line sand paper x 1: Amazon: https://a.co/d/ijqf8bV. Cut down to 3.8" diameter to fit the lid.
Description
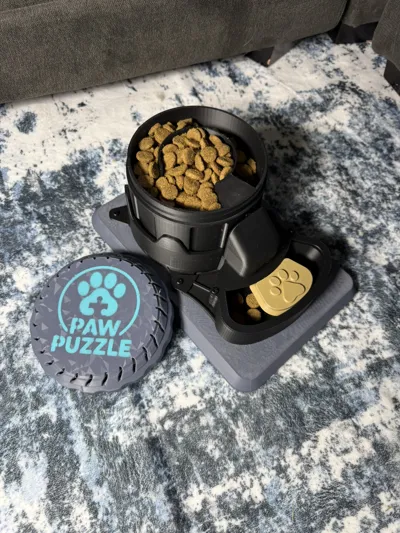
Turn mealtime into a rewarding challenge! The Paw Puzzle is an interactive dog food feeder designed to stimulate your dog’s mind, slow down eating, and provide long-lasting enrichment. Teach your pup to push down the feeder like a big button, and they will be rewarded with a small treat for each push of the button.
This unique puzzle can hold up to 1 full cup of most kibbles, keeping dogs engaged and mentally challenged for 30+ minutes. Perfect for turning breakfast or dinner into a boredom busting, enriching activity perfects for active dogs or ones that eat too fast.
Apply adhesive backed sand paper to the top of the lid for extra dog grooming. Kill two birds with one stone by keeping your dog's claws well groomed and entertained!
Construction Notes:
Hardware Requirements:
This puzzle requires one additional spring easily purchased from amazon or from a local hardware store if available. The spring force is specific and if incorrect can cause binding of the assembly.
Spring description: 0.047 inch Wire Diameter Spring Steel Coil Extension Springs (1.2 x 20 x 50mm) - https://a.co/d/iMfnEGe
Use 6x M4 x 12 mm screws to assembly the feeder onto the base plate and for the sliding food output.
Alternatively, feel free to drill out the holes to increase their diameter as needed to fit any screws you have laying about.
Optional: 5" (or 4") diameter adhesive line sand paper (80 grit), cut down to roughly 3.75" to fit the lid - https://a.co/d/ijqf8bV
Originally, this was created with the intent to attach it to a wooden board. It has evolved to be fully 3d printed but the option to use a wooden board remains. If you choose to mount it on wood to save a bit of filament or due to a limited build volume, 9.5" x 6.5" or larger. Finishing with epoxy ensures a tough, durable finish although other finishes are suitable as well.
Assembly and Maintenance:
Step 1: Position the base on the base plate as shown. Two posts are present to help install this in the right orientation. Install the spring around the center post.

Step 2: Place the locking ring over the main body. Ensure the low dip in the locking ring aligns with the outlet in the main body. This will be where the food comes out.

Step 3: Place the locking ring and main body assembly over the base and spring. Ensure the outlet for the food is facing towards the long side of the base plate.

Step 4: Screw down retaining ring to the base plate.
Please note: for best success, it's recommended to first train your dog at this stage without the slide door output. Once your dog is proficient at pushing the button in return for food, the slide door output can be added for extra stimulation.
Step 5: Assemble the slide door output by placing the door under the top slide and assembling with two screws. Ensure the door slides freely (check for printing defects).

Step 6: Use the front two mounting screws from the retaining ring to secure the slide door output.

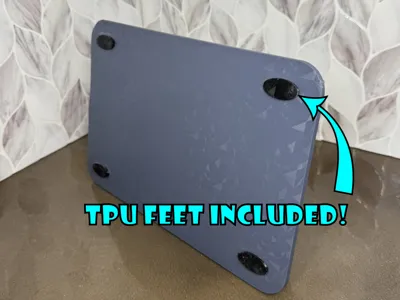
Step 7 (Optional Feet): The TPU feet and base have alignment features making installation easy. A dab of super glue is recommended to prevent these from coming apart.
Step 8: Use it! Unscrew the lid, pour in a cup of your dog's favorite kibble, screw the lid back on, and watch them enjoy mealtime.
Maintenance: Upon initial assembly and periodically thereafter, apply a small layer of cooking oil (aerosol cans like PAM spray work great) to help lubricate the sliding faces and prevent binding. Clean out the food dust if it begins to build up. Sandpaper can be changed out if it becomes worn down.
Sandpaper and Stencil:
Included as additional print profiles are stencils if you wanted to add an extra flair to the dog feeder.
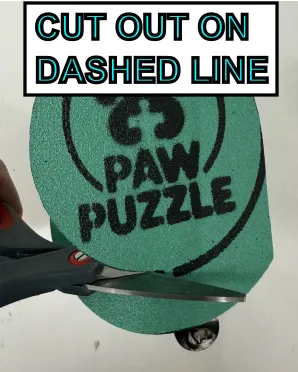
The stencil for the sandpaper is recommended, since it will also guide where to cut the sandpaper to best fit the lid.
Build the stencil by adding superglue in the tongue and groove and allowing to dry. Insert the 5" diameter sand paper into the stencil, and spray with any color spray paint. Allow to dry before removing the sandpaper from the stencil and cut out on the dashed circle. Remove adhesive, and apply to the lid.

The stencil for the lid simply sits on top of the lid during the spray time. Ensure the logo or orientated correctly when the lid is screwed on.
Leave a comment if you have any ideas for improvements or iterations of this game!
Thank you, and Enjoy!!
License
You shall not share, sub-license, sell, rent, host, transfer, or distribute in any way the digital or 3D printed versions of this object, nor any other derivative work of this object in its digital or physical format (including - but not limited to - remixes of this object, and hosting on other digital platforms). The objects may not be used without permission in any way whatsoever in which you charge money, or collect fees.
Comment & Rating (15)