Luminox – Minimalist LED Table Lamp


Print Profile(2)


Description
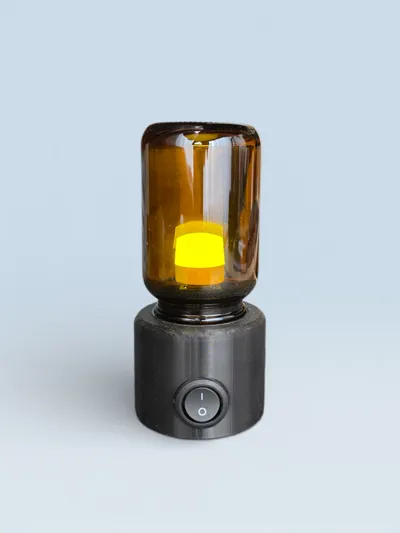
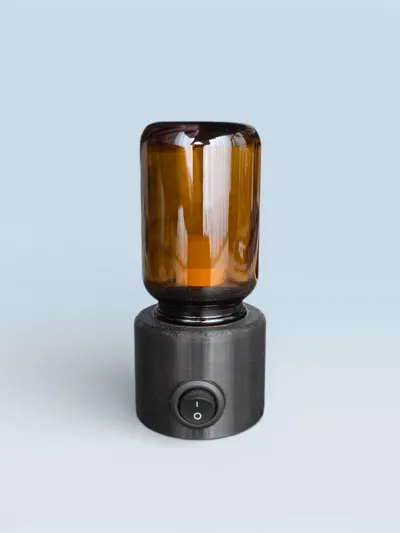
Luminox is a minimalist LED table lamp that concentrates warm light inside a compact, modern form factor. The dark 3D-printed base and amber glass cylinder create a calm, premium ambient glow that fits perfectly on desks, bedside tables, and creative workspaces.
Built around upcycled supplement bottles—this one uses a bottle from Sunday Natural—the design encourages reuse of what you already have at home. The 3D model can be easily adjusted to fit different bottle sizes and shapes, making Luminox a flexible framework rather than a fixed one.
The electronics are equally customizable: you can build it as a simple plug-in or battery-powered lamp, integrate a microcontroller to make it smart, or even hide a wireless charging coil in the base. This makes Luminox a perfect playground for experimenting with different lighting setups, power concepts, and smart-home integrations.
Assembly Instructions
- Adapt the model to your bottle
- Measure the outer diameter of your bottle’s lid and scale the lid adapter in your slicer or CAD so it matches.
- Check that the LED holder fits through the bottle neck; if not, use the smaller LED-holder version included in the other print profile.
- Prepare the printed parts
- Remove all supports carefully, especially around the lid adapter and cable channels.
- Insert M2 threaded heat-set inserts (any length) into the designated holes so the bottom cover can be screwed on later. Let the parts cool before continuing.
- Install parts
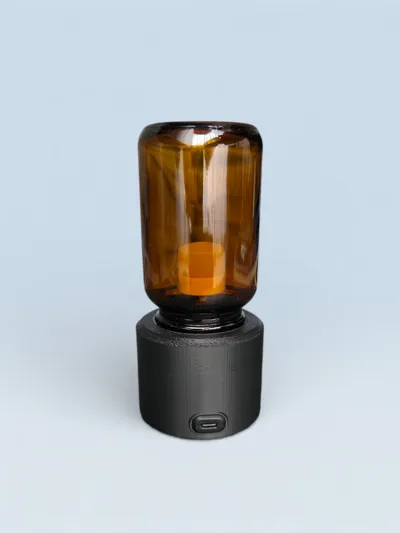
- Press the USB‑C port into the opening in the base until it seats flush.
- Press the USB‑A port into the LED holder.
- Both are designed as press-fit; if the fit is loose, secure them with a small amount of superglue or epoxy (avoid getting glue inside the connectors).
- Drill a hole through the middle of your lid, then feed the wires of the USB A (already in its holder) socket through.
- Glue the lid to the base and the LED holder to the insinde of the lid.
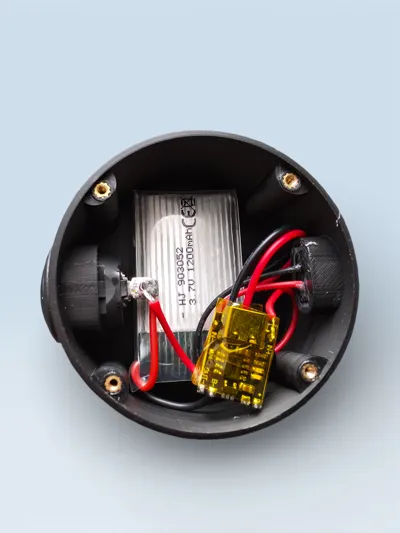
- Wire the electronics
- Feel free to customize this part to your liking. If you want a basic setup without a battery use the schematic below.
Test the circuit before final assembly to confirm polarity and switching work correctly.

- Add the light source
- Plug the LED bulb or compatible LED module into the LED holder (USB A socket).
- Gently screw the bottle into its lid over the LED holder.
- Close the base and finish
- Place the bottom cover on the base and secure it with M2 screws longer than 4 mm.
- Do a final functional test, then place Luminox where you want it and enjoy the warm ambient light.
Here are the parts I used:
- Lightsource (use white, the glass will provide the warm colour)
- USB A port
- USB C port
- Battery
If you have any questions / problems or want acess to the original f3d files, fell free to message me and I'll try to help you out.
Boost Me (for free)
If you like the model please please boost it so it reaches more people!
Comment & Rating (2)