
Fanttik T1 Max Heat Press
Print Profile(2)


Description
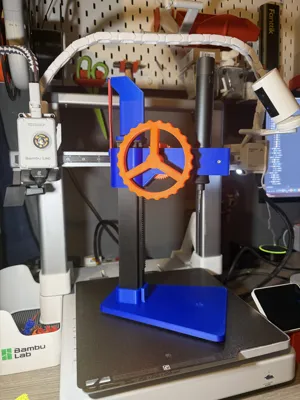
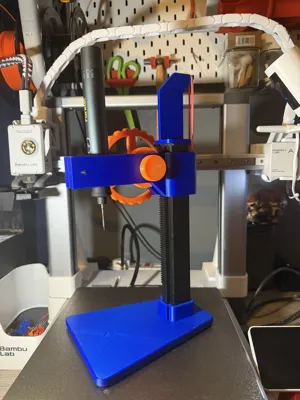
Heated Insert Press for Fanttik T1 Max
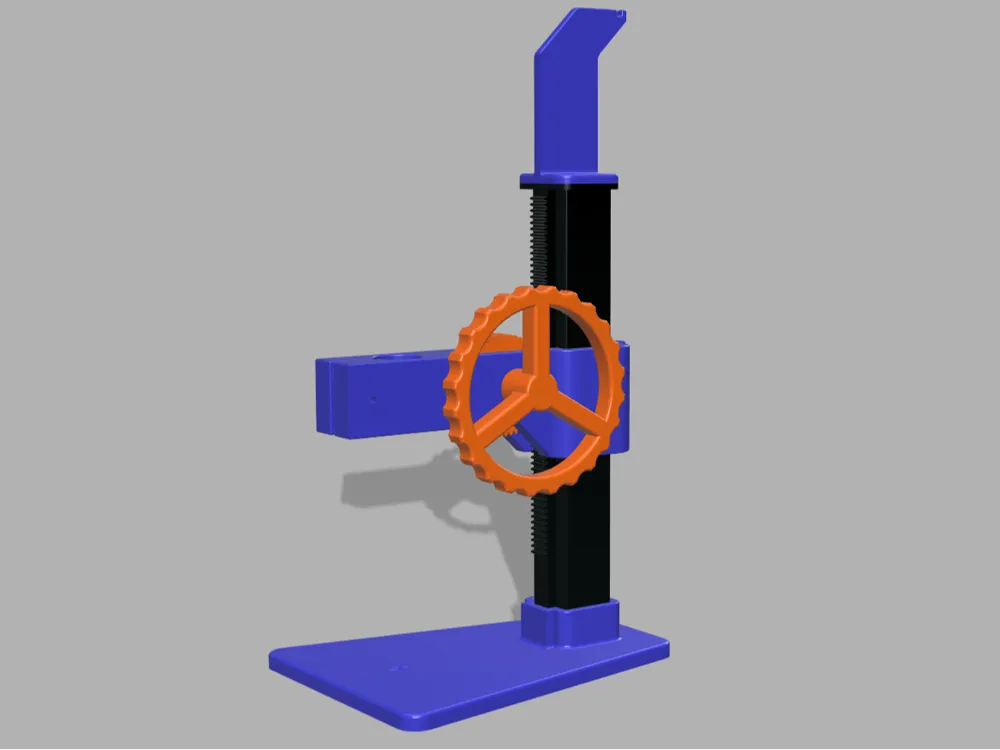
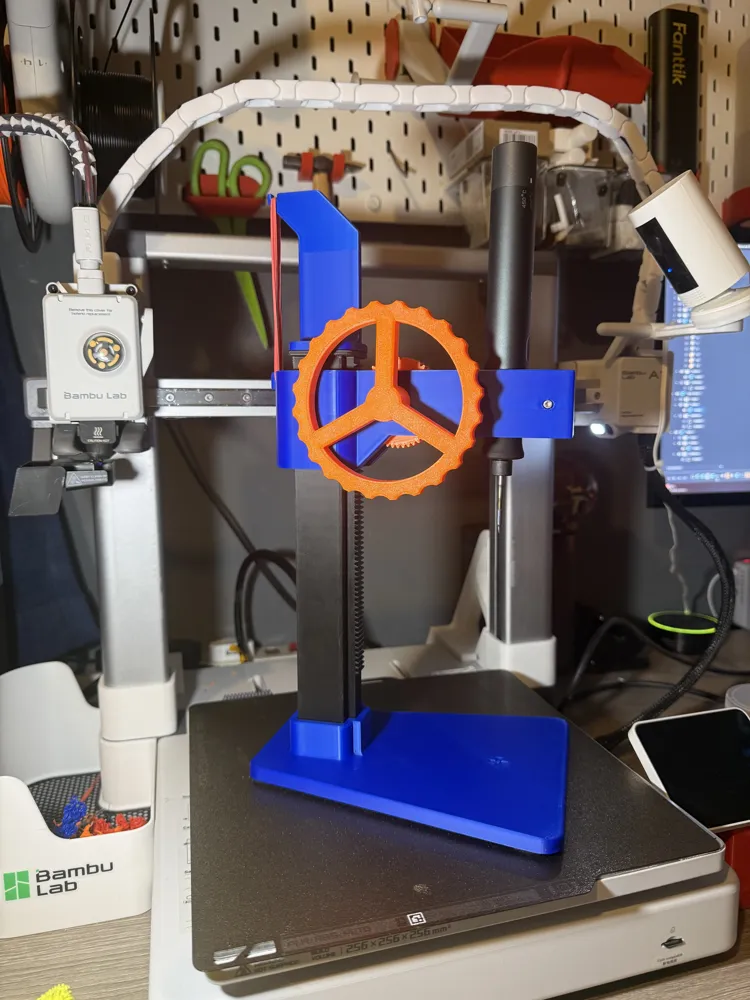
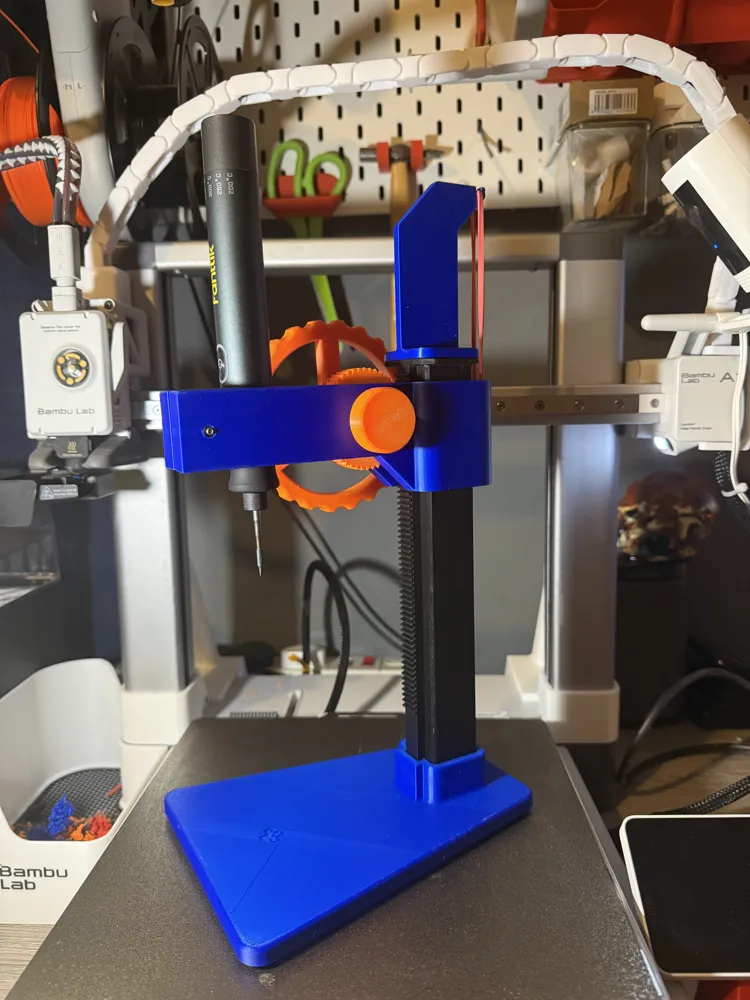
This is a manual heated insert press designed specifically to work with the Fanttik T1 Max soldering iron, allowing consistent, square installation of metric heat-set inserts.
The press provides controlled vertical movement, keeping inserts aligned while reducing the chance of crooked or overheated installs. It’s ideal for repeatable inserts in 3D printed parts.
🔧 Compatibility
- Soldering iron: Fanttik T1 Max
- Insert tip: C210 heat press insert tip (available from AliExpress - LINK)
⚠️ This design is not universal — it is sized specifically for the Fanttik T1 Max form factor, however if the neck of your soldering iron is less than 24mm diameter, then you could design a collar for it, or if larger, a simple negative cylinder part created in Babu Studio would suffice.
🧰 Hardware Required
- 8× M3 × 6 mm hex/socket machine screws
- 1× M3 × 30 mm hex/socket machine screw
- 9× M3 5mm deep heat-set inserts
- 2× rubber bands (optional, see below).
🖨️ Printing Notes
- Recommended materials: PLA or PETG
- In the example shown:
- Orange parts: PETG
- Blue and black parts: PLA
- No supports required
- Standard print settings work well (0.2 mm layer height recommended), 6 walls, 25% infill rectilinear.
PETG is suggested for parts exposed to more heat or friction, but PLA works fine for most components.
🛠️ Assembly
- Assembly is simple, but heat-set inserts are advised for the base, although it is a snug fit, so can be assembled without.
- The handle can be installed on either side, depending on user preference
- The rubber band mount is optional, but helps return the press upward smoothly after use. The only way to add the mount is using heat press inserts and screws.
🛠️ Assembly Steps
- Install heat-set inserts into the rack section x4 for the base (Optional) and x4 for the rubber band mount.
- Place the gear inside the main body, align the keyway, and insert the handle through the main body and gear, exiting the opposite side. Secure using the thumb turn knob.
- Slide the assembled main body onto the rack from the bottom.
- Attach the rack to the base using 4× M3×6 mm machine screws.
- Attach the rubber band “shark fin” mount using 4× M3 × 6 mm machine screws (Optional).
- Fit the rubber band(s).
- Rubber band size is user preference. Can be doubled over for increased lifting force
📦 Notes
- Rubber bands are not critical to function but improve usability.
- The press is designed for manual control, giving good feel when seating inserts.
- Link to the recommended C210 heat insert tip HERE
License

You shall not share, sub-license, sell, rent, host, transfer, or distribute in any way the digital or 3D printed versions of this object, nor any other derivative work of this object in its digital or physical format (including - but not limited to - remixes of this object, and hosting on other digital platforms). The objects may not be used without permission in any way whatsoever in which you charge money, or collect fees.


Comment & Rating (7)