Search models, users, collections, and posts


Print Profile(1)

0.24mm layer, 1 walls, 0% infill
Designer
4.4 h
4 plates
Open in Bambu Studio
Boost
40
112
5
0
49
24
Released
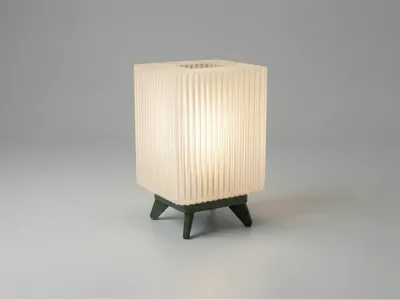
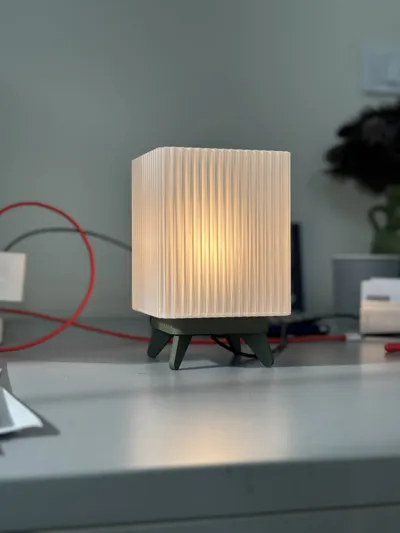
Description
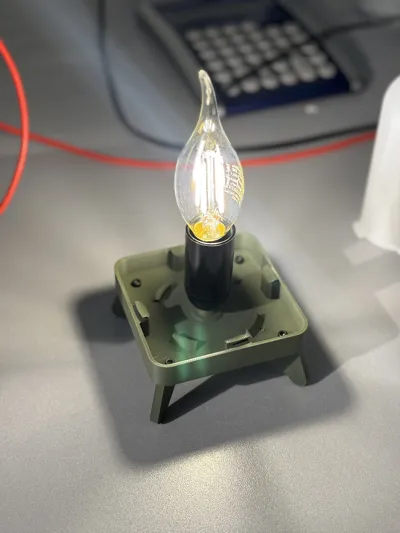
Everything needed is included in the 3MF file. You will only need the following additional hardware and components:
- 4 × M3 screws (for the legs)
- E14 socket holder and compatible lamp (LED only)
- Electrical wire and an inline switch
Assembly steps:
- Print all parts
- Lampshade has two parts, supper glue them together
- Insert the legs into the base and secure them with the M3 screws.
- Feed the wire through the hole in the bottom of the base.
- Connect the wire to the E14 socket holder.
- Fix the socket holder into the base.
- Install the lamp into the socket holder.
- Attach the diffuser with a slight twisting motion.
- Attach the lampshade the same way.
- Power it on and enjoy.
- Final step: Drop a comment and tell me how it went!
Filaments used for the photos:
- Transparent PLA – lampshade
- White JamGhe PLA+ – diffuser
- eSUN PLA+ (Olive Green) – base and legs
License
This user content is licensed under a Standard Digital File License.
You shall not share, sub-license, sell, rent, host, transfer, or distribute in any way the digital or 3D printed versions of this object, nor any other derivative work of this object in its digital or physical format (including - but not limited to - remixes of this object, and hosting on other digital platforms). The objects may not be used without permission in any way whatsoever in which you charge money, or collect fees.
Comment & Rating (5)