Dishonored Black Bonecharm


Print Profile(1)

Description
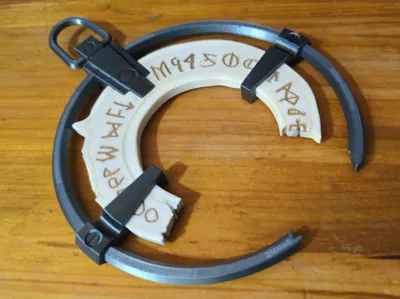
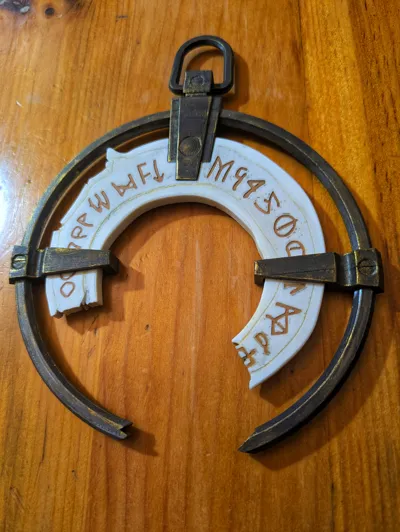
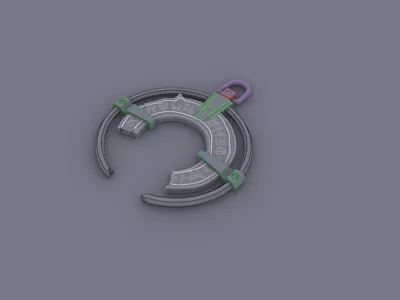
Being a huge fan of the dishonored franchise I wanted to create some Dishonored artifiacts for a display. The bonecharm models that I found were not what I was looking for. Some of them appeared to be AI image to model generations, and none of them were designed to specifically with 3d printing in mind. I was looking for something that would print well, be fun to assemble, and have a level of detail and accuracy that was needed for a display part.
I printed this model with three filaments, all Bambulab PLA, Bone White, Metallic Silver and Ochre. The bone segment was printed with the bone white and ocre pla, and the frame was printed in the silver metallic.
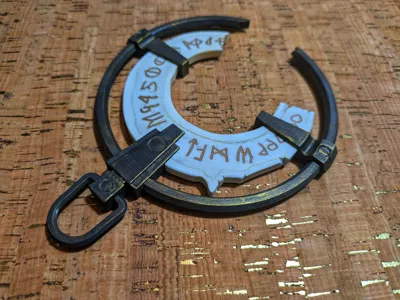
I used acrylic model paint to paint the part. I just used three colors, black gray, bronze and ochre brown. I washed the bone segment with a very dilute wash of both the ochre and the gray and wiped it off. I did this several times until I got it where I wanted it. The ring holder parts I painted with a diluted wash of the gray and then dry brushed the bronze on the edges.
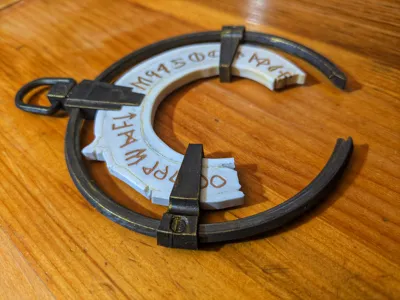
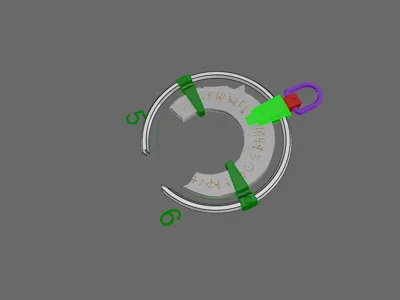
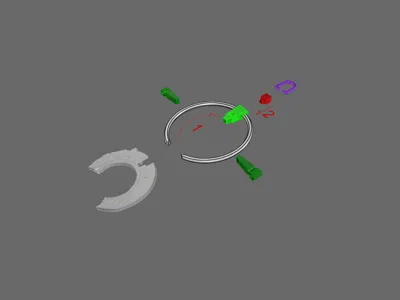
The tolerances are quite snug. I found it helpful to sand inside of the three brackets (that hold the bone segment) where the ring passes through. I used a small sanding stick for that. The assembly process is as follows. Test fit, then sand and trim until everything fits the way you like. The top pendant portion should be slid onto the ring first. The top of the pendant has a square hole in it that should line up with the square dimple at the top of the ring.


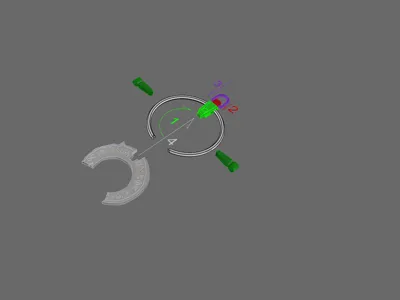
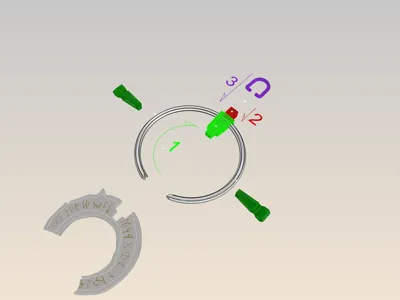
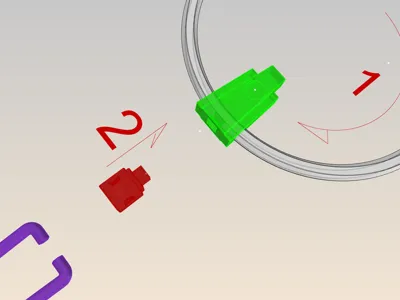
The next step is to glue in the small square block. Make sure to align it so that the holes in the (red) block piece are on the sides so that you can attach the (purple) oval ring in the correct orientation. This will lock the top bracket (green) in the correct location.
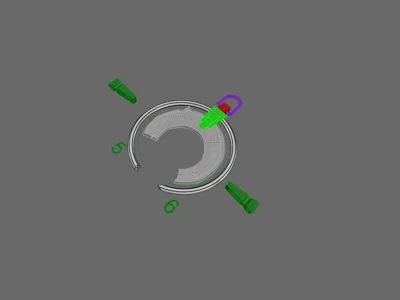
Next glue the bone segment to the top bracket. The bracket has a ridge that fits into a groove on the bone segment insuring an accurate alignment.

Now slide the side brackets onto the ring and the bone segment. This part is the most tricky since there is a specific left and right bracket. They only fit on the correct side! And to my chagrin I didn't mark them :(

I know the pictures show putting the oval ring (purple) on 2nd, but I recommend putting it on last. Be careful spreading it to fit into the holes on the side of the block (red). I didn't glue it.
Hope you had fun and
License
You shall not share, sub-license, sell, rent, host, transfer, or distribute in any way the digital or 3D printed versions of this object, nor any other derivative work of this object in its digital or physical format (including - but not limited to - remixes of this object, and hosting on other digital platforms). The objects may not be used without permission in any way whatsoever in which you charge money, or collect fees.
Comment & Rating (3)