BMO H4


Print Profile(3)


Bill of Materials


Description
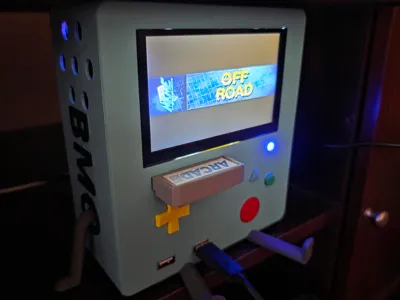
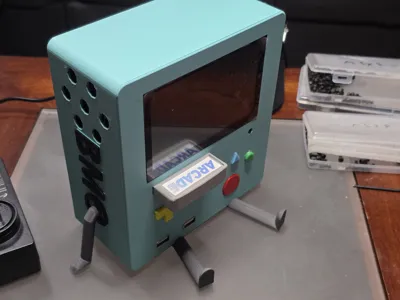
Don't be afraid to Be MOre! BMO!
The end resulting model (not counting the limbs) sits around 3"x6"x7".
I used Polymaker Matte PLA Arctic Teal for the body, PLA Matte Charcoal (black) for the body and labels, PLA Basic Dark Gray for the limbs, PLA Matte Ash (gray) for the cartridges, PLA Basic Bambu Green for the circle button, PLA Basic Yellow for the d-pad, PLA Matte Sky Blue for the triangle button, and PLA Basic Red for the power button
Other parts are as follows:
sourced from Ameridroid:
https://ameridroid.com/products/odroid-h4-h4-h4-ultra
Odroid-H4 [just the base model as the other models have different io ports in the back]
15v power supply
16GB DDR5 RAM
Amazon:
1: elecrow 5" mini touchscreen monitor 800x480 HD LCD display
1: thermalright TL-C12015 120mm slim fan
1 per cartridge: SanDisk Ultra Fit USB 3.2 Flash Drive 400MB/s
sdlqy: adhesive rubber feet (4 pads underneath the model)
pzsmocn: dupont 200 pieces 2.54 mm pitch 1-pin adapter connector female housing black socket terminal
1: areme: 90 degree USB 3.0 adapter
1: dmwd: 22mm short design metal anti-vandal IK09 momentary push button 7/8" mounting hole
1: fidioto: USB extension cable 1 male to 2 female
1: tan qy USB 3.0 extension cable 1ft Type A Male to Female
1: riieyoca 90 degree UHD 4K HDMI Female to HDMI Male braided cable
1: chenyang USB C Flat Cable USB 2.0 Male to USB C Male 90 degree UP Angled Ribbon Flex Extension Cable 0.5m
1: cablecc cyfpv fpv HDMI Male to Up Angled 90D HDMI Male Flat Cable 50cm
1: switchflux Active Display Port to HDMI Adapter
1: avery printable sticker paper matte white
12: bnuok m3x5 bolts (2 per cartridge)
10: bnuok m3x8 bolts
4: bnuok m3x20 bolts
Assembly:
These instructions assume you've already setup the bios for the Odroid H4, and Batocera for your SanDisk USB Flash Drive[s].
Connect the RTC battery and ram to the H4, connect the dupont wire connectors to the ends of the wires for the 22mm power switch and blue led

Remove the rubber sound dampeners from the corners of the fan, install it onto the back plate with 4 m3x20 bolts, turn the power toggle for the display to on and mount it with the USB C towards the top using 4 m3x5 bolts
Bolt the 22mm Power switch to the power switch adapter and connect the areme 90 degree USB 3.0 adapter to the tan qy USB 3.0 extension cable
Insert the blue led into the front plate and hot glue it into place, then insert the fidioto USB 1 male to 2 female adapter to the bottom of the face plate and hot glue into place
Insert red power button into the large hole on the face plate, then insert the combined areme 90 degree USB 3.0 adapter and tan qy USB 3.0 extension cable into the cartridge slot in the front plate, slide together both pieces of the USB holder over the fidioto 1 male to 2 female USB cable and bolt in place using 2 m3x8 bolts
Bolt the 22mm power switch to the face plate on top of the red power button
Connect the odroid h4 board to the face plate with 4 m3x5 bolts, ensure the led cables are routed exactly how you want them
Connect the 22mm power switch wires and blue led wires to the H4 board as shown. The power switch will go on the pins in the far back right counting towards the front as blank, blank, black, red, and the blue led will go on the pins near the very front left counting away towards the back as blank blue black. 
Connect the fidioto USB 1 male to 2 female to the bottom USB 3.0 port and the tan qy USB 3.0 extension cable to the top USB 3.0 port on the H4 board
Slide BMO's arm into the main body and use an m3x5 and the arm washer on the inside of the body to bolt it into place. Do this for both sides at this time
Connect the ribbon cables to their respective ends as shown in the instructions that came with them. Connect the chenyang USB C Flat ribbon Cable and cablecc cyfpv fpv HDMI Flat ribbon Cable to the side of the display with the 90 degree ends facing up away from the face plate
Connect the riieyoca 90 degree UHD 4K HDMI Female to HDMI Male braided cable with the wire facing towards the power switch, you may need to move the other USB cables out of the way but it will fit snugly. Then connect the USB C to USB A ribbon cable to the USB 2.0 as shown and then gently roll up the excess ribbon cable with a twisty tie or anything else
Plug the switchflux Active Display Port to HDMI Adapter to the display port on the H4 right above the HDMI port, and then route the adapter up beside the heat sink as shown. I used a twisty tie to help keep it in place, and another to gently roll up the excess ribbon cable after attaching the HDMI ribbon cable to that adapter
Remove the top two m3x5 bolts from the top of the H4 board as shown
Keeping the wires and ribbons all tucked in, slide the walls of the body down onto the face so that the bolts bracket near the top fits right up against the H4 board. Insert m3x8 bolts where the m3x5 bolts used to be.
Firmly push the HDMI adapter through the back plate, it should be tight enough to not need glue but hot glue if desired. Then connect the fan cable to the H4 board
Slide the power cable through the back plate and give enough slack to plug the barrel into the H4 board
Slide the top of the back plate up against the walls, and as you rotate the bottom down be sure to gently pull out any slack in the power cable left inside the case and then slide the cable plug part into the back plate that helps to make the cable look better
Attach 4 of the sdlqy adhesive rubber feet beneath the legs and use 4 m3x8 bolts to connect all of the body pieces together
If you're ready to close it all up, connect the battery door with 2 m3x5 bolts. Don't tighten them too much, they sort of bump up against the fan and you could push the fan loose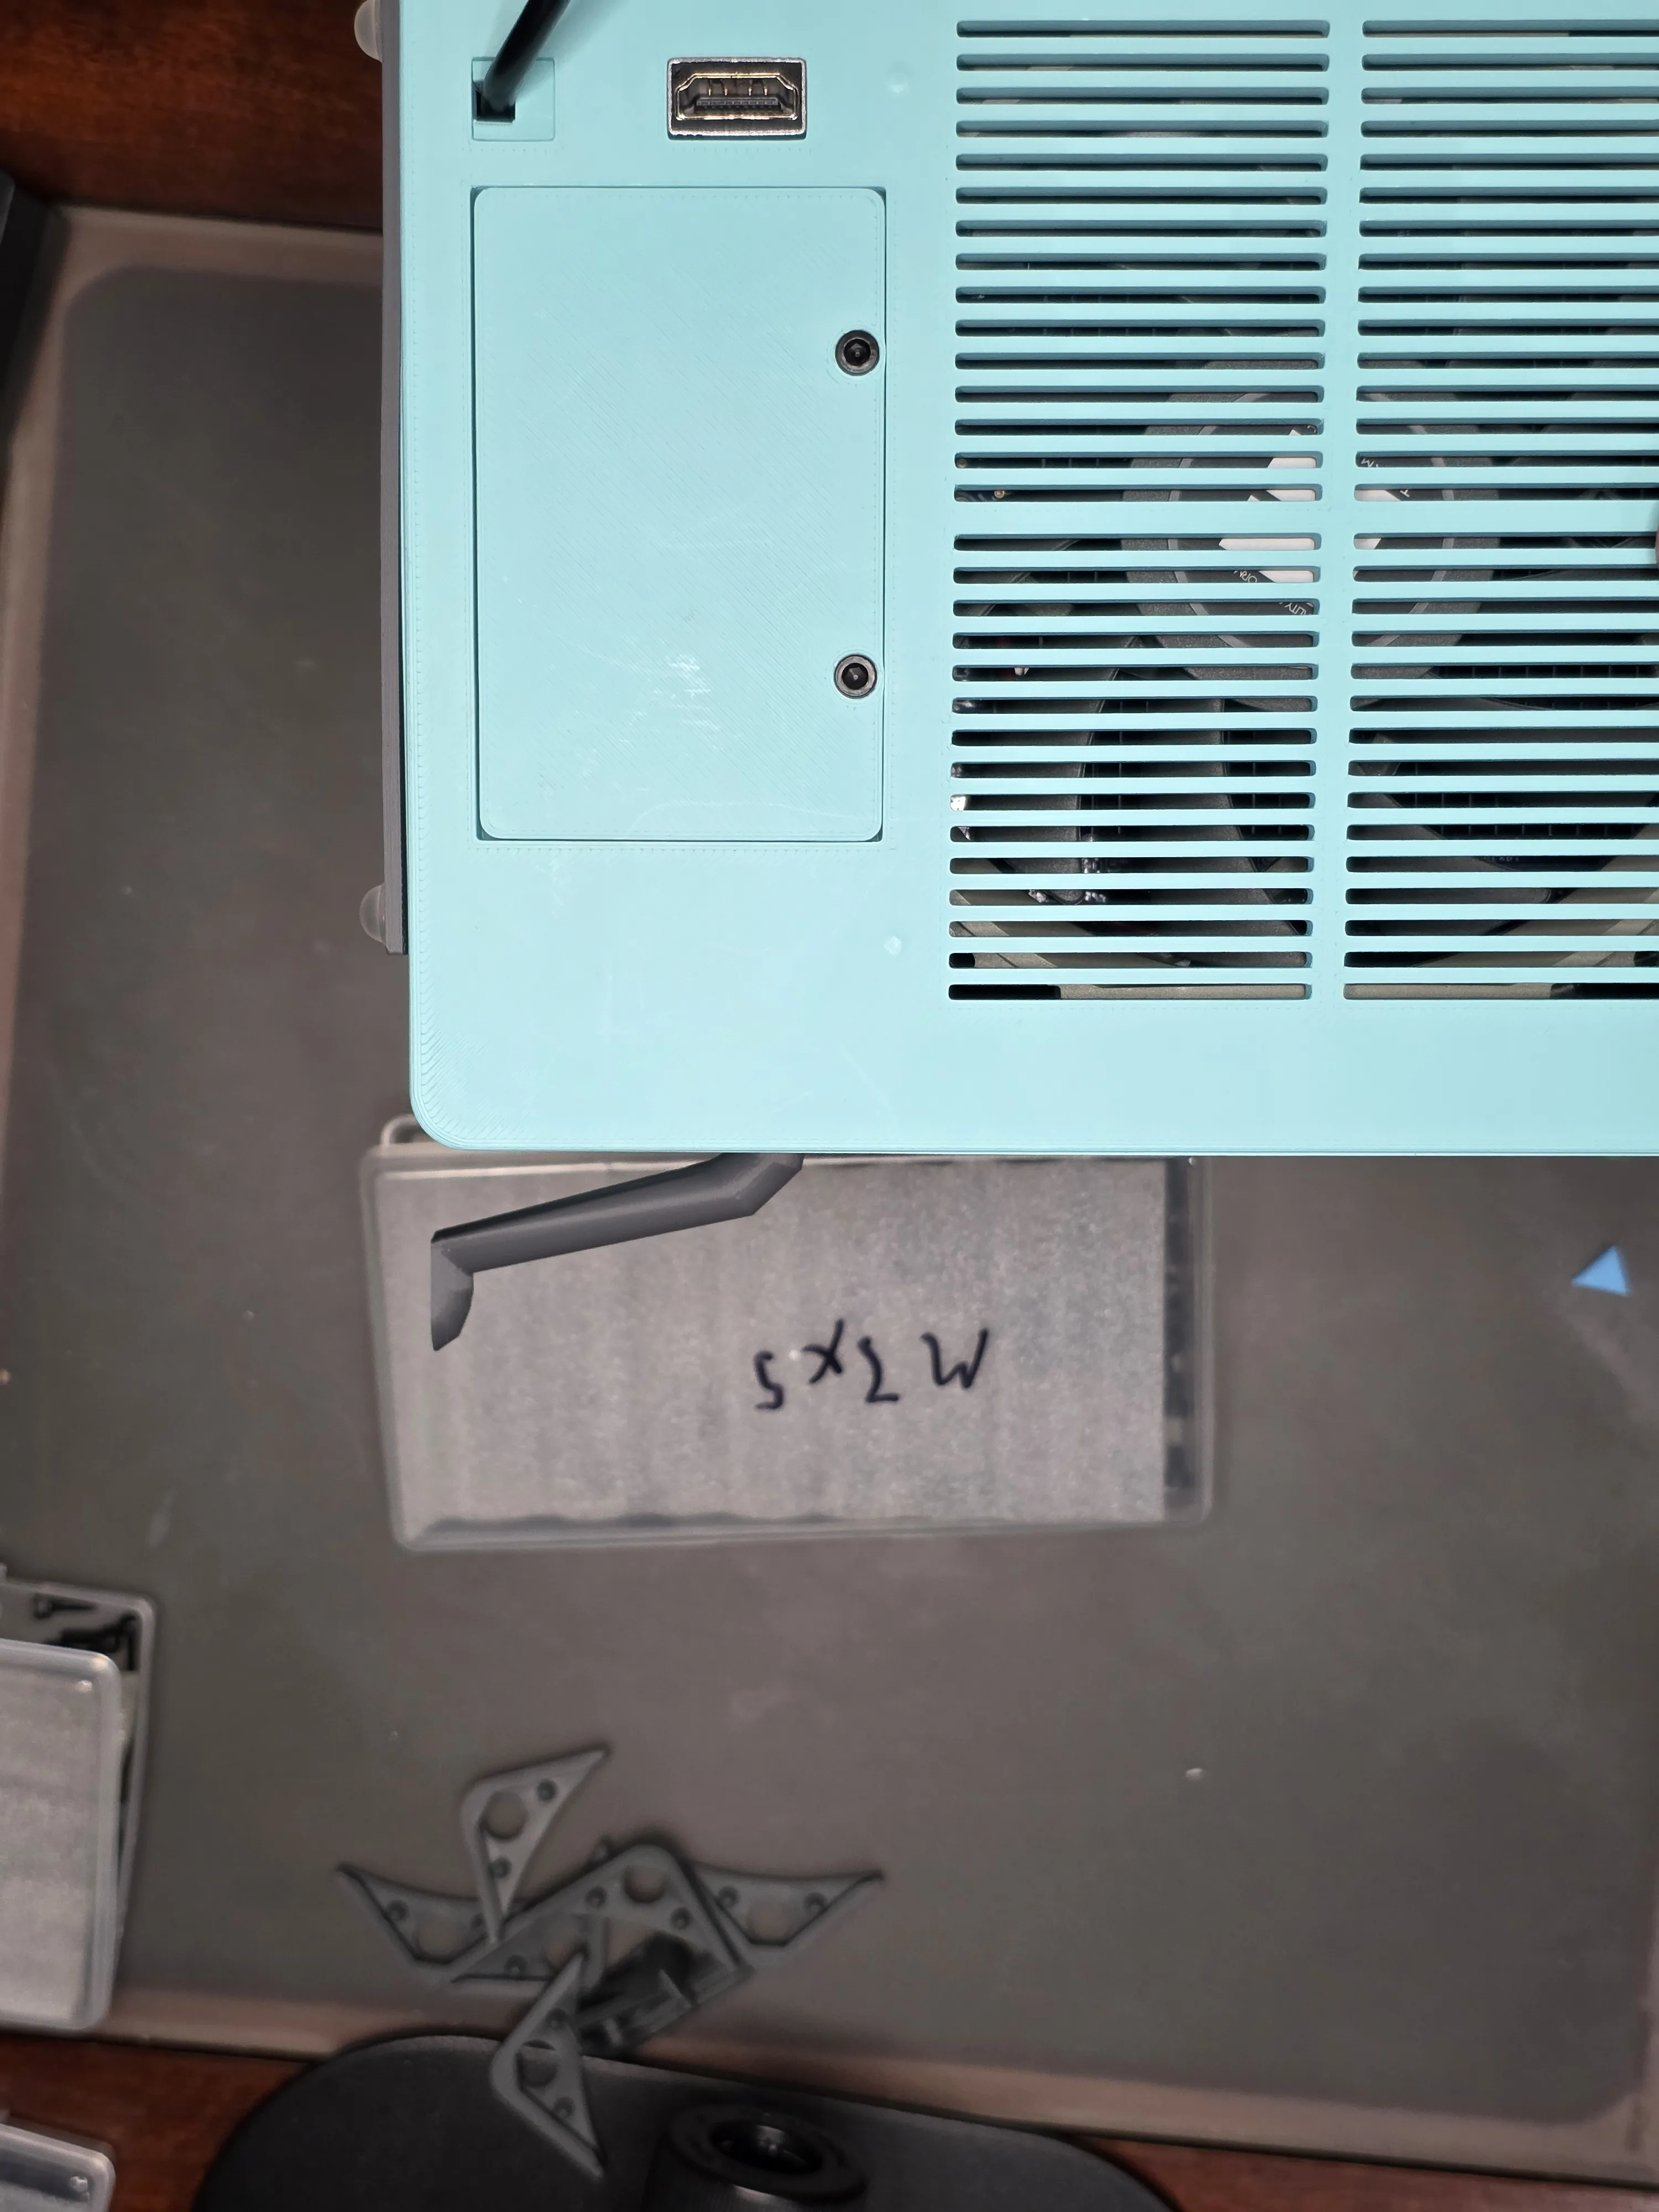
Clip off the little plastic handles from the SanDisk USB flash drive, I used small wire cutters for this
Slide the SanDisk USB flash drive into the cartridge top with the top of the flash drive facing up as shown
Slide the cartridge top into the cartridge bottom and connect them with 2 m3x5 bolts
Print out and cut to size your labels of choice onto the avery sticker paper, and then place the label on the front of the cartridge
Hot glue the d-pad and small buttons to BMO's face plate
Sliding the “BMO” label carefully over the arms, I used crazy glue to lock it into place, then repeat for the other side. The “O” should always go over the arm as shown.
If everything was done correctly your BMO should boot from USB as you set it up from the bios to do, and then whatever you put on your SanDisk flash drive will boot up as soon as you power the device on. I had to reassemble mine due to the power switch cables coming lose from how the fan cable put too much pressure on it after it was all closed up.
This build has a lot of parts and a lot of steps, apologies if I missed anything along the way.
Comment & Rating (0)