Cat scratch pad, refillable


Print Profile(2)


Description
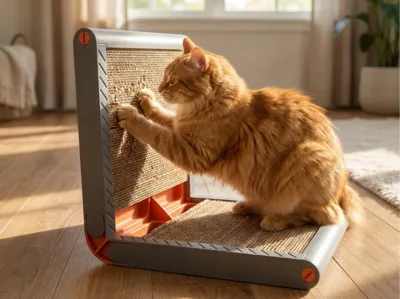
Refillable Cardboard Cat Scratch Pad
If you are a cat owner, you realized three things pretty quickly:
- Cats love cardboard
- Cats will destroy cardboard with great enthusiasm
- Buying new cardboard scratchers that arrive in… cardboard boxes always felt a bit silly
Seriously, it always felt strange to me that we buy new cardboard scratchers that arrive inside even more cardboard. Meanwhile, most of us already have a small mountain of Amazon boxes waiting for their moment. So I designed this refillable cat scratch pad that lets you turn your existing cardboard boxes into a never-ending supply of cat-approved scratching material.
The idea is simple:
- You print the scratch pad frame
- You cut cardboard into strips
- You pack the strips tightly into the frame
- Your cat goes to town
When the cardboard is worn out, you just pull it out and refill it. No waiting for a new order, no throwing away a perfectly good frame, and no buying cardboard that shipped inside more cardboard. And most importantly, no explaining to your cat why the new scratcher is “on the way.”
To make refilling easy, I also included an optional small cutting guide. Simply place it on a cardboard box, cut around it, and you’ll get perfectly sized strips every time. No measuring, no math, and no judgment from your cat while you struggle. If you prefer to cut the strips by other means, make sure each strip measures 244 × 30 mm.
My own cats have been happily using this, and as usual, they are far more interested in the cardboard than in any expensive toy I’ve ever bought them.
Happy scratching!
Assembly instructions
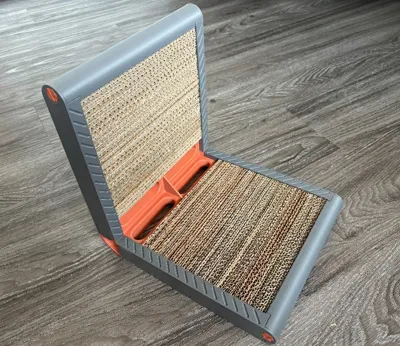
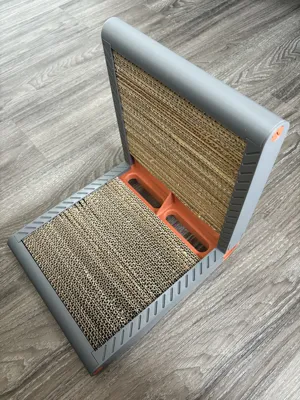
Print all parts and assemble them as shown in the picture below.
Slide the four side brackets into the center mount until they click into place.
Fill the frame tightly with cardboard strips.
- Place the two end caps on top and secure them with the screws. Tighten the screws with a coin, but make sure not to overtighten them.

Printing tips
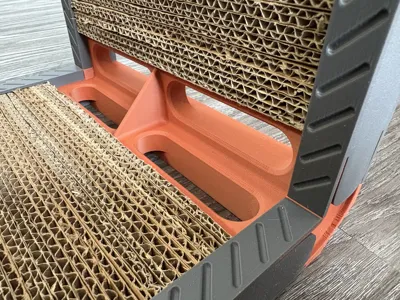
The end caps are printed with tiny connectors between them. This helps make them as sturdy as possible in the Z direction, preventing wobbling during printing.
After printing, run a box cutter or similar knife down the gap from top to bottom (see left picture below). This will leave the end caps with small studs (see right picture below).
This is intentional, as the studs grip the cardboard strips once inserted, helping to hold them securely in place.
 |  |
License
You may create derivative works based on this object, provided that all such derivative works are published exclusively on the MakerWorld platform and include proper attribution to the original creator. You may not share, upload, host, distribute, or publish this object—or any derivative work of this object—on any other digital platform, marketplace, or distribution channel. Commercial use of this object and any derivative works is strictly prohibited. This includes, but is not limited to, selling, renting, sublicensing, or using the object in any context in which you receive monetary compensation or other financial benefits.
Comment & Rating (47)