BambuLab AMS stackable Drawer with Plateholder H2C


Print Profile(17)


Bill of Materials


- 350 mm RAILS (max50mm height) x 1: https://www.amazon.de/dp/B06XKTR4L4?ref=ppx_yo2ov_dt_b_fed_asin_title&th=1
- Super Glue x 1: https://amzn.eu/d/c2bFDR5
Description
Boost Me (for free)
👉 If you like my work, I’d really appreciate your support with a boost! 🚀
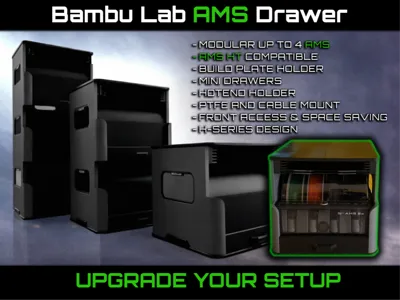
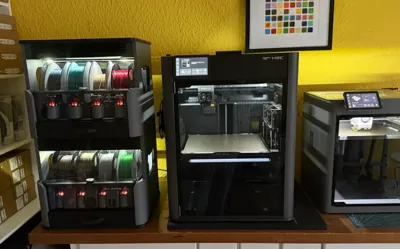
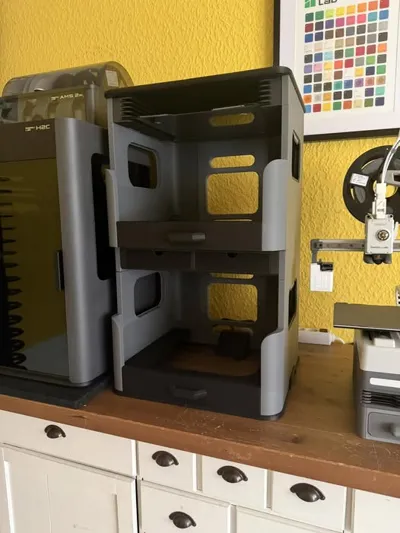
Bambu Lab Modular AMS Drawer System with Extra Storage Drawers & Plate Holder
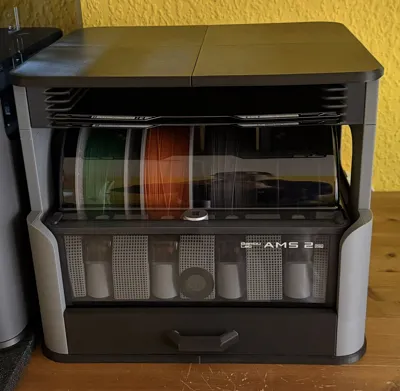
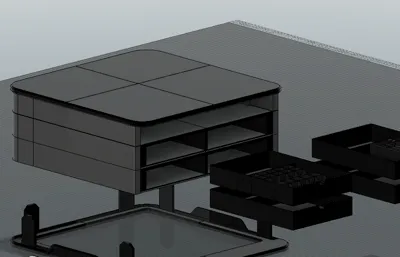
This is a modular drawer and storage system for the Bambu Lab AMS1/2, designed to be stackable, flexible and easy to adapt to different setups. It supports AMS, AMS HT and most filament dryers, with optional plate holders and storage drawers. There are also Drawers wich include Inlays for Accessoires, and for A-Series, H-Series and Vortek Nozzles!
✨FEATURES

- whole system is stackable, u can stack multiple ams drawers or even multiply of the small drawer segments or plate-holder modules on the bottom, or top, or in the middle… its also possible to just use the plate holder or small drawer moduls without ANY ams drawer as a normal storage drawer only!! → there are alot of possiblities!
— > FEEL FREE TO MAKE MODS or more options for the small middle part - just upload them as printprofile :D - Easy to assemble
- Easy to print - almost no support - i used a 0,6 nozzle for fast printing - but u can use 0,4mm to archieve alto better quality than i did!
- Optional plate holder or Drawers (not required)
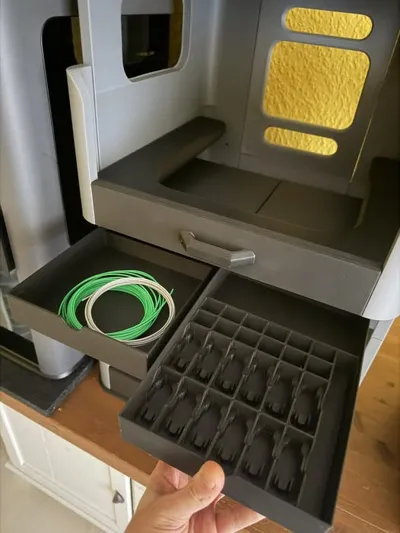
- Optional Drawers for Storage with nozzle inlays
- Stackable: up to 4 AMS1/2 units or just a single AMS + u can add one on TOP!
- Simply print the middle parts according to the number of AMS units
- Fits AMS1, AMS2, AMS HT and most dryers (e.g. Sunlu, Eibos etc)
- Cable guide on top and bottom of the back wall
- PTFE guide holes in each corner of the back wall
- PTFE guild Mount (optional)
- Fits most 350 mm / 50mm drawer rails
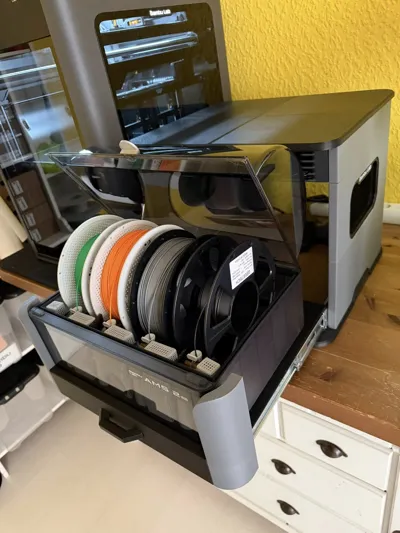
- Drawers extend far enough so you can open the AMS lid fully and it stays open
(it can happen the lid wont stay open because it got “loose” over time
THEN u can use a small velcro sticker on the lid and the counter part) - Drawers are open on the bottom
- I added an optional inlay if you want to store other items - u can place 3 AMS HT
(e.g. boxes or additional dryers) - I will update the inlay with vent holes for AMS HT once I get one
🔄UPDATE 2.0.1
- no real update but i made a Maker Tool Dock – 2-in-1 Desk & Edge Holder for the scrapper, cutters and knife.
u can either mount it inside the window if u dont use plexiglas or use doublesided tape or screws if you use the window! there are also other mounts in different sizes, for doors, drawers etc.. the moutn is easy adjustable inside the slicer and is able to hang almost anywhere
https://makerworld.com/de/models/2341687-maker-tool-dock-3in1-desk-edge-holder-for-scraper#profileId-2559710
🔄UPDATE 2
- Rearranged plate layout and modified side walls to fit 250 mm plates
(A1, P1S, P1P, X1C) - some ppl said not all plates work with all printers…
i used a p2s to create these profiles so the files ALL fit on a 250 plate! - the profiles were created using a P2S template and slice without errors; printer-specific constraints
such as exclusion zones or purge line on X1/P1 machines may require minor user adjustments. Added ALL segments as individual print profiles so you can better see print times
(upload takes a while ! give me a day!)
- Added extra files for H-Series users where the side walls are NOT cut
- Added two main profiles (each containing all required parts for one drawer):
- One for H-Series
- One for 250 mm plates !!!
!!!! i highly recommend to use super glue on the 250 models !!!!
🔄UPDATE 1
- Added a drawer segment with two drawers based on the plateholder mount!
- added a Empty drawer
- added a Drawer with inlay for nozzles / Vortek A & H
- added a Drawer with inlay for the H-Series toolkit
- Updated the plate holder to fit all Bambu Lab plates (except A1 Mini)
- Added IKEA SKÅDIS window mount with plate (screw on)
⚠️MATERIAL NOTE
- If you use AMS 1, PLA is fine.
- If you use AMS 2 with heater, I highly recommend PETG or a more heat-resistant filament.
- I personally will do it again with PETG CF it has a nice matte finish!
- I have not tested PLA yet and cannot guarantee it won’t deform.
- The same applies to AMS HT.
🧩PARTS LIST (per one drawer)
NOTE: I USED POINTED WOOD SCREWS WICH TIGHTEN THEIRSELF
- there are no holes for the ams drawer connectors!
- u just need to screw them in or drill a small 1mm diameter 1mm deep hole to get the screw in easier!
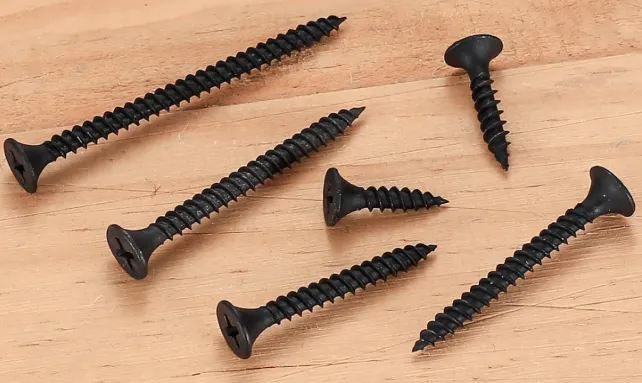
- 6 × M4 pointed flathead screws (wood), 10 mm
(mounting rails to side walls) - 6 × M4 pointed flathead screws (wood), 30 mm
(connecting the rail to the drawer itself) - 12x M3 pointed flathead screws , 8mm
( saftey connection to strengthen connector in the back- see image) - 2 × drawer rails, 350 mm
- 1 × Super glue
- 2 × Plexiglass / acrylic windows
- 185.2 mm length × 106.2 mm height
- 30 mm corner radius
- 2–3 mm thickness
- FOR CONNECTING MULTIPLE AMS DRAWERS
use 3x small M3- pointed flathead BOLTS (wood) 8-10mm on all connectors in the back (see image red dots) - 4 × M5 pointed flathead screws (wood), 20-30 mm for mounting to the surface ⚠️ Highly recommended to prevent tipping
- Optional: rubber tape on the bottom for better grip
Optional: LED for each stage on the bottom the drawer
🔧INSTALLATION
NOTE: I USED POINTED WOOD BOLTS WICH TIGHTEN THEIRSELF
- there are no holes for the ams drawer connectors!
- u just need to screw them in or drill a small 1mm diameter 1mm deep hole to get the screw in easier!
- Follow the order of the print plates – most steps explain themselves
(if not, just ask me) - Be careful when installing the top and bottom parts
→ the connectors are very long - Super glue is not required, but recommended
- Assemble everything first before using glue
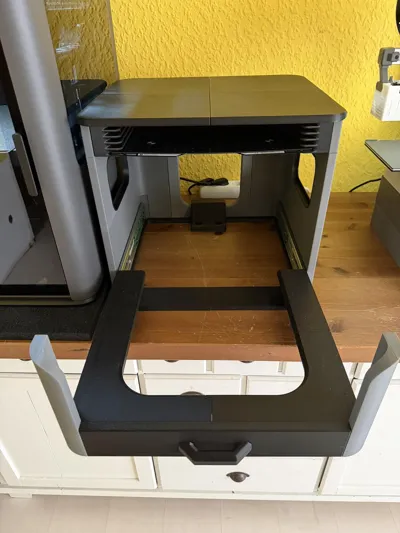
- The files are for one drawer
- I recommend printing all parts first to understand the structure
- This helps when adding more drawer levels
- Check the image below to understand what is meant by “one drawer”
- I used normal rails for a flush fit
- If you use soft-close rails, you need to slightly shorten the drawer corners
(can be done easily in the slicer) - There is also a mounting plate so you can screw the system to the surface
- An extra plate is included to fully close the drawer bottom if needed
- in the end add some small 0,8 screw to strenghten the back connectors
( very important because when u pull out the upper drawers, there is alot of force ont heconnectors wich holds the stages together) - if u want to add the ikea skadis just screw it in the sidewall


🔩RAIL NOTE
- If the rail holes don’t match your rails → no problem
- Simply drill 1 mm diameter / ~1 mm deep pilot holes
- 3 walls are strong enough if you use 4 screws per rail
💡TIP
- If you only plan to use one drawer, you can reduce the wall count
from 3 walls to 2
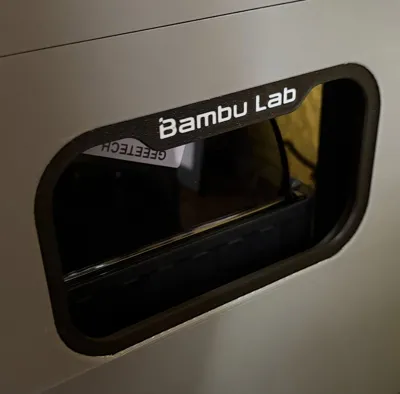
🪟WINDOWS & LOGO
- Side windows can be 3D printed or laser-cut
- Files and dimensions are included
- I recommend ordering them pre-cut in light grey transparent acrylic
- The Bambu Lab logo plate for the window is best printed with a 0.4 mm nozzle
🔗OPTIONAL ACCESSORY
If you’re looking for the AMS silica boxes I use, you can find them here:
https://makerworld.com/de/models/1672530-ams-2-pro-silica-boxes-bambulab-spool-style#profileId-1771024
This is a large project and takes some time 😄
I tried to design everything support-free, but that’s not always possible.
ENJOY!
⚠️⚠️⚠️⚠️⚠️⚠️
Most of my profiles have optimized support settings!
If you change Nozzle or Layer Height make sure to adjust my settings for the support Z distance to ensure proper results.
⚠️⚠️⚠️⚠️⚠️⚠️
I would be super happy about a boost, your photos of the printed model and a 5 Star rating
it really helps a lot and supports my work!
💛💛💛💛💛
License
You shall not share, sub-license, sell, rent, host, transfer, or distribute in any way the digital or 3D printed versions of this object, nor any other derivative work of this object in its digital or physical format (including - but not limited to - remixes of this object, and hosting on other digital platforms). The objects may not be used without permission in any way whatsoever in which you charge money, or collect fees.
Comment & Rating (288)