Search models, users, collections, and posts

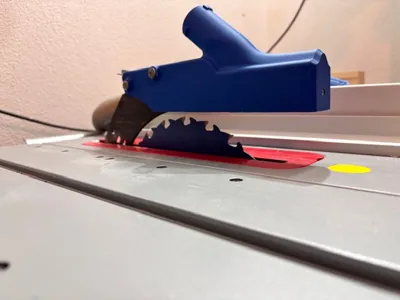
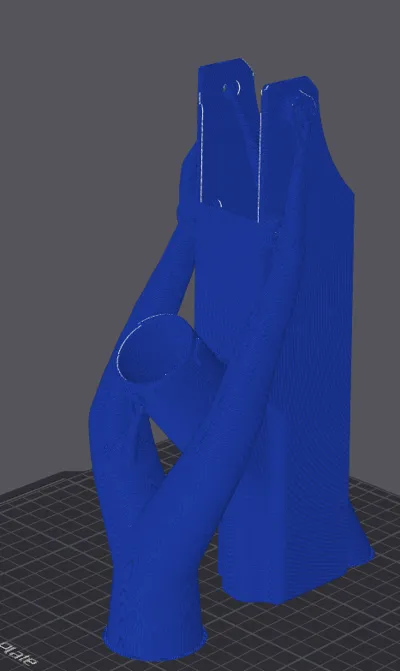
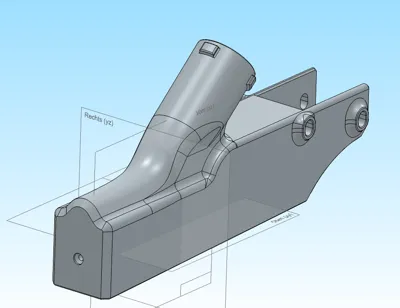
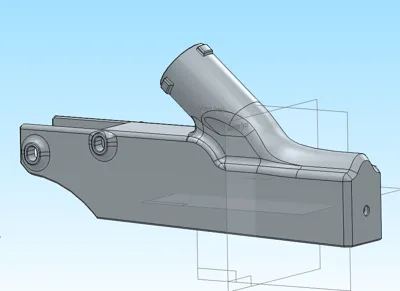
Dust Extraction Hood Bosch GTS10XC / GTA47W, OsVac, C&C

Print Profile(2)

All
P1S
X1E
H2D
X1 Carbon
H2D Pro
P2S
H2S
X2D
A1
X1
H2C
P1P
A2L

0.2mm layer, 4 walls, 40% infill
Designer
7.5 h
1 plate
5.0(2)

0.2mm layer, 4 walls, 40% infill
Designer
32.5 h
4 plates

Open in Bambu Studio
Boost
46
149
10
7
84
37
Released 

Description

Content has been automatically translated.
Show original

Boost Me (for free)

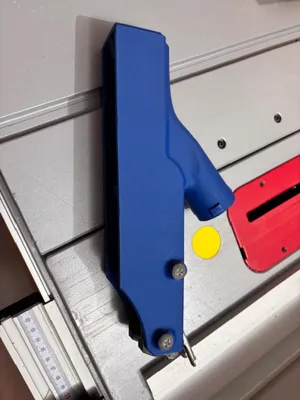
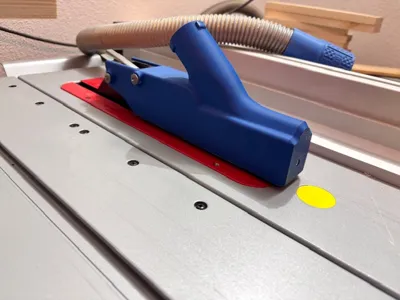
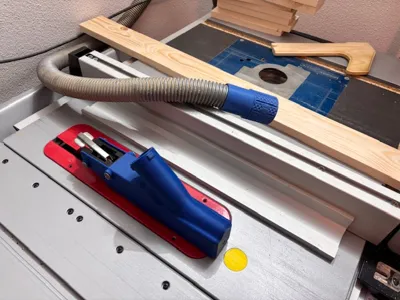
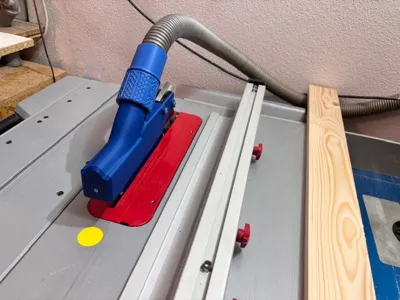
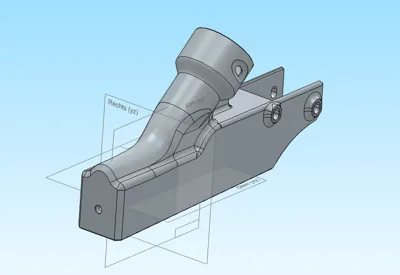
I designed a dust extraction hood here for the GTS10XC and GTA47W with the OsVac quick-release system.

For mounting, the saw guard must be unscrewed, but this dust extraction hood now creates a closed space, which allows for better extraction. 


Feel free to boost. :) 
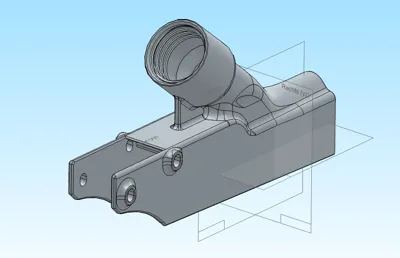
 

Also now 

  • Click and Clean connection available
  • H32 hose connection available
  • H35 hose connection available


You can find suitable OsVac adapters on my profile.  

Comment & Rating (10)

(0/1000)

Print Profile
0.2mm layer, 4 walls, 40% infill
I got it mounted, but have not tried it out yet. very strong model it fit my gta47w
(Edited)
The profile uploader has replied
0
Reply
Hey thanks for your comment. 😃 The green Looks very nice. 😃 Could i ask, which Bosch table saw you use? It looks different to the german version of GTS10XC. 😃
0
Reply
Replying to @user_1347191940 :
gta47w. I updated my review
0
Reply
Replying to @Kevin_Bone_Spur :
nice saw 😃 thanks for your reply, i will Update the Description. 😊💪🏻
0
Reply
Hello, unfortunately I'm only level 6 and can't write directly, so I hope it will be read here :) I have a question about how the part is then attached to the GTS10XC, what is it screwed on with? do you still need an adapter or is it already attached to the tension guard? Thank you in advance
The designer has replied
Show original
0
Reply
Hey, simply unscrew the two protective tabs from the original two-piece fan shroud, place the suction hood on top, and fasten it with the original screws (the Phillips head screws used on the two-piece shroud). Optionally, you can then screw in a wood screw from the front and inside at the designated holes. 😉 Hope it helps
Show original
0
Reply
Replying to @user_1347191940 :
hello thank you very much for the answer then I will print it and see how it fits :) thank you
Show original
0
Reply
Replying to @Mysteriko :
Glad you like it. 😊 Feel free to like, boost, and rate the print profile if it worked out 😃
Show original
0
Reply
Print Profile
0.2mm layer, 4 walls, 40% infill
profile
1
Reply
No more

License

This user content is licensed under a Standard Digital File License.

You shall not share, sub-license, sell, rent, host, transfer, or distribute in any way the digital or 3D printed versions of this object, nor any other derivative work of this object in its digital or physical format (including - but not limited to - remixes of this object, and hosting on other digital platforms). The objects may not be used without permission in any way whatsoever in which you charge money, or collect fees.