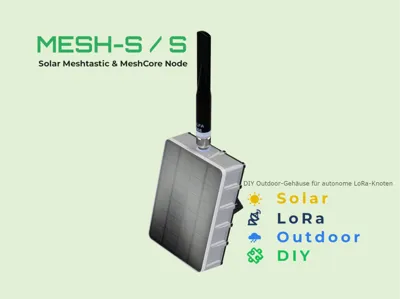
Meshtastic & MeshCore Solar Node


Print Profile(1)

Description
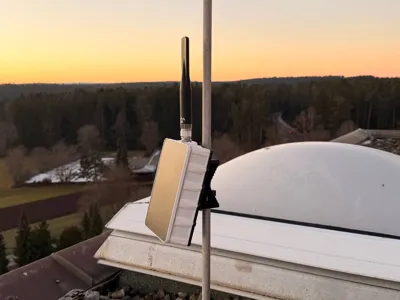
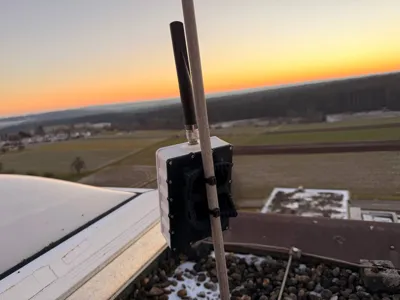
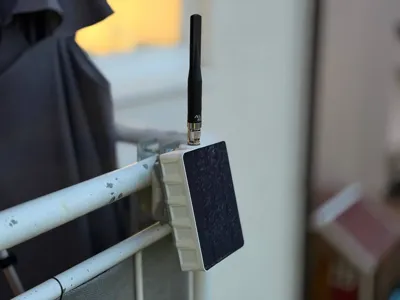
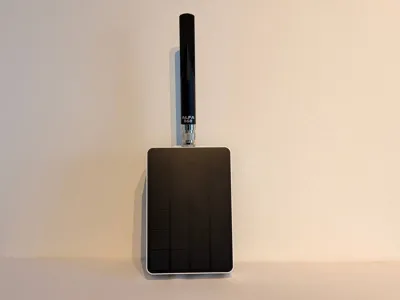
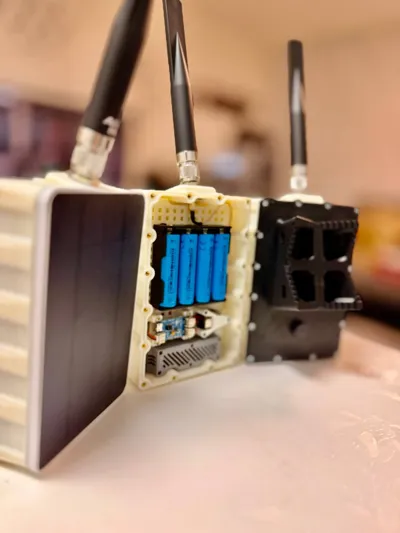
MESH-S is a DIY Meshtastic & MeshCore solar node for year-round outdoor use, based on real long-term observations
The project documents the enclosure, component selection, and practical experience
Included
- 3D print data for enclosure, mounting lid, spacer plate, and silica gel compartment
Printing Notes
- ASA recommended (suitable for outdoor use); approx 260 g ASA filament per node
Notes
- DIY project, no certification
- Assembly, wiring, and use at your own risk
Documentation / Assembly Guide
Required Parts (Variant S)
Electronics
- XIAO nRF52840 & Wio-SX1262 (1×, alternative)
- WisBlock The Basic RAK4631 (1×, alternative; optional RAK1901 sensor)
- MPPT Charge Controller CN3065 (1×, alternative)
- MPPT Charge Controller CN3791 (1×, alternative)
Power
Antenna
- ALFA AOA-868-5ACM, 868 MHz, 5 dBi, N‑Male (1×)
- N‑Type Coaxial Cable U.FL MHF1 to N‑Female, min 15 mm (1×)
Hardware
- Screws M3×12, Hex Socket (18×)
- Brass Inserts M3 (18×)
- Self-tapping Screws 2×10 (17×)
- Vent Amphenol M12 (optional, 1×)
Seal
- Silicone Seal Ø 2 mm, Silicone Foam Sealing Strip (1×)
- Sikaflex 554 (assembly adhesive)
- Silicone Sealant (optional)
- Silica Gel (optional)
3D Parts
- ASA Enclosure (1×)
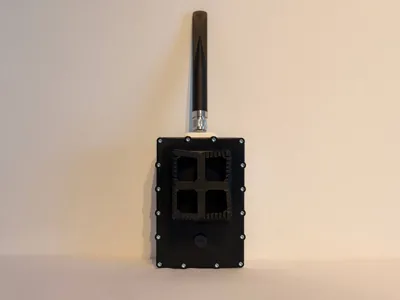
- Mounting Lid (with LTW) (1×, alternative)
- Mounting Lid (without LTW) (1×, alternative)
- Spacer Plate (1×)
- Silica Gel Compartment (1×)
- ASA filament (≈ 260 g)
Tools
- Hex keys, screwdrivers
- Soldering iron/heating insert for brass inserts
- Side cutters, wire strippers
- Sealant application tool (caulking gun)
Assembly (Step-by-Step)
- Print 3D parts in ASA (enclosure, lid, spacer plate, silica gel compartment)
- Insert brass inserts M3 into the designated receptacles
- Glue the solar panel to the enclosure with Sikaflex
- (Optional) Additionally seal the gap between the solar panel and the enclosure with silicone sealant
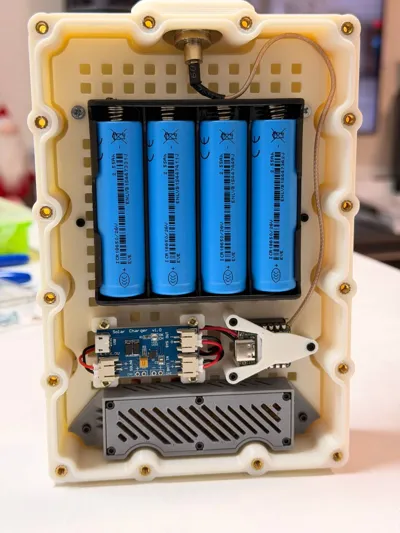
- Mount the MPPT charge controller and MCU on the spacer plate
- Mount the N-female connector in the enclosure
- Connect the solar panel to the MPPT input
- Connect the battery case to the MPPT output
- Connect the MCU to the power supply / MPPT (depending on the selected option)
- Insert and mount silica gel into the silica gel compartment
- Insert the round cord seal
- Load the battery case with 18650 cells (check polarity)
- Close the enclosure and secure it with screws
Test
- Check correct polarity and stable connections
- Test solar charging and battery voltage
- Check antenna connection (firm fit, no tension)
- Check seal all around for a gap-free fit
Tips
- Select only one MCU option and one MPPT charge controller
- Apply sealant sparingly and evenly, observe curing time
- Replace silica gel regularly, especially in high humidity
Perform a brief outdoor function test before final closing
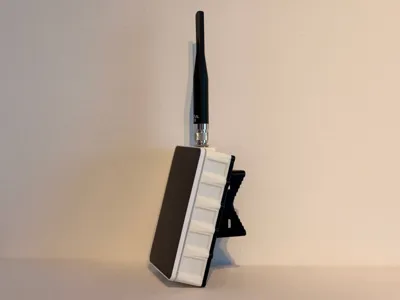
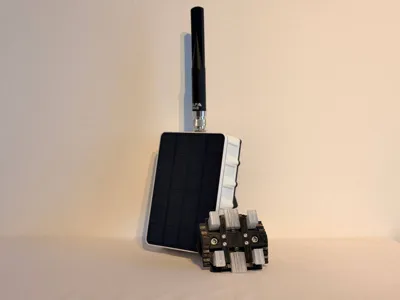
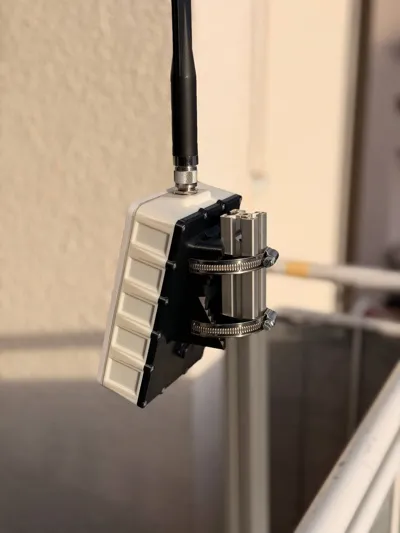
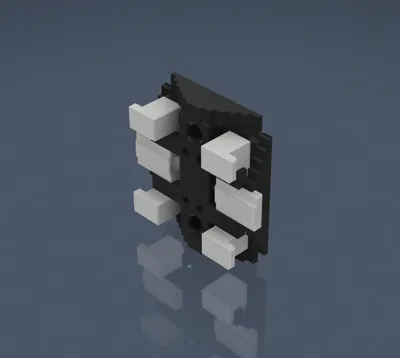
Universal Mounting System
Modular mounting concept for different mounting types without enclosure modifications
Round Structures
Suitable for masts with Ø 10–60 mm (horizontal or vertical)
Multiple mounting positions for cable ties or clamps
Rectangular Profiles
Mounting on profiles and frames from 10×10 to 60×60 mm possible
Quick Release Mount
Mechanical quick release for tool-free assembly and disassembly
Magnetic Mounting Option
Optional magnetic attachment (up to Ø56 mm) for temporary mounting on metal surfaces
Magnetic Mount:
Alternative Mounting (without Magnets):
Additional required parts:
- Brass Inserts M3 (4×)
- Screws M3×12 (4×)
- Cylinder Screws M6×12 (2×)
- Round Magnets (2×, max Ø56 mm)
- Compression Springs Ø7×19 mm (2×)
The adapter is not mandatory and can be omitted depending on the mounting type
Project Page (Documentation)
This page contains additional images, assembly instructions, and
background information about the project:
Boost Me (for free)
If this DIY project helps or inspires you, I'd appreciate a boost
It supports further development and documentation of other variants
Feedback and practical experience are also welcome
License
You shall not share, sub-license, sell, rent, host, transfer, or distribute in any way the digital or 3D printed versions of this object, nor any other derivative work of this object in its digital or physical format (including - but not limited to - remixes of this object, and hosting on other digital platforms). The objects may not be used without permission in any way whatsoever in which you charge money, or collect fees.
Comment & Rating (16)