
LightBridge - LED-Bridge Lamp - Ultra Power Light!


Print Profile(5)

![[Optional] Triple LED Channel – Ultra Power Light](https://makerworld.bblmw.com/makerworld/model/USa4e27101a461b7/559353490/instance/2026-01-11_46a078be6e45f8.jpg?x-oss-process=image%2Fresize%2Cw_100%2Fformat%2Cwebp)
![[Optional] Table Clamps for LightBridge](https://makerworld.bblmw.com/makerworld/model/USa4e27101a461b7/622662781/instance/2025-12-29_06e0d91dc13098.jpeg?x-oss-process=image%2Fresize%2Cw_100%2Fformat%2Cwebp)
![[Optional] Tolerance Testprints](https://makerworld.bblmw.com/makerworld/model/USa4e27101a461b7/549957935/instance/2025-12-29_5045d54b6f56b.png?x-oss-process=image%2Fresize%2Cw_100%2Fformat%2Cwebp)
Description
Boost Me (for free)
If you like this model, feel free to leave a boost – it helps me a lot and keeps the projects coming. Thank you! 🙌
Need more light? Modular Arc Lamp – plug-in & demountable
⚡ TL;DR
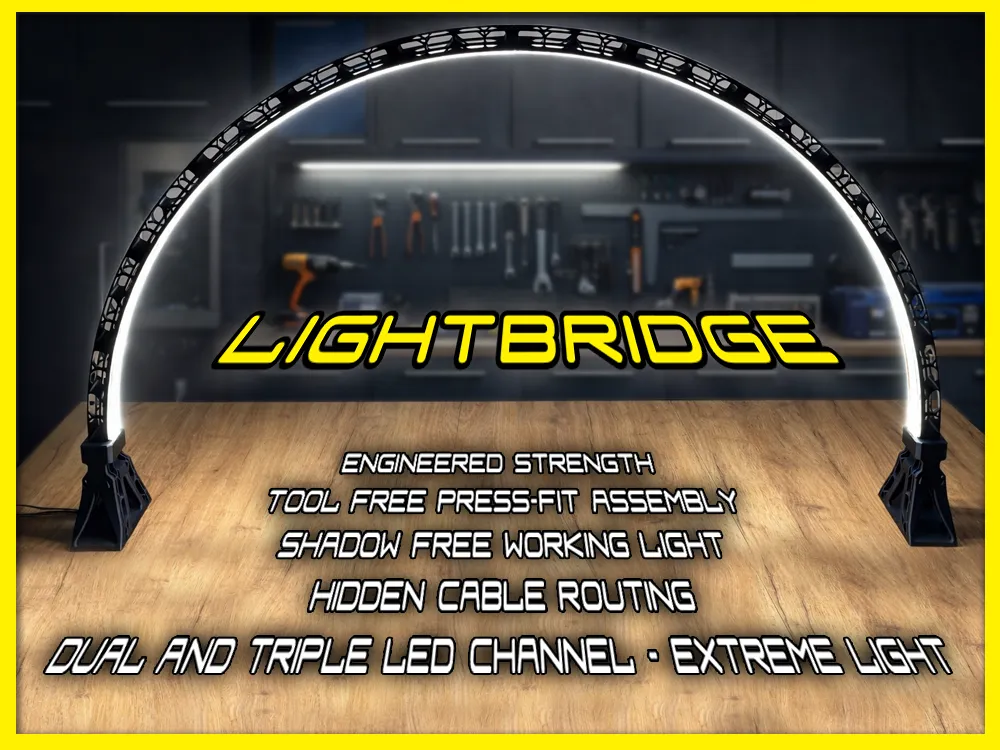
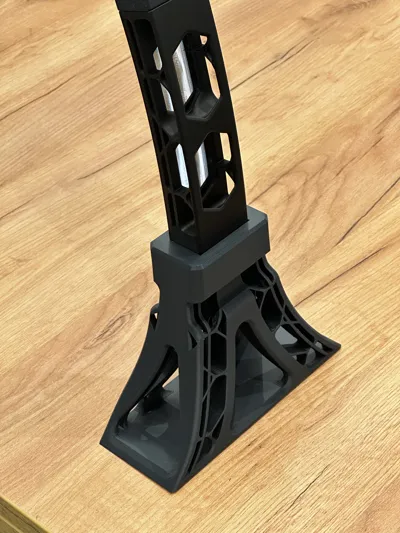
Extremely bright task light in an organic-industrial arc design – plug-in, easily disassemblable, featuring a dual and triple LED system, cleanly concealed cable routing, and a rigid, stable structure.
──────────────────
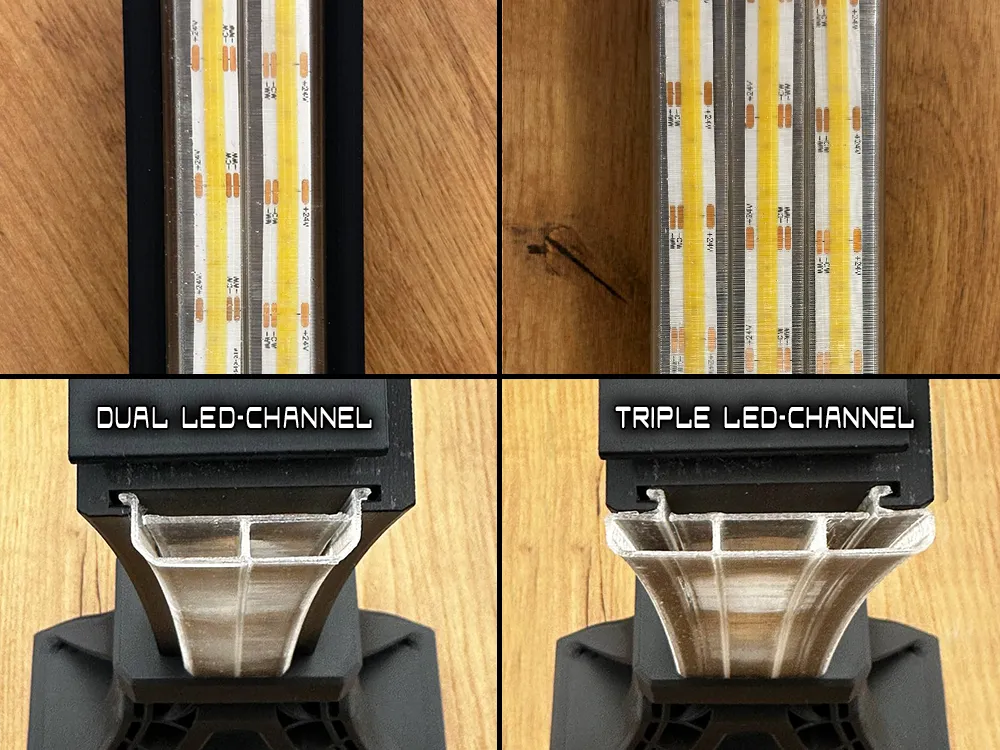
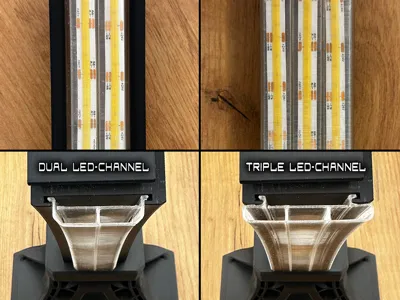
Update 2026-01-10: I’ve added a new Triple LED Channel as an optional upgrade to the existing Dual LED Channel. It allows the use of three LED strips while remaining compatible with the current foot design.
──────────────────
This arc lamp combines a clearly functional, organic-futuristic geometry with a fully modular construction.
The semi-circular light arc and the sculptural feet follow the same design logic, forming a calm, technically coherent overall appearance.
The design is deliberately optimized for easy assembly, serviceability, and high light output – without screws or glue.
📐 Dimensions & Structure
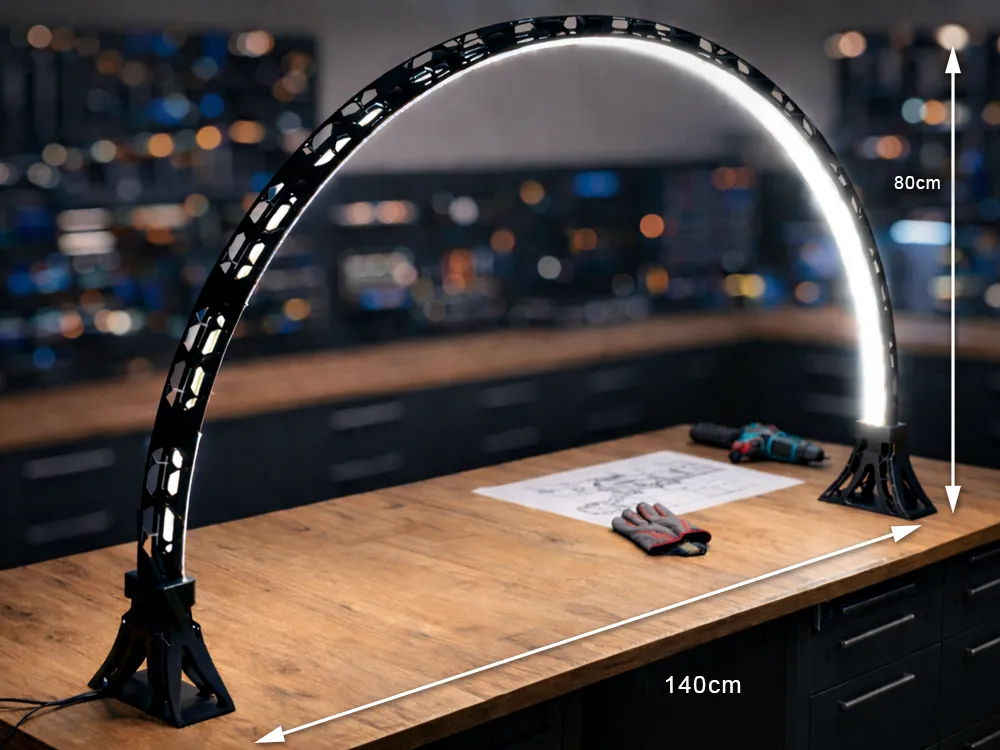
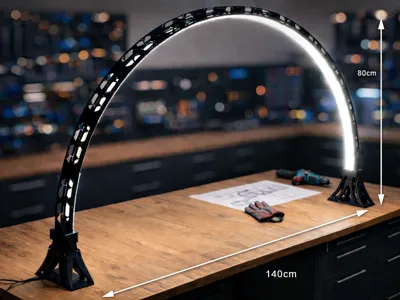
- Foot spacing (outer dimension): 140 cm
- Arc diameter: 130 cm
- Maximum height (including feet): 80 cm
- LED strip length: approx. 210 cm per LED channel (2×)
- Supported LED size: up to 12 mm × 5 mm
──────────────────
🎨 Light Characteristics & Use Cases
The semi-circular arc surrounds the workspace and significantly reduces harsh shadows, creating a bright and evenly illuminated working area.
This makes the lamp especially suitable for:
- Painting and drawing
- Model making and 3D printing post-processing
- Workbench and precision tasks
Beyond its role as a design lamp, it also serves as a high-performance task light.
──────────────────
🧩 Modular Design
- All segments are connected via press-fit joints
- No screws, no glue
- Fully disassemblable and re-assemblable
- Ideal for transport, reconfiguration, or future modifications
──────────────────
⚙️ Components Overview
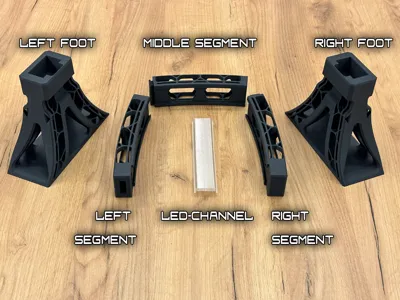
- 1 left segment (directly transitions into the left foot)
- 10 identical middle segments
- 1 right segment (directly transitions into the right foot)
- Feet: 2 pieces
- LED channels: 12 pieces, clip-in
LED channel options:
- Dual LED channels (standard)
- Triple LED channels
──────────────────
💡 LED Channels & Light Output
- Clip-in LED channels – no adhesive required
- Dual-row LED guidance
→ space for two LED strips per segment - LED strips sit loosely inside the channel
Easy to remove
Replaceable at any time - The continuous dual LED layout creates very bright, even, and low-shadow illumination.
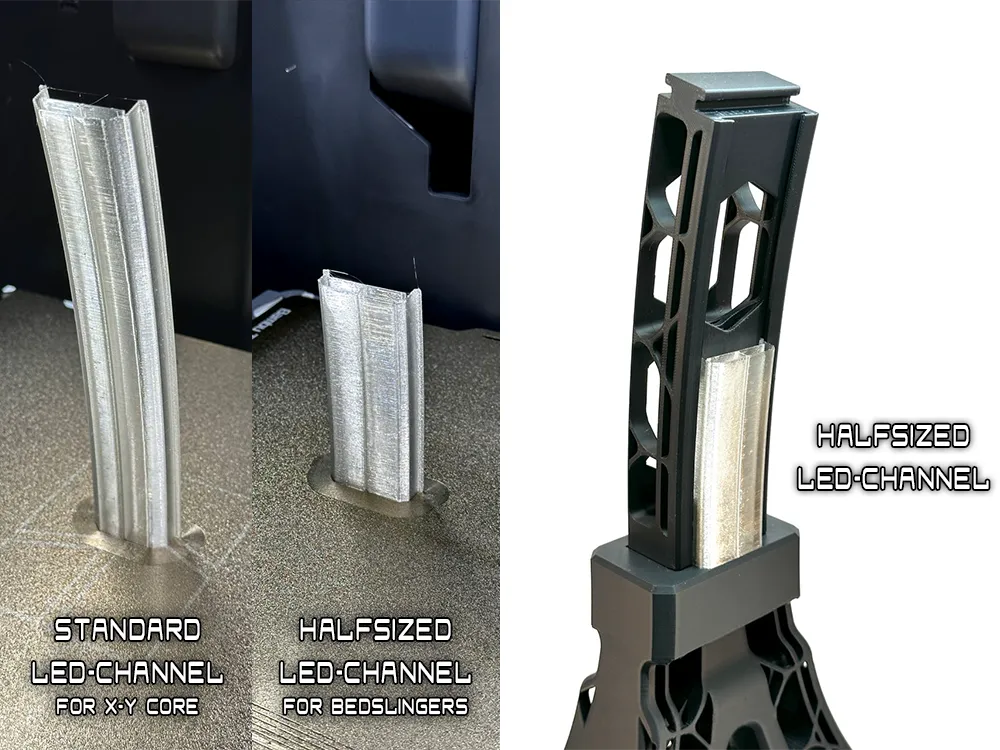
There are Two Type of LED-Channels:
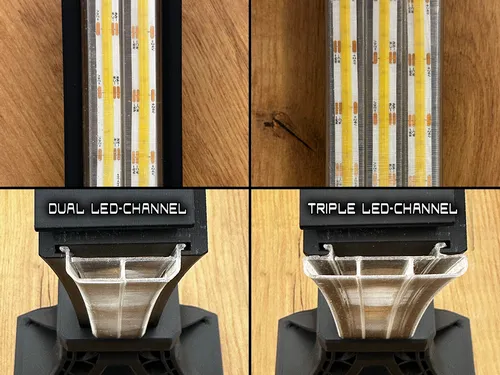
DUAL LED Channels – Power Light
Designed for standard high-output illumination using two LED strips.
Required parts:
- Standard: 12 channel parts
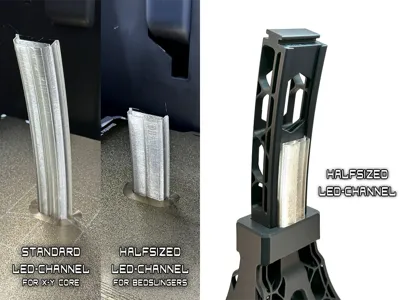
Half-sized (bedslinger option): 24 channel parts
TRIPLE LED Channel – Ultra Power Light
Optional alternative to the Dual LED Channel.
Uses two dedicated end parts (left/right) to guide three LED strips into the existing Dual LED Channel foot opening, keeping the original foot geometry unchanged.
Required parts (see print profile for Triple LED Channel):
- Standard: 10 channel parts + 2 end parts
- Half-sized (bedslinger option): 22 channel parts + 2 end parts
Note:
For bedslinger printers (e.g. A1), half-height LED channels are provided to improve print stability and reduce the risk of parts tipping over during printing.
──────────────────
🧪 Material Recommendations
Arc lamp (feet & segments):
- PLA
LED channels:
- Transparent PETG → maximum light output
- White PETG → more diffused, softer light with reduced brightness
❌ PLA is not recommended for LED channels, as heat from the LEDs may cause deformation!
⚠️Important Note:
If you experience printing issues with the LED channel—especially on bedslinger printers (e.g. A1), where taller prints may tip over—use the half-sized LED channel. In this case, 24 pieces are required instead of 12.
──────────────────
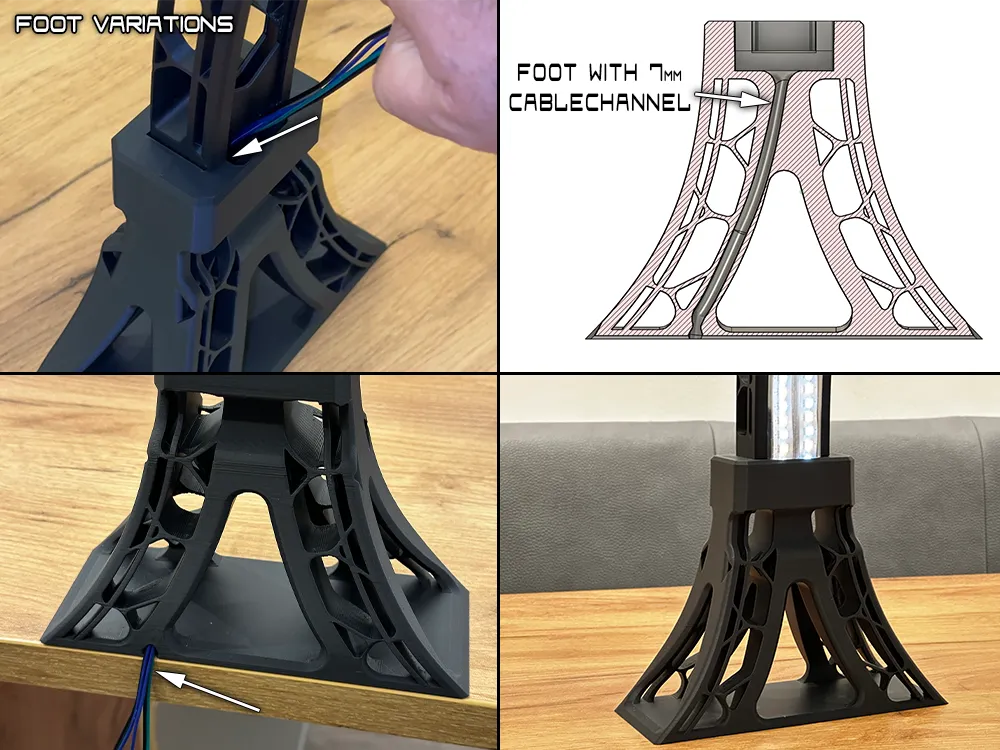
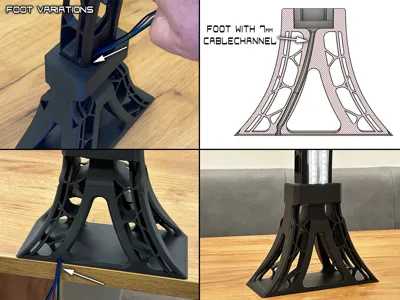
🔌 Two Types of Feet – Select Your Favorite Setup
The feet are interchangeable (left / right):
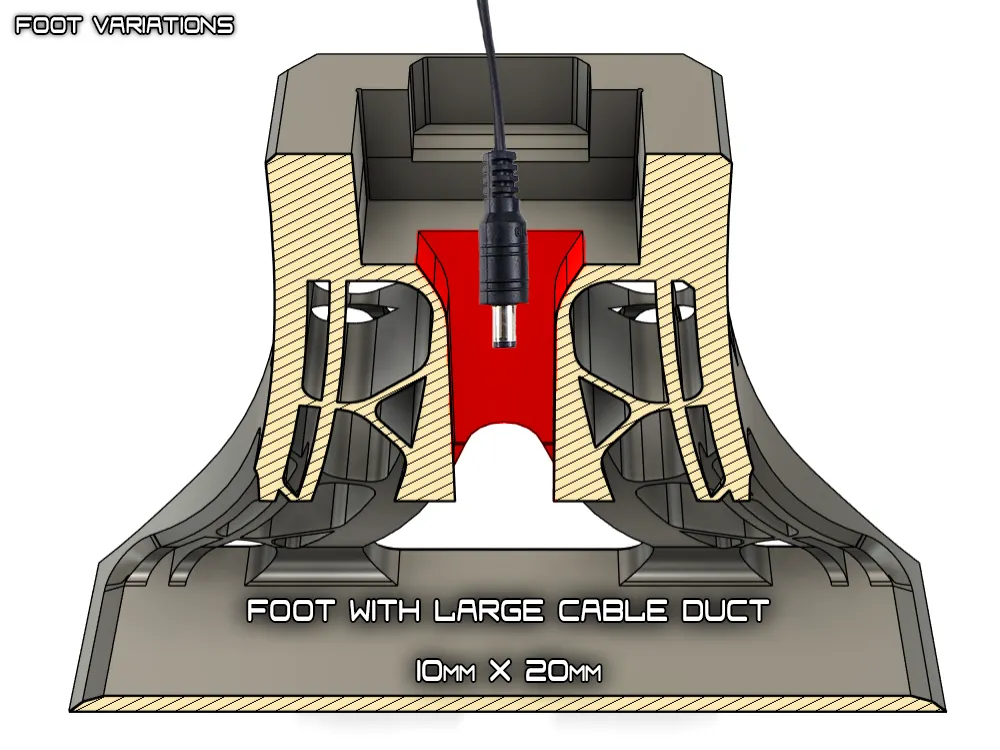
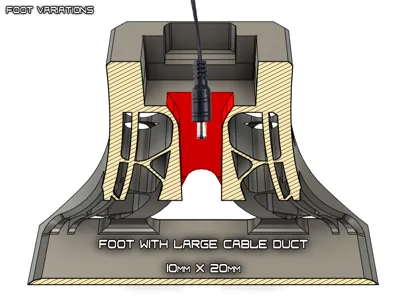
- Standard Foot with 20×10 mm Cable Duct
Allows routing of cables with connectors up to the duct size.
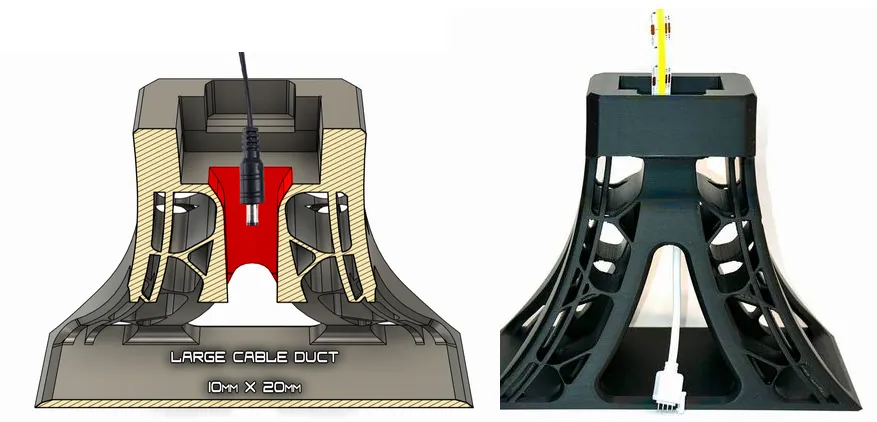
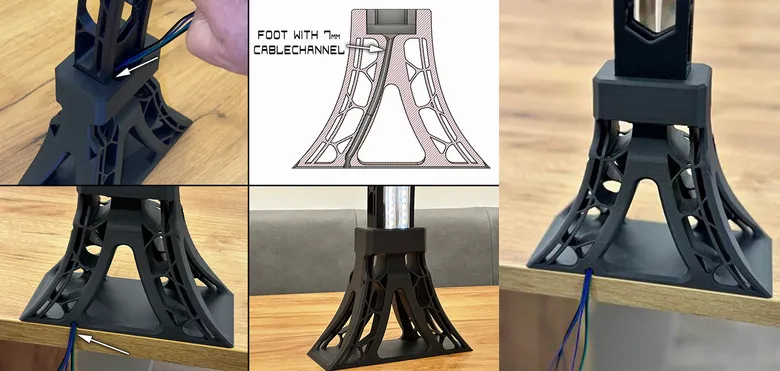
Foot with 7 mm Cable Channel (For Hidden Cable Routing)
Features an integrated, concealed cable channel with an approximate diameter of 7 mm for discreet cable routing without visible wiring.
──────────────────
🛠️ Assembly Process
- Connect all segments to form the arc
- Insert the finished arc into both feet
- Route the LED cable through the lower opening of the left segment and through the cable channel in the left foot
- Feed the LED strips through the LED channels and insert them into the segments. The LED channels can either be clipped into the segments by gently squeezing them, or alternatively slid in from the side.
──────────────────
➕ Optional plate
- Plate #7 – Half-sized LED Channel (24 pcs required) for bedslinger (e.g. A1)
If you experience printing issues with the LED channel—especially on bedslinger printers (e.g. A1), where taller prints may tip over—use the half-sized LED channel.
In this case, 24 pieces are required instead of 12.
➕ Optional print profiles
- Table clamps for M8x40 hardware, fits table thicknesses of 20 mm / 30 mm / 40 mm
- Test prints for tolerance verification
- TRIPLE LED Channel
──────────────────
⚡ Electronics Recommendation (Personal Setup)
After several user requests, here is a short overview of the electronics I personally use and recommend.
For truly bright, even, and high-quality light, I don’t recommend cutting corners on the electronic components.
My setup is designed not only for dimming, but also for stepless adjustment of color temperature from warm white to cool white, allowing the light to be adapted perfectly to mood and application.
Used components:
- LED strip: JOYLIT CCT COB LED strip, 24 V, 640 LEDs/m, CRI 92+, 2700 K–6000 K
- Power supply: Mean Well XLG-200-24-A, 24 V DC, 199 W
- Controller: MiLight / MiBoxer FUT035SA+ B2 CCT LED controller
This combination delivers very high brightness, smooth dimming, excellent color quality, and flexible light control.
──────────────────
⚠️ Please calibrate your Filament for best print results and ensure good bed adhesion by thoroughly cleaning the build plate with dish soap and avoiding touching the surface with your fingers—handle it only by the edges. If bed adhesion is still poor, use adhesive.
Membership
Are you a 3D print seller? Get a commercial license to legally use my models in your shop. These licenses allow you to print and sell physical copies of my designs.
License

You shall not share, sub-license, sell, rent, host, transfer, or distribute in any way the digital or 3D printed versions of this object, nor any other derivative work of this object in its digital or physical format (including - but not limited to - remixes of this object, and hosting on other digital platforms). The objects may not be used without permission in any way whatsoever in which you charge money, or collect fees.


Comment & Rating (275)