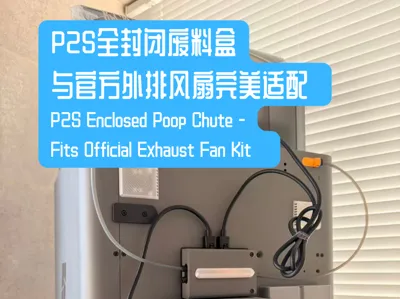
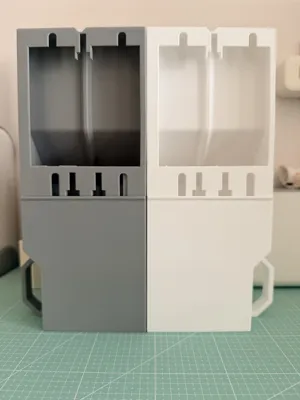
P2S Fully Enclosed Waste Bin (Compatible with Official External Exhaust Fan Kit)


Print Profile(3)

Description
Boost Me (for free)
This is my first time modeling, please leave comments or suggestions. Thank you for your support!
This poop chute is designed for the dedicated back panel of the official P2S external exhaust fan kit. New batches of P2S come with this back panel from the factory
January 28, 2026: Added a left-handle, left-sliding installation version
January 5, 2026: V2 version updated
- The poop chute has been deepened, increasing its capacity by about 70%
- A spherical snap-on retainer has been added between the top cover and the hanging panel to prevent the top cover from sliding out of the hanging panel when installing the lower bin
- The lower part of the rear hanging panel has been extended, with an added protrusion at the rear of the lower bin, to help with positioning during lower bin installation
Features
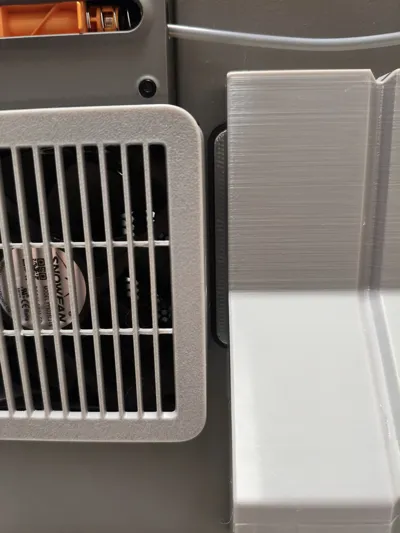
- Guide plate design that extends deep into the poop chute opening, leaving enough space, **without affecting the installation and removal of the official exhaust fan kit's exhaust pipe bayonet and main body**
- **Fully enclosed design**, to minimize large amounts of external air from directly entering through the poop chute opening and heat dissipation vents, reducing the internal temperature of the machine. At the same time, it maintains negative pressure as much as possible, allowing air to enter through small gaps
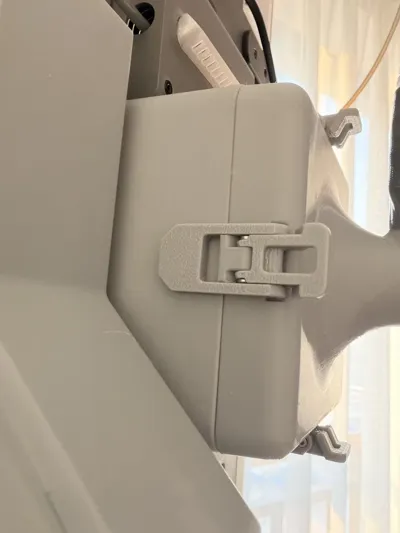
- Comfortable **poop chute handle**, convenient for installing and removing the poop chute in confined spaces
Single plate direct output
Printing
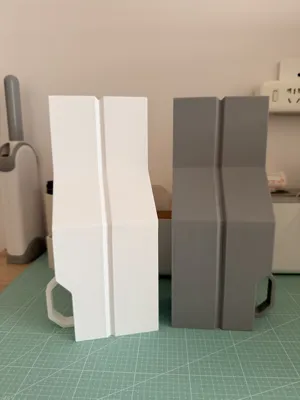
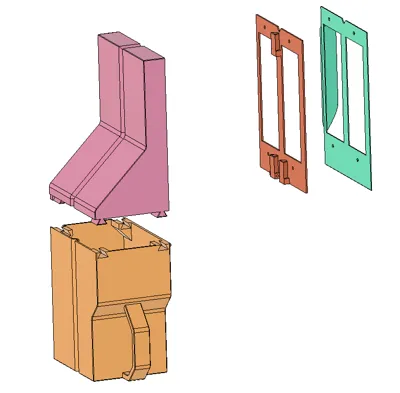
- Just print directly using the files. To minimize support material and optimize print quality, the hanging panel is divided into two parts
- I printed it using PETG, and the results were good. PETG is also recommended for printing
- The hanging panel part is relatively thin, please wait for it to cool before carefully removing it
- During design, a 0.15mm gap was left for the dovetail joint to ensure smooth installation, and no gap was left for the square limit groove to ensure locking. However, due to brand, material, and other reasons, shrinkage rates may vary. If you find the installation is not smooth, please use sandpaper or a file to sand it down
Installation

- Assemble the front hanging panel (brown) and the rear hanging panel (green) together according to the notches, with the rear hanging panel (green) facing the machine's back panel
- Use the BT3x6 screws included with the official exhaust kit (including the back panel) to secure the top-right and bottom-right. The bottom-left and top-left screws can be secured using the Bed Scraper screws (cannot be fully tightened)
- Slide the top cover (pink) into the bottom of the hanging panel from above. A 'click' sound indicates it is installed correctly
- Slide the lower bin (yellow) from the right side into the top cover (pink) towards the left side (facing the back of the machine)
License
You may create derivative works based on this object, provided that all such derivative works are published exclusively on the MakerWorld platform and include proper attribution to the original creator. You may not share, upload, host, distribute, or publish this object—or any derivative work of this object—on any other digital platform, marketplace, or distribution channel. Commercial use of this object and any derivative works is strictly prohibited. This includes, but is not limited to, selling, renting, sublicensing, or using the object in any context in which you receive monetary compensation or other financial benefits.
Comment & Rating (57)