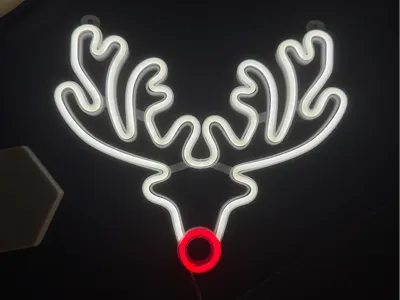
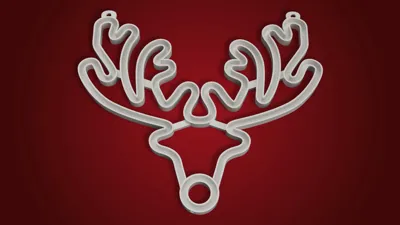
Festive Rudolph the Reindeer Neon Christmas Sign


Print Profile(1)

Description
Add some neon holiday cheer to your decor with this Rudolph the red-nosed reindeer neon sign!
Measures 12" x 11" and prints on two separate build plates. I just super glued the pieces together. You will need to do a little bit of soldering to finish this project. I recommend printing this in PETG as the 12V neon LED strips can get quite warm. If you use the 5V strips, you should be fine printing with PLA.
Materials needed:
Note: These are affiliate links and a small commission is earned (and appreciated!) with no extra cost to you if you use my links
- 12V flex neon LED strip 5M in white - https://amzn.to/3Lc6Xyv
- 12V flex neon LED strip 5M in red - https://amzn.to/4jecRf8
- Small enameled wire - https://s.click.aliexpress.com/e/_c3wioOyN
- 22 Gauge clear wire - https://amzn.to/4slYWbe
- 12V power supply - https://amzn.to/4qzlEeh
- 12V inline dimmer (optional) - https://amzn.to/48VppVo
- Super glue (I use this) - https://amzn.to/44J7vCL
- Soldering iron (here is the one I use and recommend) - https://amzn.to/4q3NMGC
- Solder (I use the thinner .08 stuff)
- And don't forget to use some kind of ventilation when soldering! (I use this) - https://amzn.to/4qrC6gr
First, cut a small slit at the bottom of one of the ends of the white LED strip (I cut off the end that has the barrel connector pig tail attached). Expose the LED strip inside enough that you can see the positive and negative pads where you will solder two small enameled wires to.
Once you have soldered these wires, carefully put the LED strip back inside the casing and put the two wires through the hole on the left side of the nose, where the main channel and the nose channel connect. Then fit the white LED strip into the main channel. Once you reach the other end, be sure to only cut the LED strip on one of the black marks on the backside of it.
Now, take the red LED strip and fit it into the nose channel and trim to the size you will need (be sure to only cut on the black marks). Once you have the red strip cut to size, do the same thing as you did with the white strip and on BOTH ends, expose the LED strip so you can solder wire onto the positive and negative pads. On one end, solder your 22 gauge wire (cut to size you need) and on the other end, solder the two enameled wires you soldered onto the white led strip. Once the soldering is done, feed the 22 gauge power cable through the hole in the bottom of the nose, carefully tuck the enameled wires into the bottom of the nose channel and then fit the red LED strip into the channel.
Now you can use the female barrel connector that comes with the 12V power adapter on the other end of your 22 gauge power wire, plug that into the 12V adapter and you are done!
Hope this brings joy to your family for the Holidays!
License
You shall not share, sub-license, sell, rent, host, transfer, or distribute in any way the digital or 3D printed versions of this object, nor any other derivative work of this object in its digital or physical format (including - but not limited to - remixes of this object, and hosting on other digital platforms). The objects may not be used without permission in any way whatsoever in which you charge money, or collect fees.
Comment & Rating (0)