P2S - LCD Cover Door 2.0 (Updated)


Print Profile(2)


Description
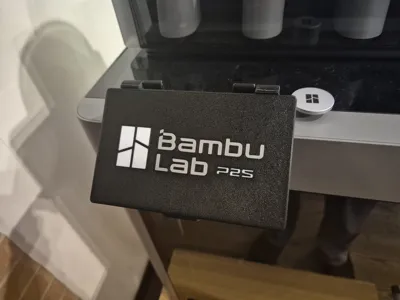
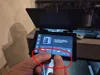
This LCD Touch Screen protector for the Bambu Lab P2S is aesthetically pleasing and very functional. It is a protector formed by a frame perfectly calibrated to the external shape of the P2S screen. It adheres perfectly to the screen thanks to two slots located at the bottom of the frame that protrude internally by 1.5mm above and below.
The 3mm thick door protects against accidental impacts, and the printed logo adds an elegant touch.
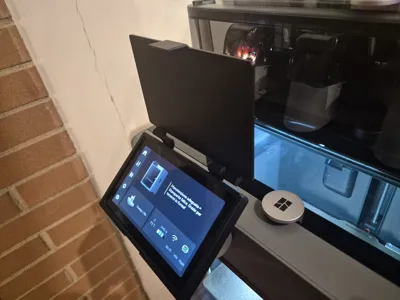
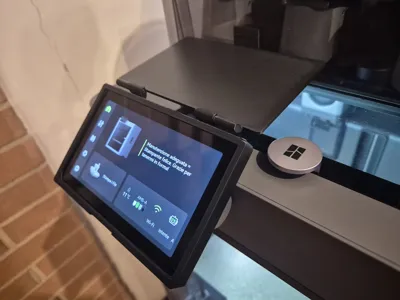
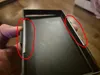
There are 3 images in the assembly guide; the assembly itself is very simple. Using the two protrusions in fig. 04 highlighted in red, tilt the frame diagonally, guiding the upper part towards the screen (see fig. 05). Subsequently, once the upper part is inserted, insert the lower part by gently pulling down the central part (fig. 06) to allow the frame to enter the bottom section as well.
Adjust the frame so that it adheres perfectly to the screen.
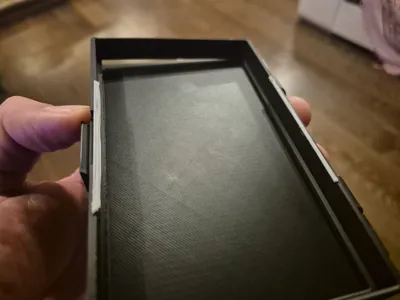
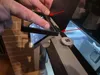
I separated the two parts so that both are aesthetically pleasing, because printing the base vertically in the old version resulted in imperfections and took much longer. Now we also have pins to insert manually at the end of the print. I advise caution; although they are quite strong, if any support remains inside the holes, they might bend, but the final result is much nicer and more functional.
Regarding the logo on the door for this multicolor version, I recommend activating the bucket tool with the “Edge Detection” function. Subsequently, under the “Strength” paragraph, you need to adjust “Bottom paint penetration layer”.
It's a slightly longer process, but if you also want to print the logo, since it's not a separate object but a Fusion 360 sketch transferred to the cover surface, I therefore preferred it to be optional and not mandatory to print.
Documentation (5)

License
You shall not share, sub-license, sell, rent, host, transfer, or distribute in any way the digital or 3D printed versions of this object, nor any other derivative work of this object in its digital or physical format (including - but not limited to - remixes of this object, and hosting on other digital platforms). The objects may not be used without permission in any way whatsoever in which you charge money, or collect fees.
Comment & Rating (71)