Xtool D1 Cable Chain Kit (Fits Portable Enclosure)


Print Profile(1)

Bill of Materials


Description
Boost Me (for free)
Please consider boosting me (or following) if you like my designs!

This consists of a cable chain kit, and a 500mm honeycomb mount kit that will hold a back plate and the honeycomb, with a space in between if needed.
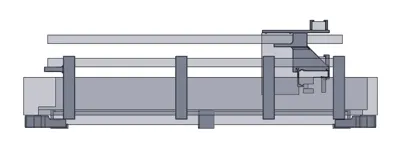
My cable chain kit design is unique because it is low profile and does not extend the footprint of the frame. This is why it works with the portable xTool enclosure and others that are a similar size.


Cable Chain:
Parts:
XTool D1 Series Repair Kit (Includes extended cables, bearings, and belts - a pretty good deal)
1 Meter/39.4 Inch Drag Chain Cable Carrier 10x15mm
Screws: Amazon or Bambulab if available.
3 EA M3x30mm flat head socket cap screws
12 EA M3x8mm flat head socket cap screws
- Gantry Cable Chain (X-Axis):
- Laser head mount:
- 2 M3x30mm screws for laser head mount to laser head (Remove the two shorter fan screws on the top and replace with these)
- 3 M3x8mm screws for cable chain (Can use only one screw and it holds well)
- Gantry Mount:
- 1 M3x30mm screw to clamp the mount to the gantry (it goes through the furthest hole to the left on the gantry)
- 3 M3x8mm screws for cable chain (Can use only one screw and it holds well)
- Laser head mount:
- Frame Cable Chain (Y-Axis):
- Gantry Mount:
- 3 M3x8mm screws for cable chain attached to the side of the moving gantry (Can use only one screw and it holds well)
- Frame Mount:
- 3 M3x8mm screws for cable chain attached to the frame near the round button (Can use only one screw and it holds well)
- Gantry Mount:
Instructions:
- Remove existing cables and remove them from the mesh.
- Route new cables through the mesh sleeve and route them along the general path.
- Remove the two shorter screws from the top of the laser head (I believe these are on the left side of the laser head).
- Insert the new cable into the cable chain and place the cable chains in the general location.
- Install the 7 pieces that are indicated in the photos. Most of these snap in place and require a bit of force to push into position.
- Install the screws to hold these in place.
- Mount the cable chains with the screws onto these pieces.
- Use zip ties to secure the cables on each end of the cable chain and in specific locations where noted in the photos.
- Specifically between the two cable chains to keep the cables and air line from contacting the inner wall of the enclosure and that prevent the motor cable from getting crushed when the gantry is against the back of the frame.
Honeycomb Holder
500mm xTool Honeycomb or Amazon 500mm Honeycomb
No screws are required.
Instructions:
- place the lower plate on top of the four mounts.
- Place the spacers on the plate (if needed)
- Place the honeycomb on top.
- Place the laser frame into the round clamps and push down.
- Done!
Check out some of my other designs:


Documentation (8)


License
You shall not share, sub-license, sell, rent, host, transfer, or distribute in any way the digital or 3D printed versions of this object, nor any other derivative work of this object in its digital or physical format (including - but not limited to - remixes of this object, and hosting on other digital platforms). The objects may not be used without permission in any way whatsoever in which you charge money, or collect fees.
Comment & Rating (7)