Search models, users, collections, and posts

Pain Roller with Spinner and Clicker

Print Profile(1)

All
P1S
H2D Pro
A1 mini
H2D
X1
A1
P1P
P2S
X2D
X1E
X1 Carbon
H2C
H2S
A2L

0.2mm layer, 3 walls, 15% infill
Designer
2 h
2 plates
4.7(15)

Open in Bambu Studio
Boost
135
416
49
18
555
380
Released 

Bill of Materials

Maker's Supply Kits and Parts
Select all
608ZZ P5 Steel (2PCS) - EA028
List other parts
  • Keyswitch x 1: Haimu Whisper or other Cherry MX compatible

Description

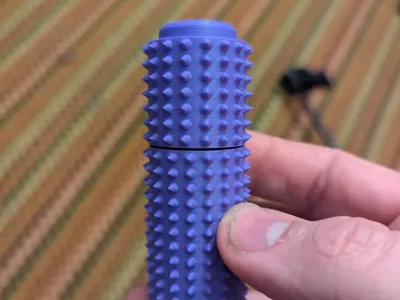
This is just a pain roller, but with a couple of extra tricks… Using a 608 bearing, the top part will spin, and it also has a button on top that uses a key switch (I use Haimu Whisper, but I think most Cherry MX style switches should work?)

Saw something similar elsewhere, but it didn't fit the switches I had and had a restrictive license, so I thought I'd have a hand at building one from scratch, I'm pretty happy with how it turned out.

Supports should only print under the top piece for the cavity for the 608 bearing. Feel free to play around with the profile, though larger layer heights may reduce the pokiness of the spikes.

The button stem for the keyswitch is not square, so for the Haimu switches there is definitely an orientation to it that should be pretty simple to figure out.  The bearing may need a bit of encouragement to slide into place, it's friction fit.

The normal base has a relatively loose fit on the bearing, but there's a second base I uploaded that has a much tighter fit on plate #2.

Note: I don't really recommend silk PLA for the button, as it's a fairly thin support and there's a nontrivial amount of force being applied.  I've seen a fair number of issues with it.

Comment & Rating (49)

(0/1000)

how does this go to together?
The designer has replied
0
Reply
There is support material in the bottom part of the top piece that needs to be removed.
0
Reply
ive printed 3 of these. the first plate the bottom doesnt stay in. the second i cannot get the bearing on to the post for the bottom, it breaks before i do. on both plates the mx keys i have will not fit the cross hairs and break the cap. id be fine with adding some glue to the cap to keep it on. seems like a great answer is between the first and second for the bearing.
(Edited)
1
Reply
is there a setting i need to change on p2s, the cross hairs of they key never insert. they print and look slightly offset, like the printer cabt accurately make them.
0
Reply
Print Profile
0.2mm layer, 3 walls, 15% infill
Clicker broke after a few minutes. Needs more reinforcement.
The profile uploader has replied
0
Reply
I will say that Silk Filament seems to have that issue, I've never had an issue with regular PLA.
0
Reply
I did just modify the button geometry to try to make it stronger... I'm not sure it will be enough with Silk PLA, but you can give it a try.
0
Reply
Replying to @keronian :
That's a good point, I'll try the new modified version with a non-silk. Thanks.
0
Reply
The top broke off when I tried to put the bearing. Tighter fit not the choice, but the button did work.
The designer has replied
1
Reply
I would definitely put the bearing into the top piece first as the tolerances there are pretty tight and the structure is stronger. Like, the way I put mine together is I use a mallet to get the bearing into the top first, then I add the switch and the button and then attach it to the bottom piece.
(Edited)
0
Reply
Print Profile
0.2mm layer, 3 walls, 15% infill
I lengthened the original to 4.5” and printed in PLA Silk. Had been looking for this for a long time.
profile
1
Reply
how did you make it longer? I need this version! !
(Edited)
1
Reply
So I downloaded this and first printed the TighterFitBase, but it was a little too tight for my bearing. I already had some 608-RS bearings. I also took the two rubber seals off my bearings and cleaned the grease with brake cleaner so they would freely spin. In the end I printed 3 of the DefaultBase, the supports came out easily, the bearings went in great. One the bearings went in a little too far and then wouldn't spin. I took my pliers and grabbed the center of the bearing trying to pull it out some. What ended up happening was I made a little more slack in the bearing and they really started spinning free. So after installing the other two bearings I did the same with my pliers so they could really have some speed. For the clickers I had already purchased the ones pictured for another item I was planning to print. I ordered the recommended Cherry MX style also, but I preferred the ones I have pictured. For the file and the print profile, it's top notch.
designer
1
Reply
printed ok there is a random split on the top part of mine, not sure what happened. I didnt realize I needed a bearing, but luckily found a printable one that worked just fine for this print only complaint, the clicker sound isn't great, but unsure how I'd fix that
The designer has replied
0
Reply
Sometimes you just get a bad print. Happens to the best of us. As far as the sound goes, you could try other key switches maybe.
0
Reply
Print Profile
0.2mm layer, 3 walls, 15% infill
So I downloaded this and first printed the TighterFitBase, but it was a little too tight for my bearing. I already had some 608-RS bearings. I also took the two rubber seals off my bearings and cleaned the grease with brake cleaner so they would freely spin. In the end I printed 3 of the DefaultBase, the supports came out easily, the bearings went in great. One the bearings went in a little too far and then wouldn't spin. I took my pliers and grabbed the center of the bearing trying to pull it out some. What ended up happening was I made a little more slack in the bearing and they really started spinning free. So after installing the other two bearings I did the same with my pliers so they could really have some speed. For the clickers I had already purchased the ones pictured for another item I was planning to print. I ordered the recommended Cherry MX style also, but I preferred the ones I have pictured. For the file and the print profile, it's top notch.
0
Reply
love this model! is there any trick to removing the supports from underneath? it’s super tedious. also, if I hammer in the 608 ball bearing all the way it doesn’t spin. am I doing something wrong?
The designer has replied
0
Reply
No particular trick, though I usually use some tweezers. there's a depression in the cavity that should allow it to spin even pressed all the way in, unless you didn't clean the support material out very well.
0
Reply
Replying to @keronian :
I am confused on how to put together can you walk me through it
0
Reply
Replying to @huddyT :
what do you call the bearing
0
Reply
Print Profile
0.2mm layer, 3 walls, 15% infill
obsessed with this!
(Edited)
0
Reply
Boosted
Hey! I really love this, great work. :) I wonder if you'd be interested in offering it in a few different textures? Maybe a softer 'spike' for kids? that would be rad.
The designer has replied
1
Reply
My girlfriend's 5 and 6 year olds both love the spikes on the current design... I'm just not sure what another texture would be useful for.
0
Reply
Boosted
Replying to @keronian :
no worries, I appreciate the reply. nothing wrong with the original texture at all. I was thinking maybe a trio of ‘spiky’ levels? Just to provide some options for folks with different sensory preferences.
1
Reply