Eko Core 500 Stethoscope Swivel Holster


Print Profile(1)

Description
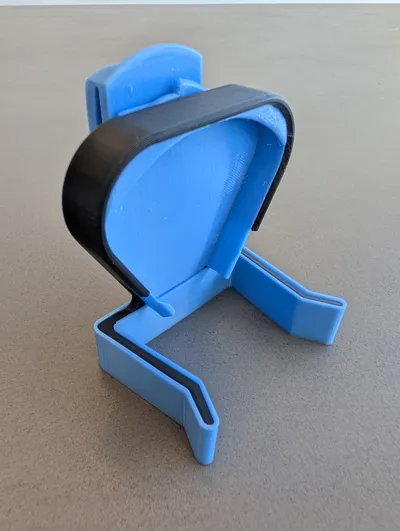
🩺 Eko CORE 500 Digital Stethoscope Waist Clip Holster
Upgrade your clinical carry with a holster designed and tested by an Emergency Physician. This model moves your stethoscope from your neck to your hip, ensuring your most valuable tool is secure, clean, and always within reach. 🚀
✨ Why Use a Holster?
- 🧘 Ergonomic Health: Keeps the weight off your neck and the irritating plastic tubing off your skin.
- 🛡️ Device Protection: Keeps your high-value stethoscope securely attached to your person, preventing accidental drops or loss.
- 🖐️ Anti-Grab Safety: Removes strangulation or pulling hazards.
🛠️ Design Features
- 🔗 Print-in-Place Swivel: Features a clever mechanism inspired by AlwaysTinkering’s Print in Place Stethoscope holder remix. Allows the stethoscope to hang freely and comfortably even while seated.
- 💎 Assembly: Printed in 3 parts from TPU for AMS and PLA.
- TPU: Used for the clip and interior to provide the necessary "flex" for the belt/waist clip, easy insertion/removal and to prevent scuffs on the stethoscope.
- PLA: Forms the outer shell to provide structural rigidity and a clean finish that hides any imperfect overhangs.
- Not tested with other materials but other combinations, including without TPU would likely work too.
- 🚫 No Supports Needed: Optimized for a clean, support-free printing experience.
- 💡 No AMS Required: Each component can be printed individually in a single material.
- 🖐️ One-Handed Operation: Efficient design allows for quick access and re-holstering with one hand after a small amount of practice.
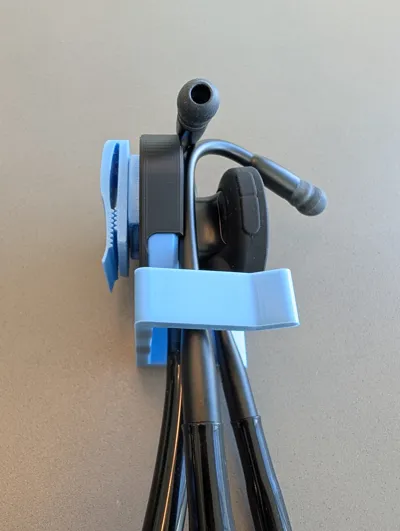
📖 How to Use
- Insertion: Push the top two “lobes” of the bell into place at the top of the clip first.
- Locking: Rotate the bottom “lobe” of the bell downward into to clip to secure firmly into place.
- Security: The earpieces hang on the bell and are held securely by the integrated arms, keeping the unit stable during movement.
- Removal: Remove the earpieces, then pull the bottom “lobe” out first, followed by the top two.
⚙️ Post-Printing Instructions
Release the print-in-place swivel as below. A knife inserted gently to separate the moving parts is also very effective, especially with TPU.
This model features a "BREAK LOOSE" print-in-place swivel. Per the original design by AlwaysTinkering:
“There are 4 or so thin stands to support the beginning of the floating shaft and swivel. […] Hold the swivel plate and give it a good turn to the right (a rag might help in holding it). If it is stubborn about breaking loose, push left and then right should help it break loose. The swivel plate will only turn right from the print position as the swivel prints against the left stop.”
- Insert the main holster into the shell firmly but taking care not to over-stress or break the shell. The clip will fit through the hole at the back of the shell in a horizontal position.
- Slide the bumper onto the arms, and on top of the bottom corner of the holster.
Upgrade your clinical carry and give your neck a break today! 🏥
Description generated with help from Gemini ✨
Comment & Rating (3)