Search models, users, collections, and posts

CC 003 Tryx - Open Air SFF PC Chassis

Print Profile(1)

All
A1
H2C
H2D Pro
H2S
H2D
P2S
X2D
A2L

0.16mm, 3 walls, 30% infill
Designer
31.3 h
6 plates

Open in Bambu Studio
Boost
355
709
21
22
256
13
Released 

Description

An updated 2.0 version of this chassis is in the works! I would advise waiting for the update if you want to print this. See the bottom of the description for more info on what's to come in the updated model.

This chassis was designed specifically for the MakerWorld × TRYX Open-frame Case Design Contest.
 

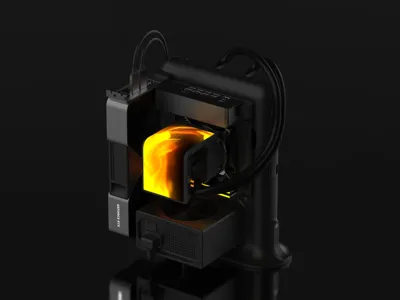
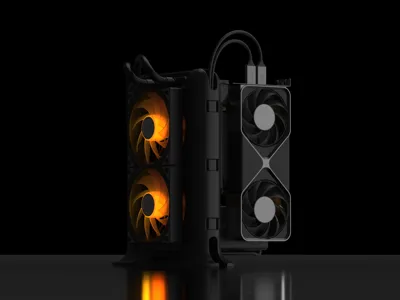
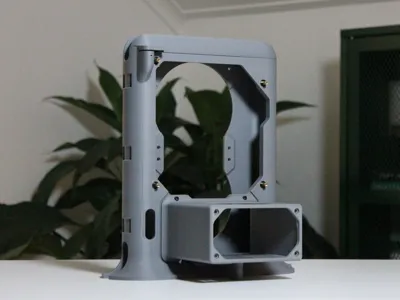
While this is an SFF, open-air chassis specifically created to showcase the TRYX Panorama ARGB SE CPU cooler, I aimed to develop a versatile model with a strong focus on ease of assembly and simplicity in design.
 

Unlike many other open-air PC chassis, this design features deliberate and precise cable management with zero compromise, allowing key components to remain in the spotlight—exactly as an open-air system is intended to do. The inverted power supply shroud channels cables directly into the stem of the chassis, keeping them completely hidden before they are neatly dispersed to their respective components. The shroud also includes an integrated, bottom-facing velcro channel and a dedicated cable pass-through, ensuring the AC power cord is properly managed.
 

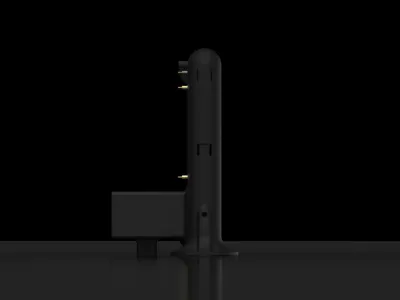
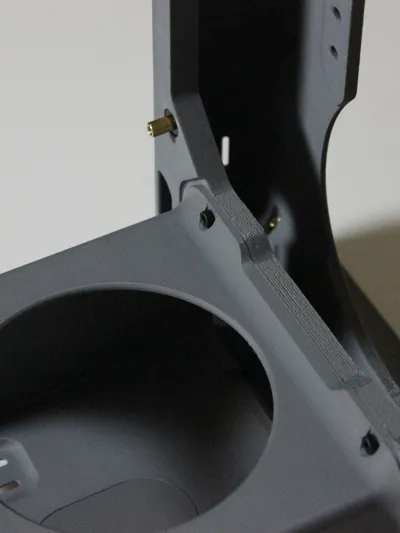
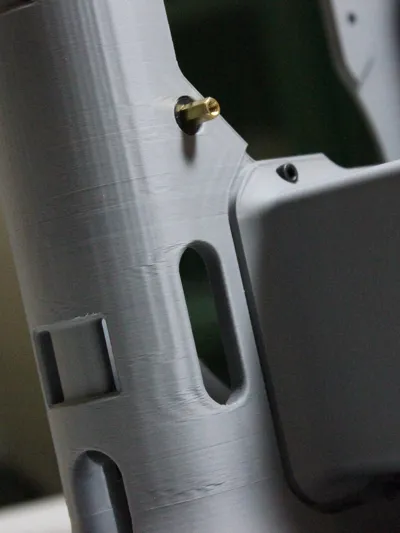
The stem and base house an additional eight Velcro channels (three bottom, two right, three left) to securely route both cables and the CPU cooler tubing. To simplify cable routing, the areas surrounding the 8-pin EPS and 24-pin ATX motherboard connectors have been kept relatively open, and a dedicated, enlarged cable pass-through is positioned behind the GPU. Display, power, and peripheral cables can exit the chassis from the bottom-left, further reducing visible cable clutter on your desk.
 

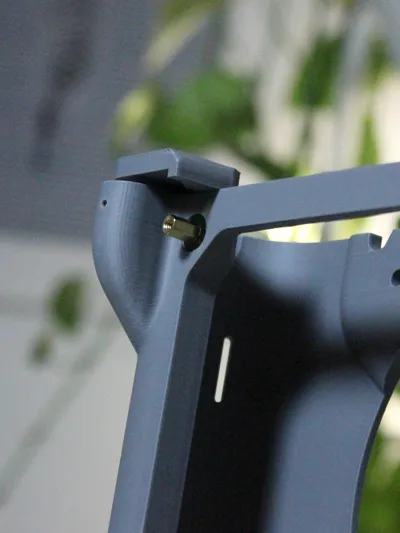
The chassis also includes a highly compact GPU mounting solution. Unlike traditional chassis designs, the GPU is not secured using standard PCIe bracket screws. Instead, the base of the PCIe bracket is clamped directly to the top of the stem. This eliminates the need for bulky standardised mounting hardware and reduces material usage, while maintaining sufficient rigidity. The GPU attachment is compatible with all GPUs using standard PCIe brackets.

Key Features include:

  • Enclosed stem equipped with velcro-channels for clutter-free and user-friendly cable management
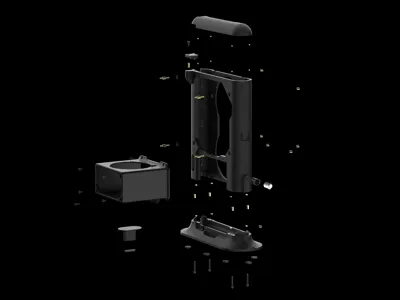
  • Seamless 3-piece design for an open PC assembly environment (base-stem-topper)
  • Enclosed PSU shroud with integrated velcro channel for power cable
  • Top and bottom pass-throughs for display, peripheral, and power cables
  • Novel GPU PCIe bracket for compact yet rigid assembly
  • Reinforced geometry with sturdy attachments to accommodate heavier components (motherboard, PSU, GPU, radiator/fans)
  • Magnetic and poka-yoke interfaces for easy assembly of the chassis
  • Integrated tool-less assembly for a “standardised” power button
  • TPU-padded base for added vibration dampening
  • Top-facing motherboard and GPU I/O for added convenience
     

Please refer to the attached assembly manual for further details.
 

While it remains untested, I advise against using materials with an HDT lower than PETG (~70 °C) due to thermal requirements. My recommendation is to use PETG CF for added rigidity (or ABS, ASA, PC, PA if your printer allows it).
 

Designing this has been an absolute blast. The only thing I regret is not starting sooner—there are several details I would have liked to refine further if time had allowed. I may continue finalising and iterating on the design after the Christmas break. In the meantime, enjoy—and feel free to reach out if you have any questions, concerns, or feedback regarding the design.


Disclaimer!
This design has not been tested and verified with a full set of genuine PC components.


My future plans for this design:

  • Fully fledged testing with a genuine PC setup (assembly, stability, feel, performance, cable management)
  • Further refined construction, design, and hardware selection
  • Optimised print profile for quality and efficiency
  • Support for SFX-L power supplies
  • Potential support for longer graphics cards
  • Improved assembly guide
  • Material exploration and viability

/ Nik
 

Boost Me (for free)

If you really enjoy this design, consider boosting me to support my future work!


Documentation (1)

Assembly Guide (1)
CC 003 Tryx - Assembly Guide.pdf

Comment & Rating (21)

(0/1000)

Hello, First of all, THIS IS AN AWESOME IDEA, I am looking for a nice ITX case, there are so many, but this one. AWESOME. I wanted to ask the creator about the status. I would gladly print the first version, but if it is said that a V2 is coming, it can only get better. I hope it will be ready soon, I want to redecorate my living room with the build. LG Micha I printed the good part. Unfortunately my PETG CR was crap.. but well.. All holes are fitting so far. It's not the prettiest hardware, but it now gets enough fresh air. Feedback on compatibility: I have installed a Corsair Nautilus 240 RS. Unfortunately, it's a few mm short in length. Now the bottom edge of the radiator is pressing against the base plate... My power supply: be quiet! SFX Power 2 300W SFX 3.3. just barely fit... Motherboard: was super easy to attach. Graphics card: INNO3D GeForce RTX 3060 Twin X2 OC LHR fits in length
(Edited)
The designer has replied
Show original
0
Reply
Thank you for the interest Micha, unfortunately I haven't had the time to work on the model lately. I'd love to put out a V2 but at this stage it's just too soon. I'll be sure to ping everyone who's shown interest when the new and improved model is up!
0
Reply
Hi. I'm on the lookout for an open chassi to replace my current case with and yours seem like a really well thought out option. I've got a couple of questions though. It's stated that the max gpu length is 280mm atm. From the renders it does look like there's some room left before a card hits the table, any idea much? And is 2.0 addressing this? Also, is there any chance 2.0 would be A1 mini compatible? Lastly, before I run out and buy a Tryx AIO, if one went with an aircooled setup the chassi would fit two fans in place of the rad, right?
The designer has replied
designer
1
Reply
Hello, Regarding the GPU length, I'm looking into various concepts on how to expand the compatibility. The compatibility scale trails off at roughly 335 mm, providing support for 90% of GPUs on the market, so that's my aim for now. In the 2.0 version, I will showcase an air-cooled setup as well. So yes, you are correct in your assumptions. Hope this helps, / Nik
1
Reply
Hi, Thanks, that clears some of my questions! Do you think 2.0 will be able to print on a A1 Mini when it's released? The current one can with a cut into two pieces of the main body and foot, which is obviously not ideal but maybe workable. Lastly, any ETA for 2.0? Regards
(Edited)
designer
1
Reply
Replying to @Hubuh :
At the moment I do not have any plans on making this design printable on the A1 Mini. I could take a look into this in the future though. Personally, I think dividing the parts degrades the visual appeal, but I understand there's a lot of people who has the A1 Mini as their main printer.
1
Reply
Boosted
When do you plan to release v2, I will need to print one next week and I really like yours! Thank you
The designer has replied
Show original
designer
1
Reply
Hello, thank you for the interest! Unfortunately it's taking a bit longer than anticipated. I don't want to promise a certain date because I'm not entirely sure exactly when I can finalize this. I'm aiming to have the 2.0 version ready during this spring.
1
Reply
How does the Airflow look? does the PC overheat? I'd really like to print it but i also want the Maximum out of my PC
The designer has replied
designer
1
Reply
Hello, At this point, I haven't tested the thermal performance with a real setup. I don't personally have a secondary set of components on hand to do this. However, I do plan to build a real system to evaluate this, but I can't say exactly when. In raw speculation. I doubt there will be any issues with thermal performance. There are plenty of air gaps and room behind the radiator for hot air to be expelled into the surroundings. The motherboard might suffer a few degrees higher temperatures due to the direction of the hot air being pushed through the radiator. With that said, motherboard components very rarely overheat. At this time, I wouldn't recommend building a system with a top-end CPU where the VRMs on the motherboard are consistently under high load, possibly causing them to overheat. If I were you, I'd still wait for the 2.0 version to be released if you're not time-constrained. By then, I should have been able to do some light testing.
(Edited)
0
Reply
Really like this. Great job!
The designer has replied
designer
1
Reply
Thank you, that means a lot!
0
Reply
Hey @cc.3dp any chances you'll be looking to share the .step files for these instead of the STL's? I'd love to change a few things / combine a few parts. TIA!
The designer has replied
designer
1
Reply
Hello! Since I'm working on the new design at the moment, I won't be sharing any 3D files right now. However, I do like the idea of being able to remix the design so I'll definitely revisit this idea in the future. Would you be willing to share what you have in mind? Maybe I'll take a look at it while I'm working on the new version.
0
Reply
does it support mini itx? Is the power supply standard?
The designer has replied
designer
1
Reply
Yes, this chassis supports nothing but mini ITX motherboards! For the power supply, you'll need to use an SFX form factor one (SFX-L and ATX power supplies are too large for this version). I might look into SFX-L support in the future, but for now, SFX is the only supported format. See the spec sheet in the attached assembly guide for more details :)
(Edited)
0
Reply
Looking forward to ver2 from you
Show original
designer
1
Reply
Sadly, the hardware list is kinda complicated for the EU. Why no Heat Inserts like M3 used on Vorons? And Metric Screws?
The designer has replied
0
Reply
Hello, I understand it may be difficult to find the correct M3 hex inserts depending on your location. Not to worry though, the 2.0 version will include a variant that uses heated inserts instead. As for the screws, I'm not entirely sure what you're referring to. All screws used for the chassis are standard metric cap head. The exception in the hardware list is the 4 x screws for the power supply. This is because all power supplies use UNC 6-32 as defined by the ATX standard. Hope this helps, / Nik
(Edited)
1
Reply
yo can you please get the v2 finished and what parts did u use for the test?
0
Reply