Search models, users, collections, and posts
Kingdom Death Monster Survivor Gear Grid
IP Report


GIF

Print Profile(4)
![[V1] 0.2mm layer, 2 walls, 15% infill](https://makerworld.bblmw.com/makerworld/model/US6368ccd90c4ba1/687294484/instance/2025-12-22_547bd1322106c8.jpg?x-oss-process=image%2Fresize%2Cw_100%2Fformat%2Cwebp)
[V1] 0.2mm layer, 2 walls, 15% infill
Designer
4.1 h
3 plates
![[V2] GearGrid - 0.2mm layer, 2 walls, 15% infill](https://makerworld.bblmw.com/makerworld/model/US6368ccd90c4ba1/687296240/instance/fedf88cf505c884b.jpg?x-oss-process=image%2Fresize%2Cw_100%2Fformat%2Cwebp)
[V2] GearGrid - 0.2mm layer, 2 walls, 15% infill
Designer
5.4 h
4 plates
![[V2] Sliders - 0.2mm nozzle](https://makerworld.bblmw.com/makerworld/model/US6368ccd90c4ba1/687298801/instance/f7ba24335db40b2e.jpg?x-oss-process=image%2Fresize%2Cw_100%2Fformat%2Cwebp)
[V2] Sliders - 0.2mm nozzle
Designer
4.2 h
4 plates
![[V2] For P1S](https://makerworld.bblmw.com/makerworld/model/US6368ccd90c4ba1/700739176/instance/e86e969ac2092da7.jpg?x-oss-process=image%2Fresize%2Cw_100%2Fformat%2Cwebp)
[V2] For P1S
Designer
5.1 h
4 plates
Open in Bambu Studio
Boost
8
39
1
2
30
10
Released
Description
Description
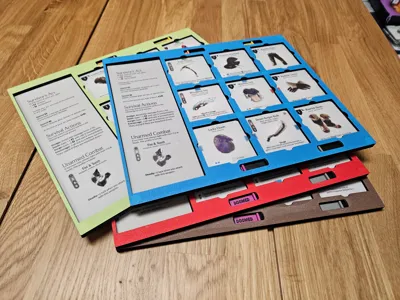
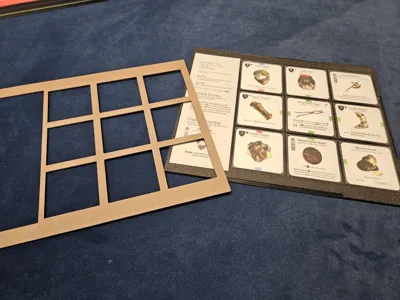
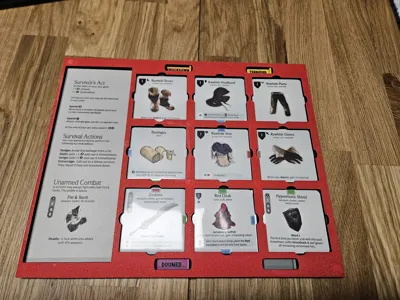
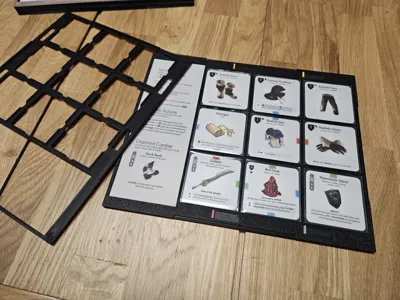
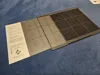
This is my design for a gear grid which can be easily moved and stored away.
Design Goals
- can hold sleeved gear cards
- gear cards are fixed in the grid in a way that moving the grid or storing it away is easy
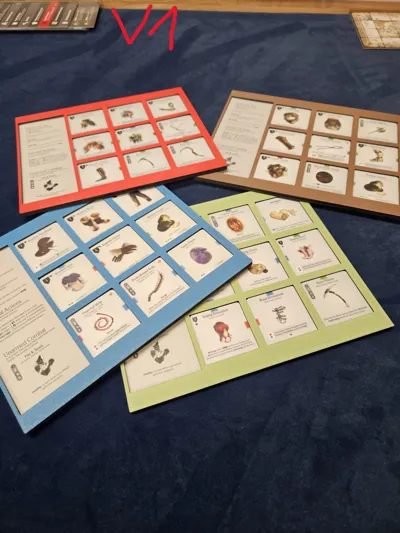
- top part is printed in a different color and can be changed easy between different grids. My miniatures are using a magnetized colored base which fits to the corresponding gear grid, so it's easy to identify the grid with the model (this is especially helpful for new players or if I do not have a good fitting model for the loadout)
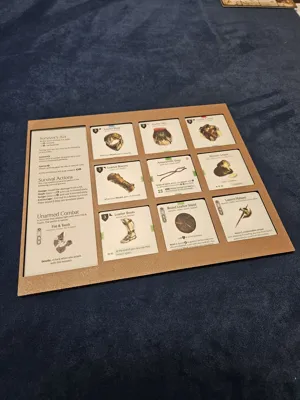
- it should fit the original gear grid with its rules and fist & tooth stats readable
- [V2] it should help me in tracking some common status effects, like Knockdown
Additional Notes
- I used magnets to make everything flexible and the usage nice and easy
- of course they are optional or you can use less if you want
- you need following magnets for each grid you print:
- 4 magnets 8x2mm for the base
- 12 magnets 8x1mm (4 for layer 2, 8 for layer 3)
- pay attention on the polarization. Make sure to make it consistent for all your grids so they stack on each other and the top layer is interchangeable
Print Notes
Version 1/2
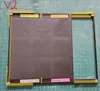
- layer 3 can be printed in two colors. In my case just the first layer (top of the gear grid holder) is printed in a color, for everything else I used black
- layer 3 stops during printing for adding magnets. Use a drop of super glue to avoid losing the magnet when the nozzle prints over it
- parts of layer 2 are printed with overhangs
- during my first print I completly forgot that the part where the gear cards are slotted in are printed in mid air without any helping structures. However it worked and I really like the look how it turned out so I kept it that way (and I don't know how this could be solved without the need of introducing another layer)
Version 2
Two profiles belong to this Version
- Grid with some color changes and stops for magnet inserts
- Layer 3 exists in two versions depending on if you need the sliders or not
- Sliders are printed with 0.2er Nozzle for better quality. I tried 0.4, it might work but the result was not that good
Assembly
Version 1/2
- glue 8x2mm magnets to layer 2
- glue 8x1mm magnets into layer 1
- glue layer 2 on layer 1
- layer 3 stacks in place with magnets
Version 2 (Slider)
I did it following way:
- glue magnets into layer 1 (4x in the middle, the left slots are not needed - see example picture in instruction). Wait until glue is dry
- make sure the polarization fit to the magnets already added during print for layer 3
- layer 3 facedown on the table (to have a plain surface with sliders later)
- fit layer 2 on 3 (no glue needed)
- put in sliders and magnets (no glue needed)
- now you have a plain surface for the sliders and magnets already match the layer 3 polarization
- pay attention on the slider orientation (picture is added - of course you can do your own variation in terms of order)
- put glue on layer 2 and bring it together with layer 1
- pay attention to not put any glue where the sliders are located, so they are still moving afterwards. I added some markings in the instruction pictures where I used glue.
Changelog
- [2026-03-30] Version 2 added
- it supports sliders to track 4 different status effects (Knockdown, Terrified, Doomed and an empty one to be flexible)
- additional cut added to improve readability of affinities from all angles
- the design was improved on several parts which should increase the printing quality and holds the gear cards better in place when moving the grid
- layer 1 already contains additional magnet spaces (currently not in use, just for potential future plans, so I don't have to print everything new)
- Version 1 and 2 are not compatible to each other. You need to print everything new if you want
Documentation (5)
Assembly Guide (5)

License
This user content is licensed under a
Creative Commons Attribution-Noncommercial-Share Alike
Comment & Rating (1)