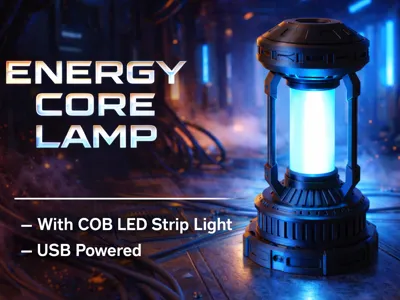
Energy Core Lamp – Futuristic Sci-Fi LED Light


Print Profile(1)

Bill of Materials


Description
Energy Core Lamp – Futuristic Sci-Fi LED Light
Bring a true sci-fi atmosphere to your desk or room with the Energy Core Lamp.
Inspired by futuristic reactors and power cores, this lamp is built from a fully 3D-printed housing combined with modular electronics, resulting in a clean and professional look.
The glowing core is created using a COB LED strip, placed inside a 3D-printed translucent PLA tube. This provides a smooth, even light without visible LED dots, while keeping the internal structure hidden.
Perfect as a desk lamp, ambient light, display piece, or sci-fi decoration.
🔹 Features
- Futuristic Energy Core / Reactor design
- Smooth, diffused light through a translucent PLA printed tube
- Compact but highly detailed mechanical appearance
- USB powered
- Modular internal layout for easy assembly
Suitable for desk, shelf, or display use
🔌 Required Electronics
- IA005 – Power Distribution Board (PDB), 4 Channels (1 pcs)
- KA007 – 100 × 1 mm COB LED Strip Light (1 pcs)
IA007 – Potentiometer Board with SH1.0 Connector (1 pcs)
🔩 Required Hardware
- AA086 – M3×8 FHCS Machine Screw (4 pcs)
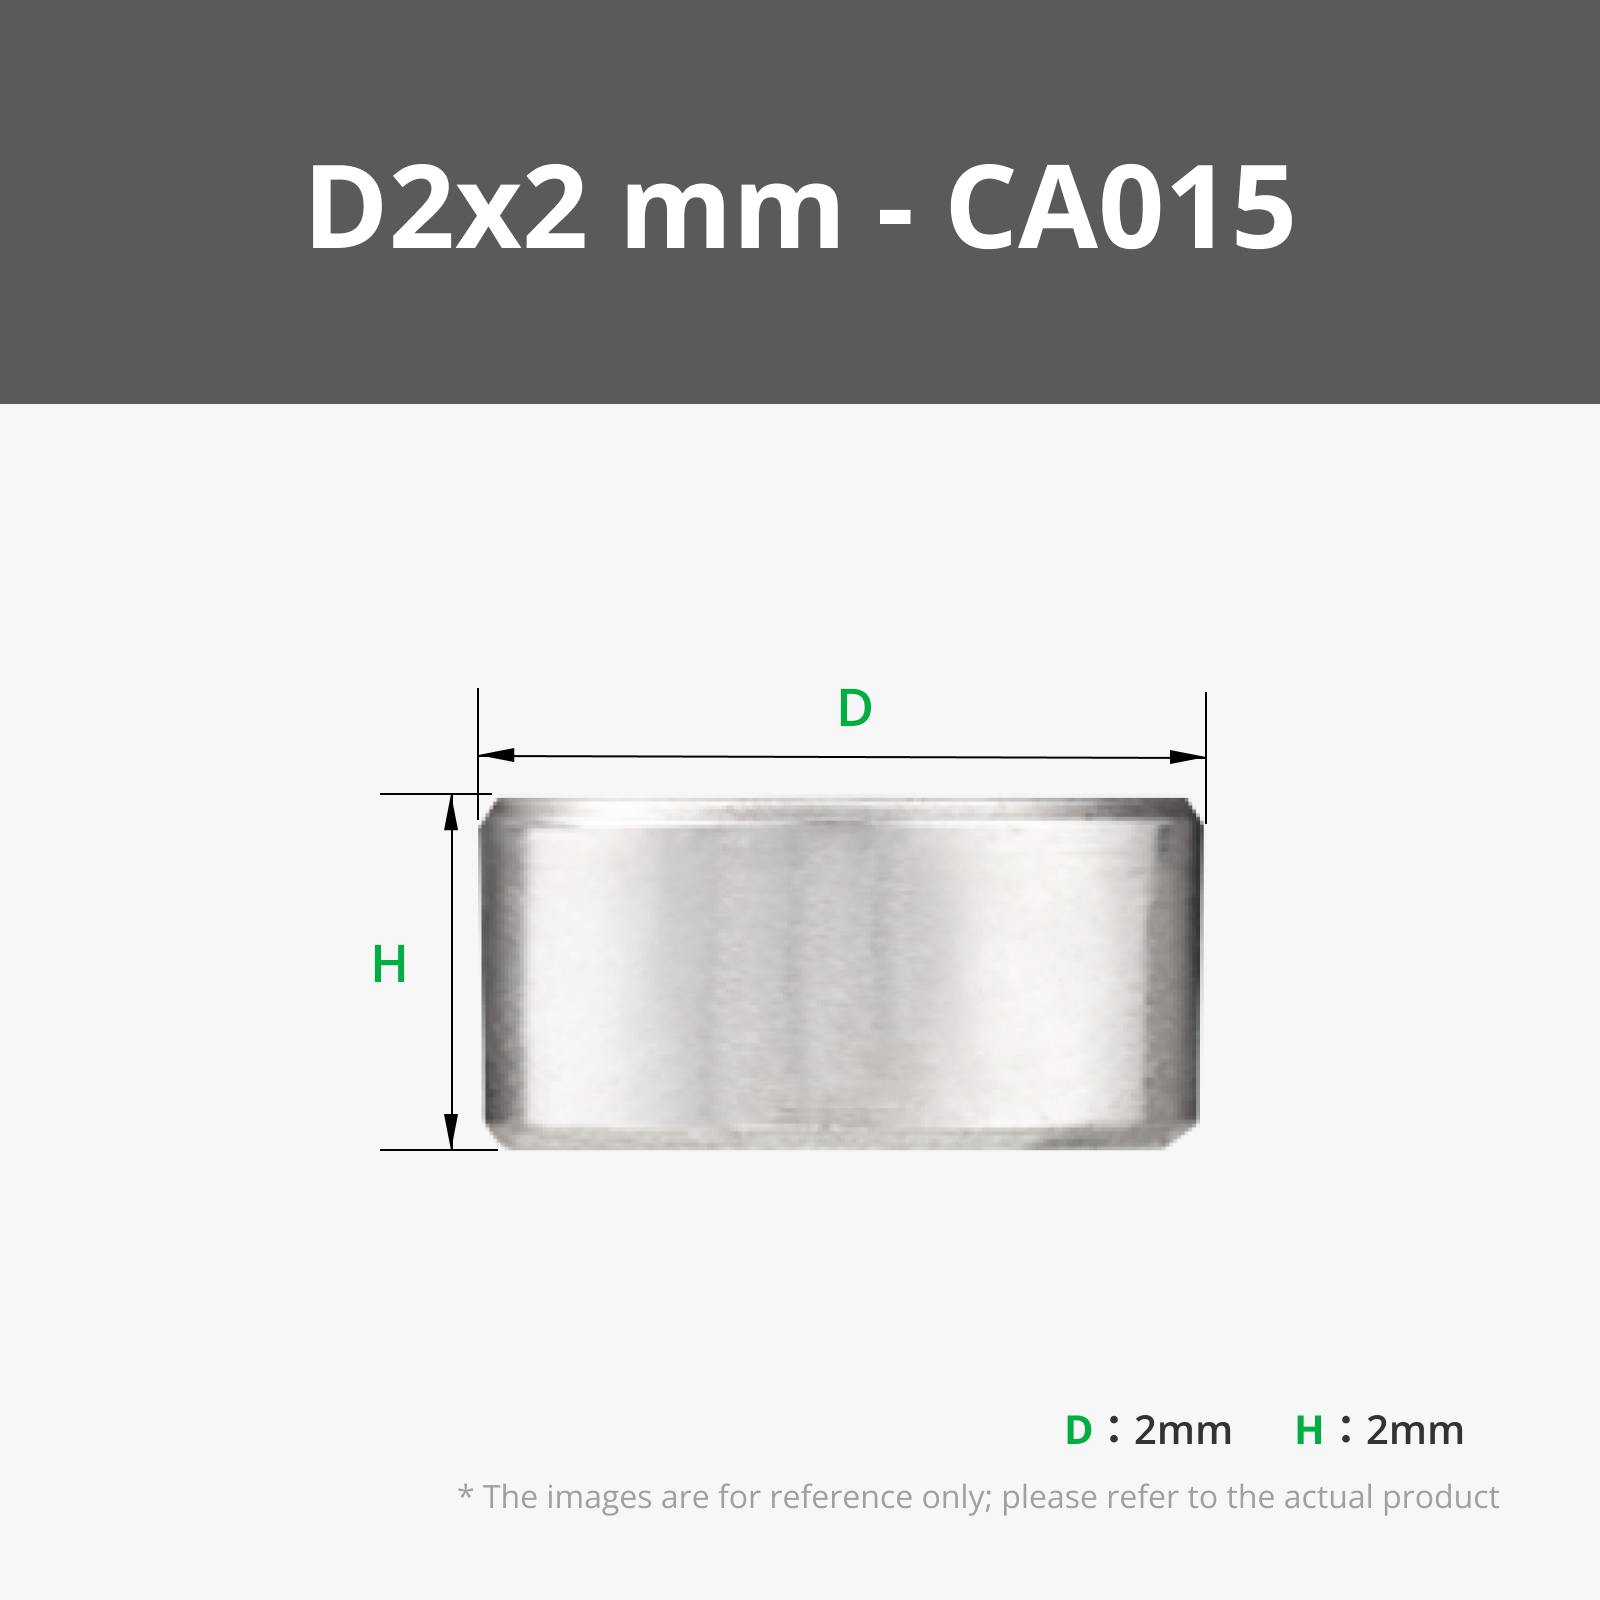
- CA015 – Ø2×2 mm Round Magnet (2 pcs)
- AA149 – M2×4 SHCS Machine Screw (6 pcs)
2.0 mm diameter heat-shrink tube (~5 mm long)
💡 Printing Tips
- PLA Iron Gray Metallic filament gives the most realistic sci-fi look for the housing
- Recommended print setting: 0.16 mm layer height for better result
- Use PLA Translucent Teal for the core tube (Or other Translucent color)
- All parts are designed to be printed without supports, except for the Base, which requires a small amount of support on the bottom due to the electronics.
In some areas there are minimal overhangs, but they are barely noticeable.
🔧 Assembly
Top Cover:
- The top cover can be assembled freely to your preference.
It is secured using 4 pins, which are simply press-fit into place. - Push the pins in by hand until they sit firmly — the fit is tight enough to hold everything securely.
No glue is required. 
After pressing the pins into place, the top cover should look like this:

Electronics Installation:
- Next, install the electronics into the base.
- Secure the power distribution board and the potentiometer board in their designated positions using 4 pcs of 2mm screws. Make sure both boards sit firmly and are properly aligned.
- Carefully insert the COB LED strip into the central hole.
Take your time and be patient during this step to avoid damaging the LED or the wires. - Once the LED is in place, connect all cables according to their connectors.
- If you are not sure how to connect the electronics based on the photos, I am happy to help — feel free to contact me.
- At the moment, I was not able to create a detailed wiring or technical diagram for the connections.
Thank you for your understanding. 
Cable Fixation & Magnet Installation 🔌🧲:
- Next, install the cable strain relief into its designated position.
- At the end of the COB LED strip, attach the Ø2×2 mm magnet.
Use heat-shrink tubing and carefully shrink it in place using a heat gun or a lighter. - Make sure that one end of the magnet remains exposed.
This is important so the magnet can properly connect to the magnet inside the cap during final assembly. - Take your time with this step to ensure correct alignment and a secure connection.


Core Tube & Cap Installation
- Once the previous steps are complete, remove the inner brim from the translucent printed tube.
- Place the tube into its position, centered inside the lamp body.
- Apply a small amount of glue to the three alignment pins, then carefully place the cap on top.
As shown, one of the pins has a square shape, which acts as a guide to ensure correct orientation. - Next, gently move the COB LED strip until it snaps onto the magnet inside the cap.
After the magnet connection is made, pull the LED module slightly downward from the bottom until the COB LED strip becomes nicely tensioned and straight. This ensures a clean, centered appearance of the glowing core:

Base Bottom Cover:
- As the final step, attach the bottom cover to the base using 6 pcs of M3 screws.
- Tighten the screws evenly until the cover sits flush with the base.
Do not overtighten — just enough to hold the bottom cover securely in place. - Once completed, the base should feel solid and stable.

✅ Assembly Complete!
- And this is how the Energy Core Lamp should look once fully assembled:

- Thank you very much for downloading this model!
If you enjoyed it, please consider giving it a Like and following me for more similar designs and upcoming projects. - 🔒 Commercial Use Notice
If you’d like to sell prints of my models, please subscribe to the Commercial Supporter license on my Patreon.
👉 Patreon link in my bio
Thank you for supporting my work! 💙
Boost Me (for free)
One little Boost from you = one big push for my next project 💪 Thank you!
License
You shall not share, sub-license, sell, rent, host, transfer, or distribute in any way the digital or 3D printed versions of this object, nor any other derivative work of this object in its digital or physical format (including - but not limited to - remixes of this object, and hosting on other digital platforms). The objects may not be used without permission in any way whatsoever in which you charge money, or collect fees.
Comment & Rating (36)