Easy Low cost Tinsel Christmas Tree


Print Profile(1)

Description
The Tinsel Tree Frame: Customizable 3D Christmas Tree DIY
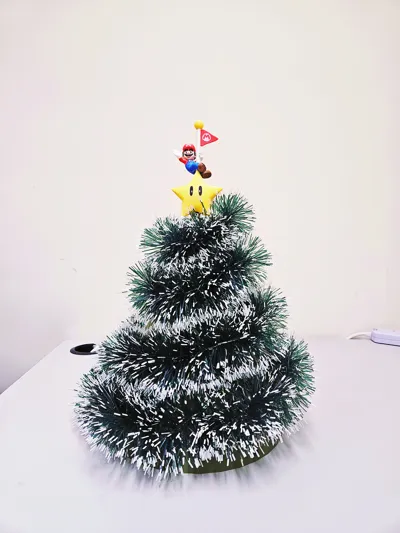
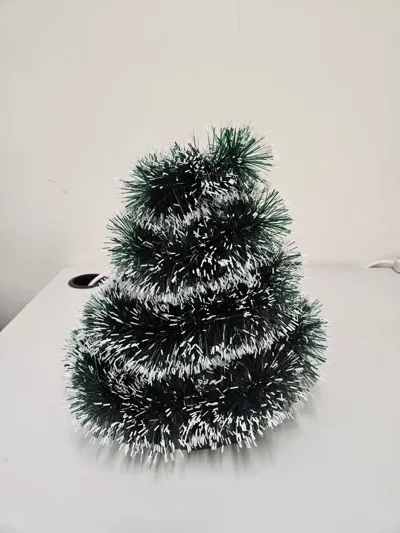
Transform a simple strand of tinsel into a beautiful, sturdy Christmas tree! This 3D-printable Cone Frame system is designed to provide the perfect structure for your holiday decor. Whether you want a desktop tree for your office or a custom centerpiece for your home, this modular frame makes assembly a breeze.
How It Works
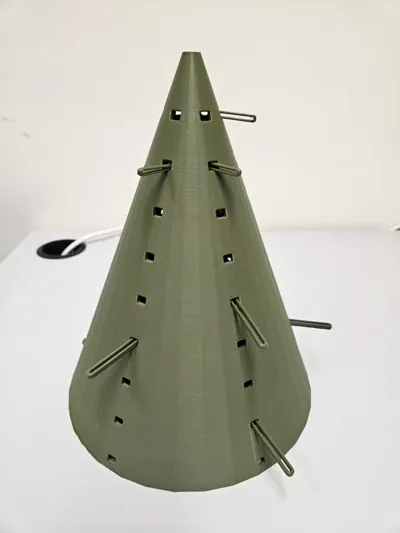
The design uses a specialized "Hook & Hole" system. You insert temporary hooks into the frame to guide your tinsel, creating a perfect spiral every time. Once the tinsel is secured, the hooks can be pushed inward or used to hang your favorite ornaments!
What to Print and Prepare
To achieve the look seen in the photos, you will need to print the following:
- 1 x Cone Frame: The main body of your tree.
- 12 x Long Hooks: Used for the lower, wider sections of the cone.
- 3 x Short Hooks: Ideal for the tighter space at the top.
- 1 x Tinsel (2m to 3m): You need a minimum of 2m of tinsel. In my photos, I am using exactly 2m, but I recommend 3m if you want a fuller, denser look.
Pro Tip: Feel free to add more hooks if you want a denser wrap, or scale the hooks up or down in your slicer to better fit the hole and the thickness of the tinsel you are using!

Assembly Instructions
1. Prepare the Frame & Hooks
- Print the main Cone Frame.
- Print your hooks. You can scale these in your slicer to fit the thickness of your tinsel.
- Note: In the example photos, I used 12 long hooks and 4 short hooks for the top section.
2. Set Up the "Staircase" Support
- Insert the hooks from the inside of the cone to the outside through the provided holes.
- For the best result, place a hook every two holes to create a "spiral staircase" effect. You can add more hooks if necessary.
- Pro Tip: If a hook feels loose, simply rotate it 90 degrees to lock it firmly into place.

3. Wrap the Tinsel
- Start at the bottom of the frame.
- Rest the tinsel on the hooks as you wrap upward, ensuring even coverage.
- Adjust the tinsel density as you go until you are satisfied with the look.

4. Secure the Ends
- Once you reach the top, squeeze the start and end of the tinsel strand and tuck them into the nearby holes of the frame to lock them in place. No glue required!
5. Decorate & Finish
- Use the protruding hooks to hang small ornaments or lights.
- When finished, simply push any extra or unused hooks back toward the inside of the cone to hide them.
6. Add the Topper
- The top of the cone features a dedicated mounting hole for a star.
Note: The "Power Star & Mario" topper shown in the photos is by another designer (3d_lizard). If you want to use it, I recommend downscaling it slightly for a perfect fit! (Link to the model)

Printing Recommendations
- Material: PLA
- Scalability: The hooks can be printed in different sizes depending on the "fluffiness" of your tinsel.
- No Supports Needed: The cone is designed for easy printing.
License
You shall not share, sub-license, sell, rent, host, transfer, or distribute in any way the digital or 3D printed versions of this object, nor any other derivative work of this object in its digital or physical format (including - but not limited to - remixes of this object, and hosting on other digital platforms). The objects may not be used without permission in any way whatsoever in which you charge money, or collect fees.
Comment & Rating (0)