

Print Profile(2)

Description
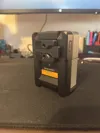
# Quick Release Mini V-Mount Adapter (Remix)
## Credits & Attribution
This model is a remix of **"Quick Release Mini V Mount"** created by **EvanRLD**.
Full credit goes to the original author for the brilliant design concept.
Original Model: [https://www.printables.com/model/1477984-quick-release-mini-v-mount](https://www.printables.com/model/1477984-quick-release-mini-v-mount)
---
## Description
This is an updated adapter plate designed for Mini V-Mount batteries, based on EvanRLD's design.
**Key Changes in V2:**
* **Strengthened Spring Force:** The spring mechanism on the base mount has been reinforced for a more secure hold.
**⚠️ Important Note:**
Please allow the part to **cool down completely** before testing or using it.
If you operate the spring mechanism while it is still warm from printing, it may deform and remain open.
## Print Settings
* **Material:** PETG or PLA+ (PETG recommended for durability)
* **Infill:** 20% - 40% (Grid or Gyroid)
* **Walls:** 3 or 4 loops
* **Supports:** Not required (optimized for flat printing)
## Hardware Needed
To assemble this, you will need:
* M3 or M4 Screws (x4) - *Length depends on your mounting plate*
* Matching Nuts (x4)
---
## 日本語の説明 / Japanese Description
This is a remix (improved version) created by **EvanRLD** based on "Quick Release Mini V Mount".
Thanks to EvanRLD for creating the excellent original design.
**Changes in V2:**
* **Strengthened Spring:** The design of the spring part on the base mount has been reviewed and the fixing strength has been improved.
**⚠️ Important Point:**
After printing, do not move or test the printed object until it has **completely cooled down**.
If the spring is operated while residual heat remains, it may deform and remain open.
**Recommended Settings:**
Printing with PETG or PLA+ is recommended. An infill of 20-40% should provide sufficient strength.
License
You may create derivative works based on this object, provided that all such derivative works are published exclusively on the MakerWorld platform and include proper attribution to the original creator. You may not share, upload, host, distribute, or publish this object—or any derivative work of this object—on any other digital platform, marketplace, or distribution channel. Commercial use of this object and any derivative works is strictly prohibited. This includes, but is not limited to, selling, renting, sublicensing, or using the object in any context in which you receive monetary compensation or other financial benefits.
Comment & Rating (11)