Rotary Laser Aid Christmas Tree Ornaments xmas Balls


Print Profile(1)

Description
Boost Me (for free)
Could I help you with this device? Then I would be very happy about a boost from you!
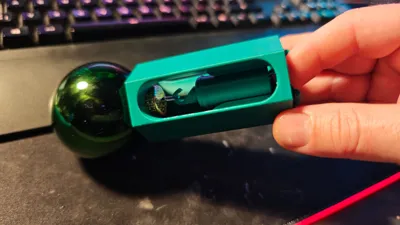
Rotary Clamping Aid for Christmas Tree Ornaments (20–100 mm)
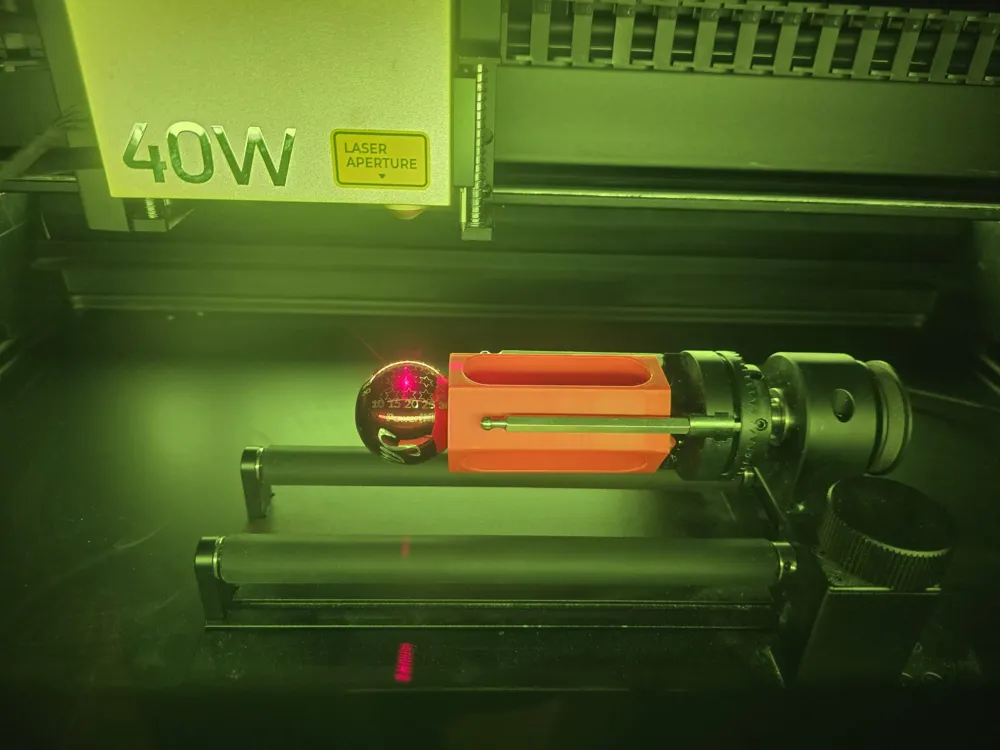
This 3D-printed clamping aid was specially developed for the safe and reproducible engraving of Christmas tree ornaments in a rotary laser fixture
The goal was to fix sensitive glass balls without tension, centered, and twist-proof – without clamps, without pressure marks, and without risk from the laser
🔧 Functional Principle
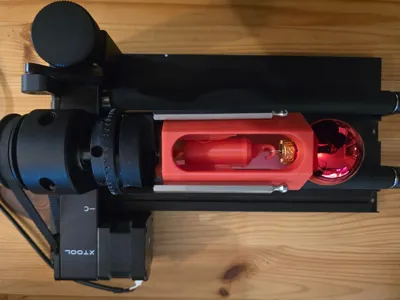
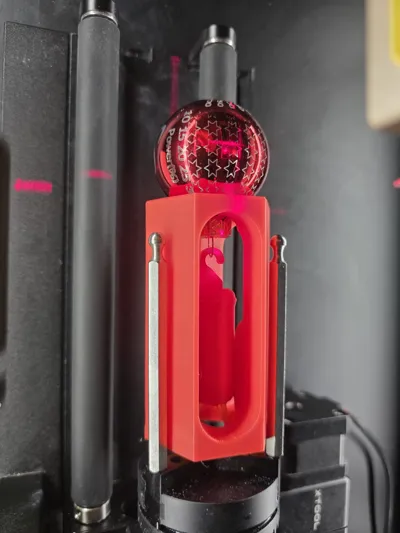
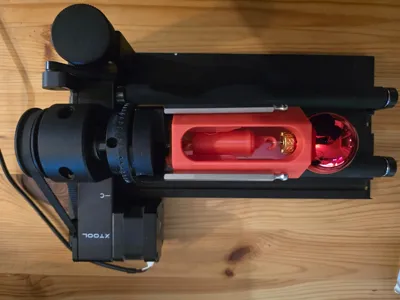
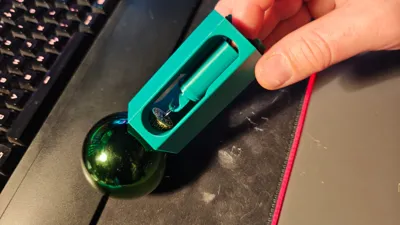
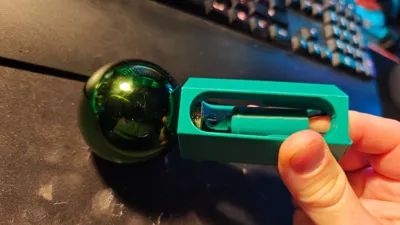
The ball rests at the top of the holder and is gently pulled downwards by an internally guided piston.
The piston is pre-tensioned by an elastic band at the bottom, creating an even and soft pulling force
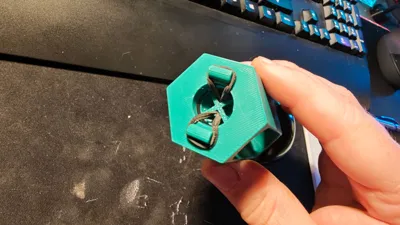
- The piston is guided securely within a housing
- By pulling the piston towards the ball, the pre-tension can be released → quick ball change
- The elastic band is located outside the laser area and is thermally safe, it is guided through the cross at the bottom of the piston, admittedly, it's a bit fiddly but you can easily thread the elastic band through with the tip of a paperclip!
📏 Compatibility
- Suitable for ball diameters from approx. 20 mm to 100 mm (depending on how high your rotary is)
- Works with most rotary axes (roller or chuck)
✅ Advantages
- Tension-free fixation of sensitive glass balls
- Self-centering and reproducible
- No twisting during engraving
- Quick change between different ball sizes
- No metal or spring parts in the laser area
🖨️ Print Recommendations
- Material: PLA, PETG or ABS
- Support only necessary for the piston with hook
- Clean dimensional accuracy recommended for the hexagonal guide
- Please remove the support from the hook only when the part has cooled down and with CAUTION!
It was tested on the Xtool Rotary and found to be good!
⚠️ Note
Please remove the support from the hook only when the part has cooled down and with CAUTION, as the hook could otherwise break!
🛠️ How to use
- Prepare the clamping aid
Make sure the piston slides freely in the hexagonal housing and the elastic band is correctly hooked at the bottom - Release the piston
Pull the piston upwards towards the ball to release the pre-tension - Insert the Christmas tree ornament
Place the ball into the holder from above.
The ball rests self-centringly in the support - Pre-tension the ball
Slowly release the piston.
The elastic band pulls the piston down, creating a gentle, even pre-tension that holds the ball securely – without pressure or clamping - Insert the clamping aid into the rotary
Place the complete unit in your rotary axis (roller or chuck) and align it parallel to the laser axis - Focus the laser
Set the laser focus on the surface of the ball.
Check if the ball rotates freely and evenly - Start engraving
Start the engraving as usual.
The ball remains centered and twist-proof in position - Remove the ball
After engraving, pull the piston upwards again, remove the ball – done
License
You shall not share, sub-license, sell, rent, host, transfer, or distribute in any way the digital or 3D printed versions of this object, nor any other derivative work of this object in its digital or physical format (including - but not limited to - remixes of this object, and hosting on other digital platforms). The objects may not be used without permission in any way whatsoever in which you charge money, or collect fees.
Comment & Rating (0)