


Print Profile(4)


Description
Boost Me (for free)
Give me a boost if this saved you a trip to the store plus a ridiculous price for a piece of plastic or shipping fees!
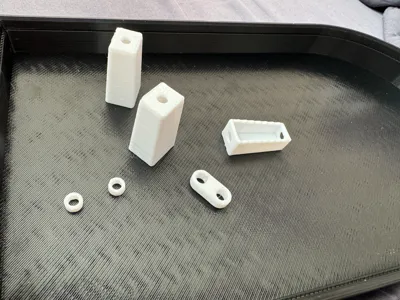
The hunter douglas blinds / window shades in my home pull strings / pull cords housing keep breaking and tying the strings to the pull cord wasn't aesthetically pleasing enough for my wife. A quick amazon search showed they were $10. https://www.amazon.com/Hunter-Douglas-Duette-Housing-Gardenia/dp/B00Y3LAJDU/ for a single set or $23 for a set of 3 https://www.amazon.com/dp/B0G138QC8L/ … Bambu slicer says these are 12 cents per set to print yourself (probably closer to 6 cents if you get a good PETG deal or buy in bulk). I'm new to CAD design, but i was able to come up with a functional piece in a few hours in Fusion 360 and learned a lot of new tricks and buttons along the way.
Functionally this will work the same as the really annoying clips.
How to connect your blinds (just one method for blinds with a single pull cord and joiner for multiple strings):
- locate all of the strings that come out the top of the blinds. to access them if they fell through you can take the end pieces off and slide the top and bottom pieces out to feed new string or grab one that maybe slipped through.
- once all of the strings are in your hand with enough slack to lower the blinds all the way and tie a knot, you are ready to feed them through the top of the joiner body. If you had to take your blinds off the window, it's a good idea to reattach them and get them lowered where you want in order to locate where to attach the joiner in the next steps.
- with the blinds lowered, make note of the location on the string in relation to the upper stop. then raise some slack by pulling the blinds up.
- feed the string through the top of the joiner body insert
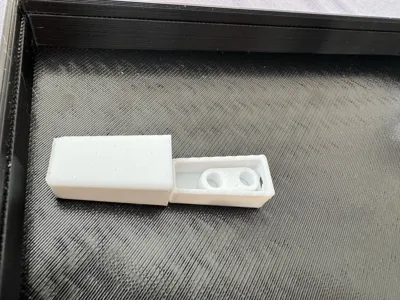
- tie the string to the joiner so that the noted/marked location is just above the joiner. The joiner is symmetric so whatever hole will work.
- put the joiner into the joiner body insert and put the insert into the joiner body. if there is a ton of extra string it might not close all the way right now, if there is just a little string then you can probably wrap it around the joiner and keep it in the joiner insert body. don't cut strings yet.
- sanity check: lower the blinds all the way and make sure the joiner body stops at the upper stop if there is no window sill for the blinds to rest on. If they are resting on the sill, there should be a small amount of string or almost none to prevent them from falling too far.
- If the location of the joiner needs adjusting, undo the knot and adjust the strings as necessary. once it is just how you want it tie it off, recheck the location works properly, and then you can wrap or cut excessive strings.
- lift the joiner body off of the joiner body insert to access the joiner.
- feed the pull cord through the base of the joiner body insert and tie it to the unused joiner hole.
- on the other end of the pull, you can attach the pull cord body by feeding the cord through the top of the pull cord body and then tying it to one of the washers so it can't come out. cut off any extra string when it's the length you like. (even if your pull cord has the original still intact, this new one will make the joiner and pull match color and style)
Comment & Rating (10)