Search models, users, collections, and posts
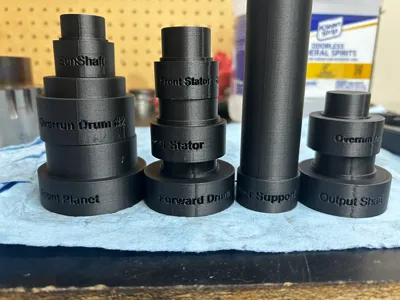
4L80E Bushing Driver Set
IP Report


Print Profile(1)

0.2mm layer, 6 walls, 6 bottom layers, 50% infill
Designer
30.6 h
1 plate
Open in Bambu Studio
Boost
18
58
1
1
27
10
Released
Description
This is a bushing driver set I modeled for installing 4L80e bushings. The ID fits snugly into the bushing, the small ridge (if applicable) recesses the bushing to the proper depth, and the largest portion is designed for use on a press. I used these to install my bushings during 2 rebuilds, so they have limited testing. Use at your own risk.
NOTES:
- These are plastic tools being used on a press. The tool can and will fail. Use at your own risk; if it fails, print a stronger one. I intended to use them once and print another one if I needed to.
- These need to be printed with at least 6 walls and 6 bottom layers at 50% infill. If yours breaks, try increasing the walls or the bottom layers, depending on the cause of the failure.
- Use something to distribute the pressing force across the entire surface…. If you push only in the middle and rely on the infil to support the pressure, it will fail.
- I only use the extra-wide front stator bushings, so the tool in this set is intended for that bushing, not the stock skinny version.
- PLA and PETG served their purpose for my installation, but a stronger material like Nylon may hold up to extended use.
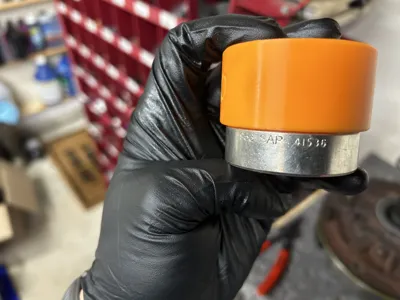
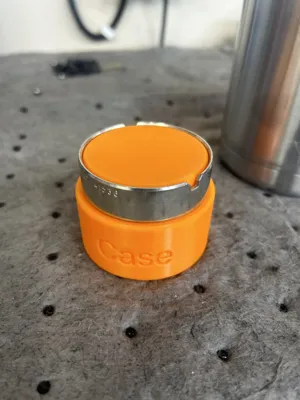
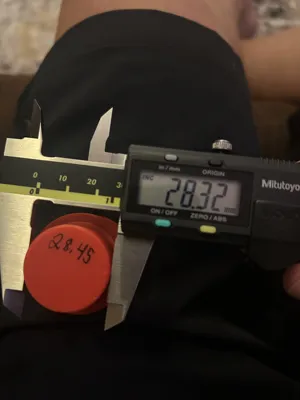
- These tools fit snugly to prevent any deformation. If you do not calibrate your printer, the tool will be too tight and can get squeezed into the bushing once installed. You need a properly calibrated printer that prints dimensionally correct circles. I would recommend using the “Califlower” tool to correct your XY axis/shrikage for whatever filament you are using. Google “Califlower” and you will find the STL that I am referring to. I have no affiliation with this company, but it solved my problems and allows me to print dimensionally correct after calibration (See photos above).
- You must use scarf seams for the tool to fit correctly.
- Makerworld will not let me upload “Custom” filaments as a print profile, so please check all your settings (Walls, Bottom Layers, Infill, scarf seams, etc.) before printing.
Hopefully, this helps someone else build their transmission.
License
This user content is licensed under a
Creative Commons Attribution-Noncommercial
Comment & Rating (1)