Red Bull Display box v2


Print Profile(5)


Bill of Materials


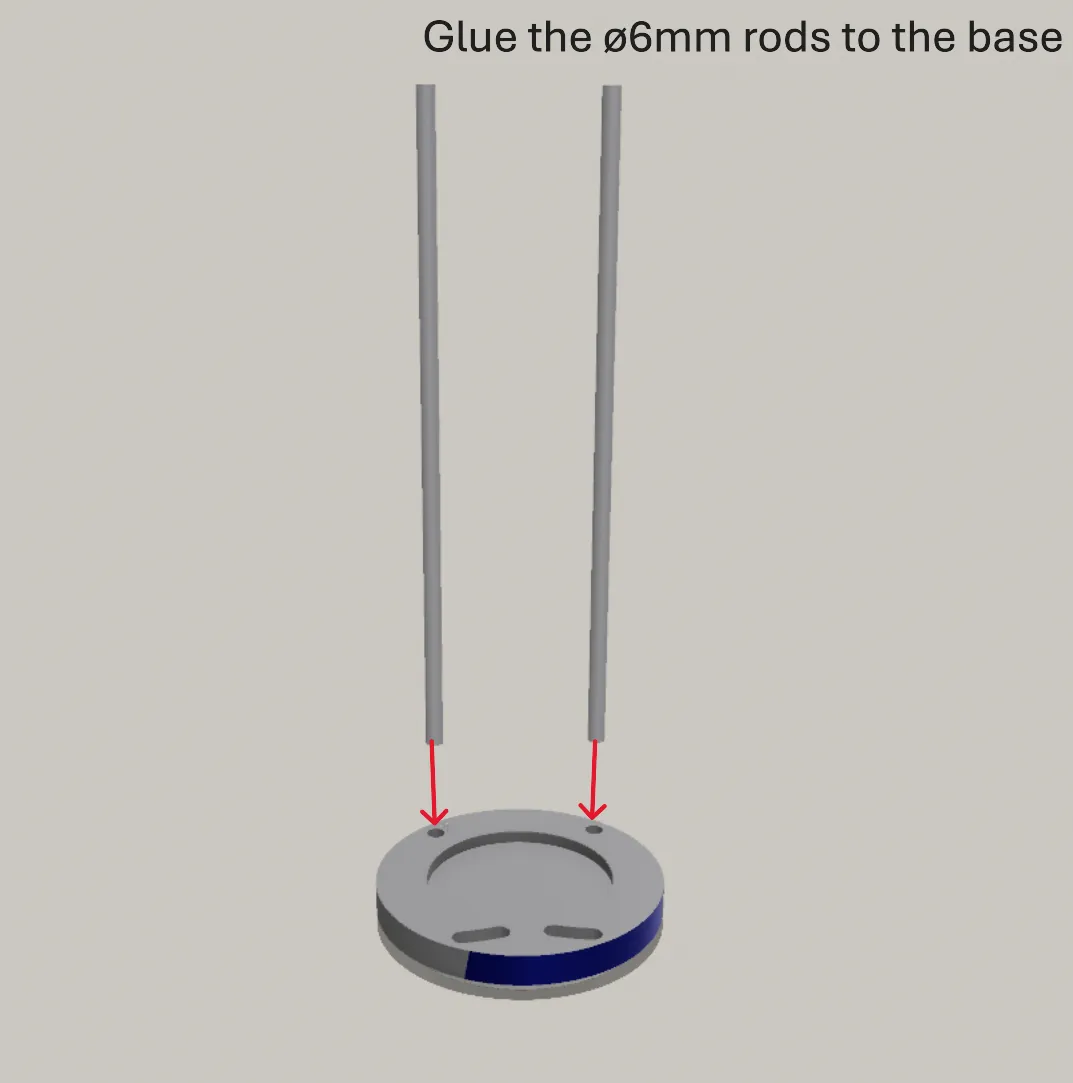
- Steel-alu rods x 2: ø6mm
Description
Boost Me (for free)
Boosting this design is free for you, yet it makes a huge difference for me. Thanks for helping me keep creating!
Membership
Commercial License
If you find my designs interesting and useful, and would like to see more in the future, please consider giving me a boost and becoming a supporting member.
Also, if you need parts for any of my designs, please use the BOM link provided on the model page when buying. This gives me a small commission.
Update : 22.02.2026
I have modified the base and top so that the 250mm rods doesn't need to be cut. You can now use the full length of the rods in the link.
UPDATE : 31.12.2025
I have adjusted all of the back pieces (2.1 - 2.2 and 2.3) so that the box now can be fully opened.
If you already printed the box and can't fully open it, just print new back pieces.
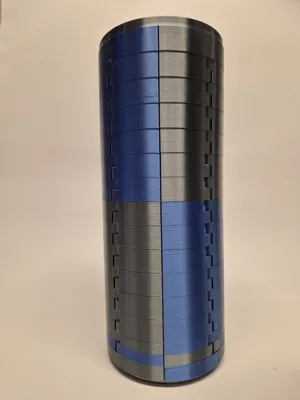
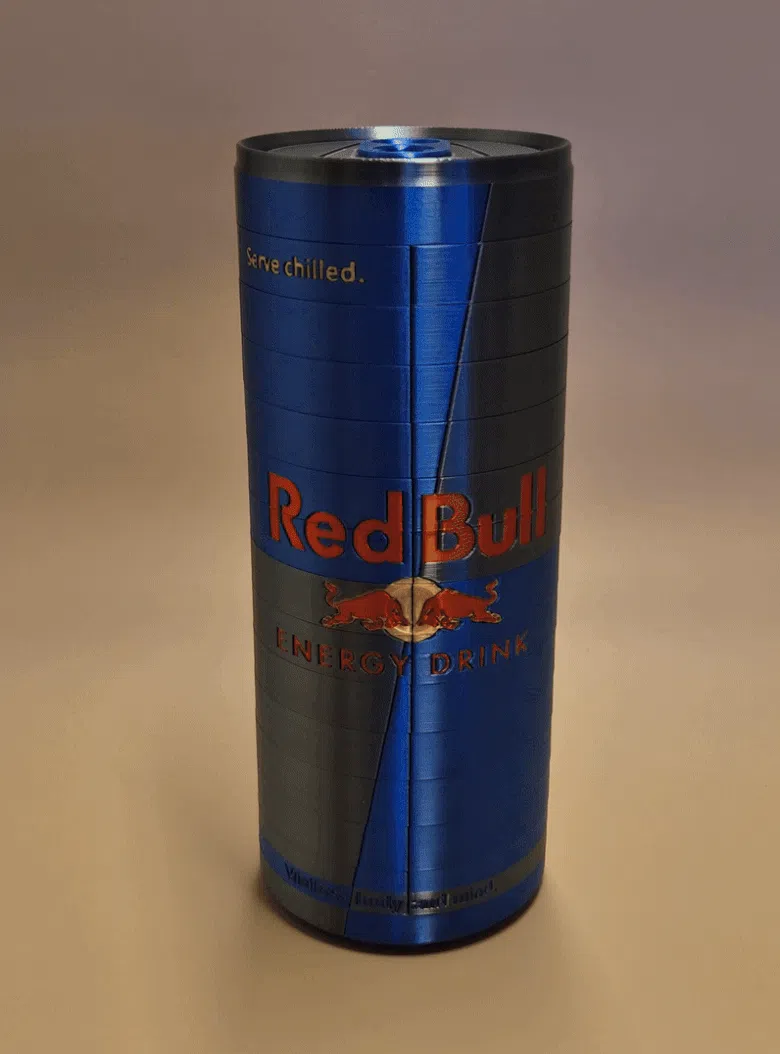
Red Bull Display Box v2
I decided to make a new version of the Red Bull box. The first version was one of my early designs, and it had some flaws. I've had loots of feedback on my models, and i try to implement and improve based on what you want.
What has been improved?
- Size : This version is a lot smaller. Fits a 500ml can.
- More robust build : Thicker pins
- Filament saving design
- Larger magnets
- Led Lamp 001 and KC007 Compatible
- Minimal supports
- Better assembly guide
Want it to look just like my printed model? Use these filaments.
- Bambu blue silk+ PLA
- Bambu candy red silk+ PLA
- Bambu gold silk+ PLA
- Bambu titanium grey silk+ PLA
(I recommend slowing down outer wall speed to get that extra shiny look from the silk+ filament)
3D printed parts :
- Top pins x 2
- Base x 1
- Top x 1
- Back pcs x 13
- Door parts x 26
Other parts required :
- 2 pcs Steel/alu rods ø6mm x 250mm long.
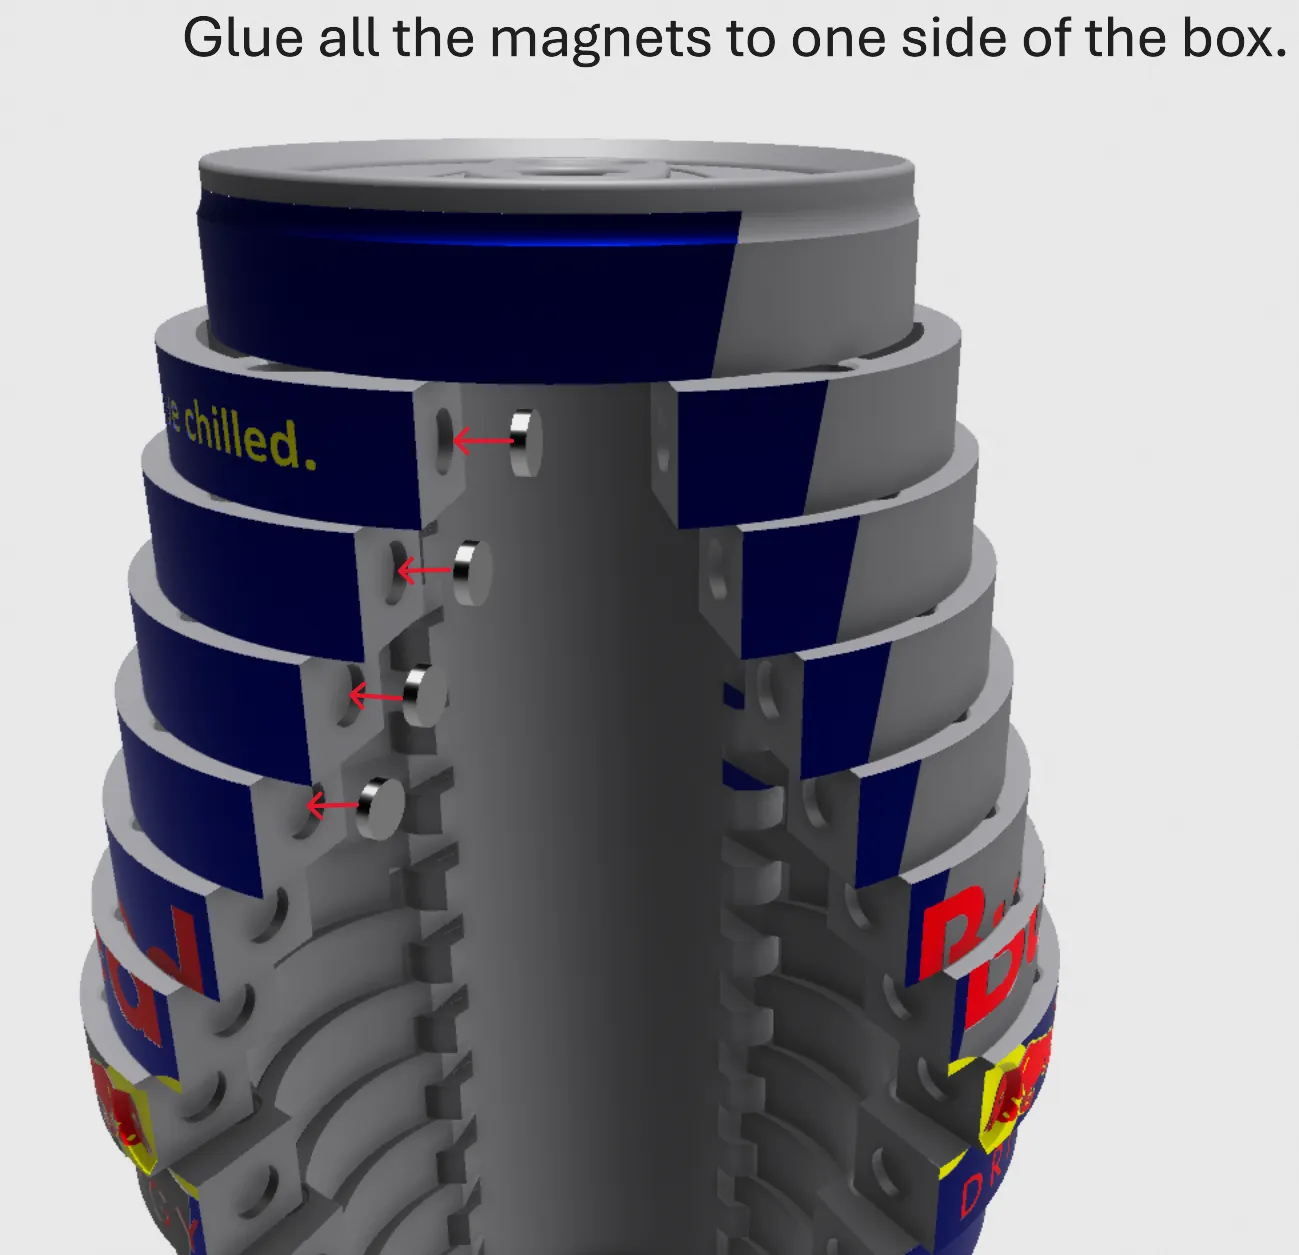
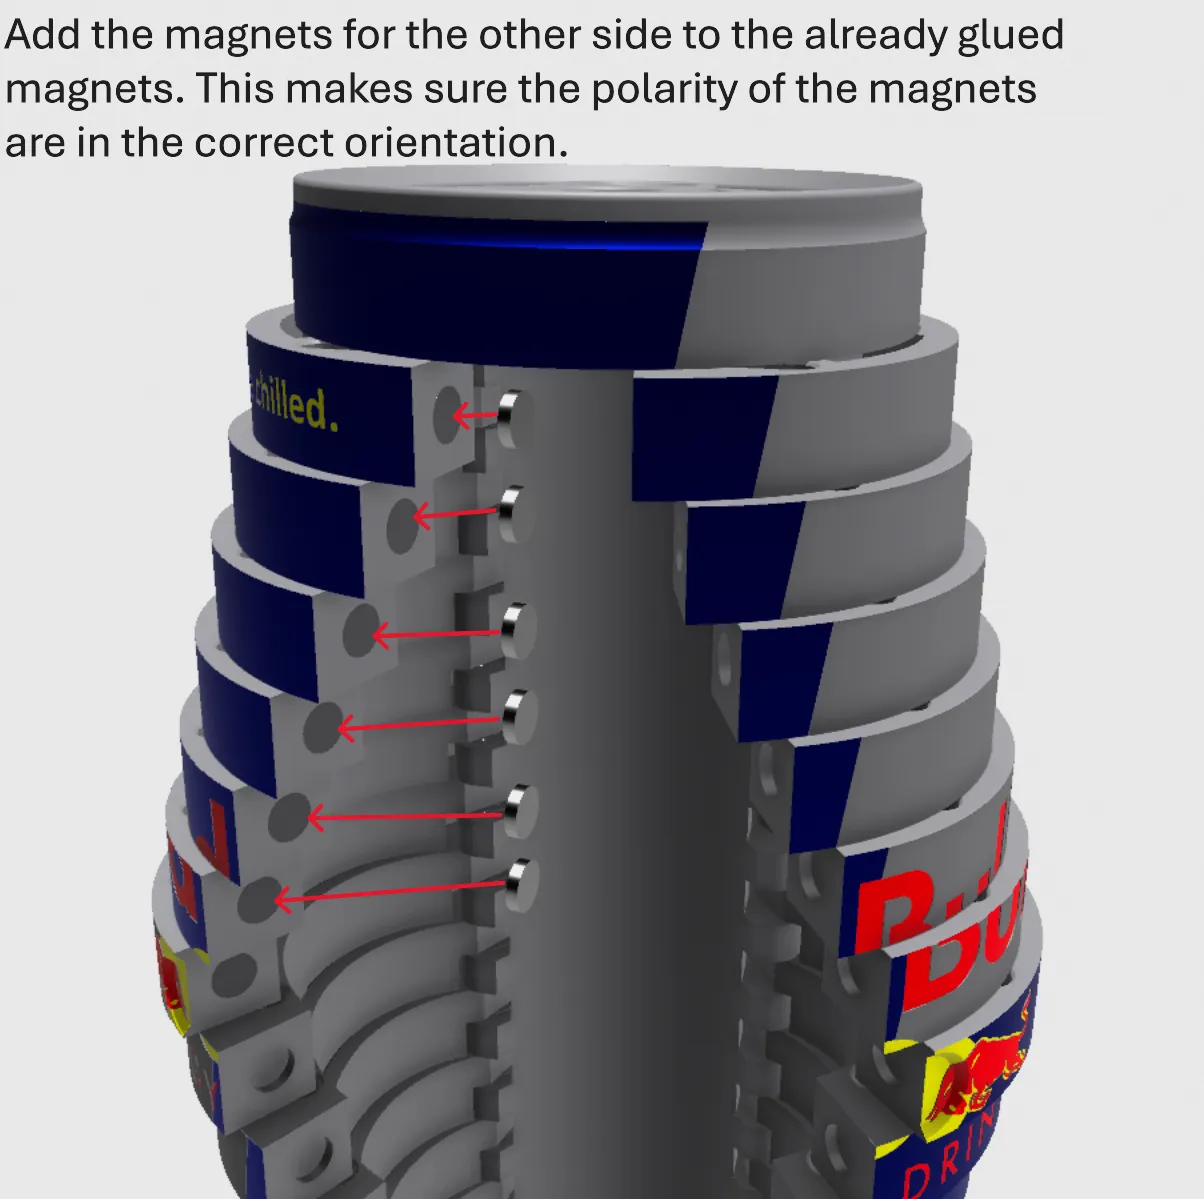
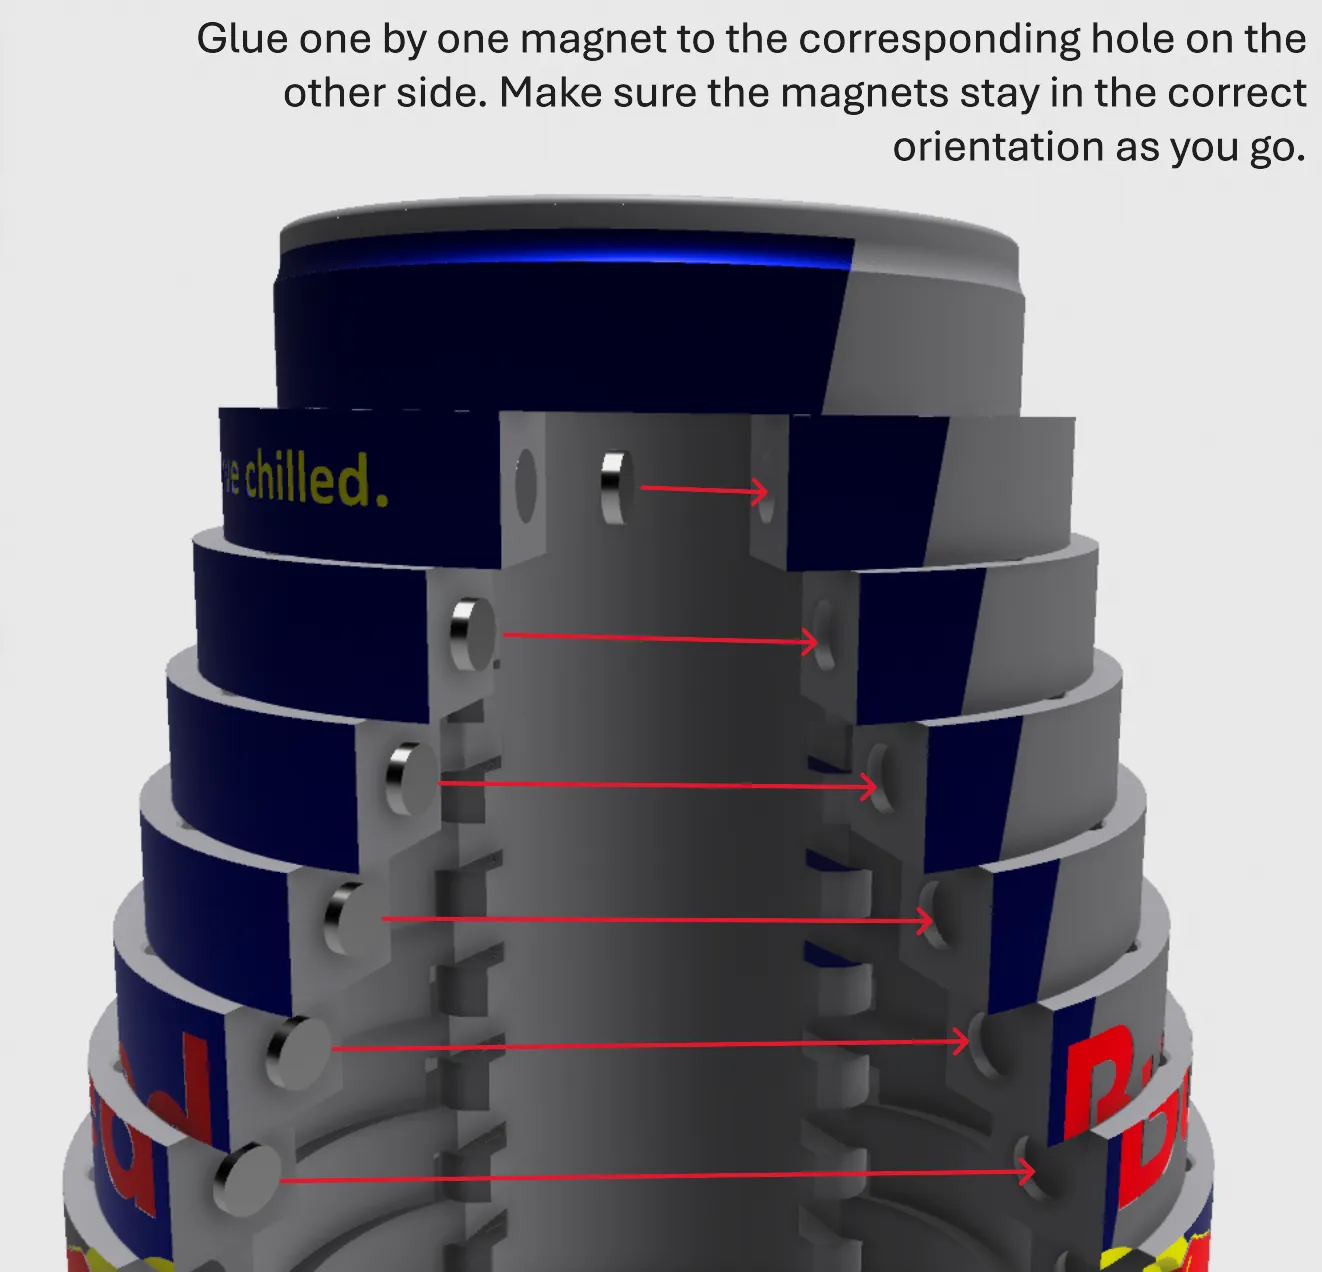
- 26 pcs Round Magnets 8x2mm
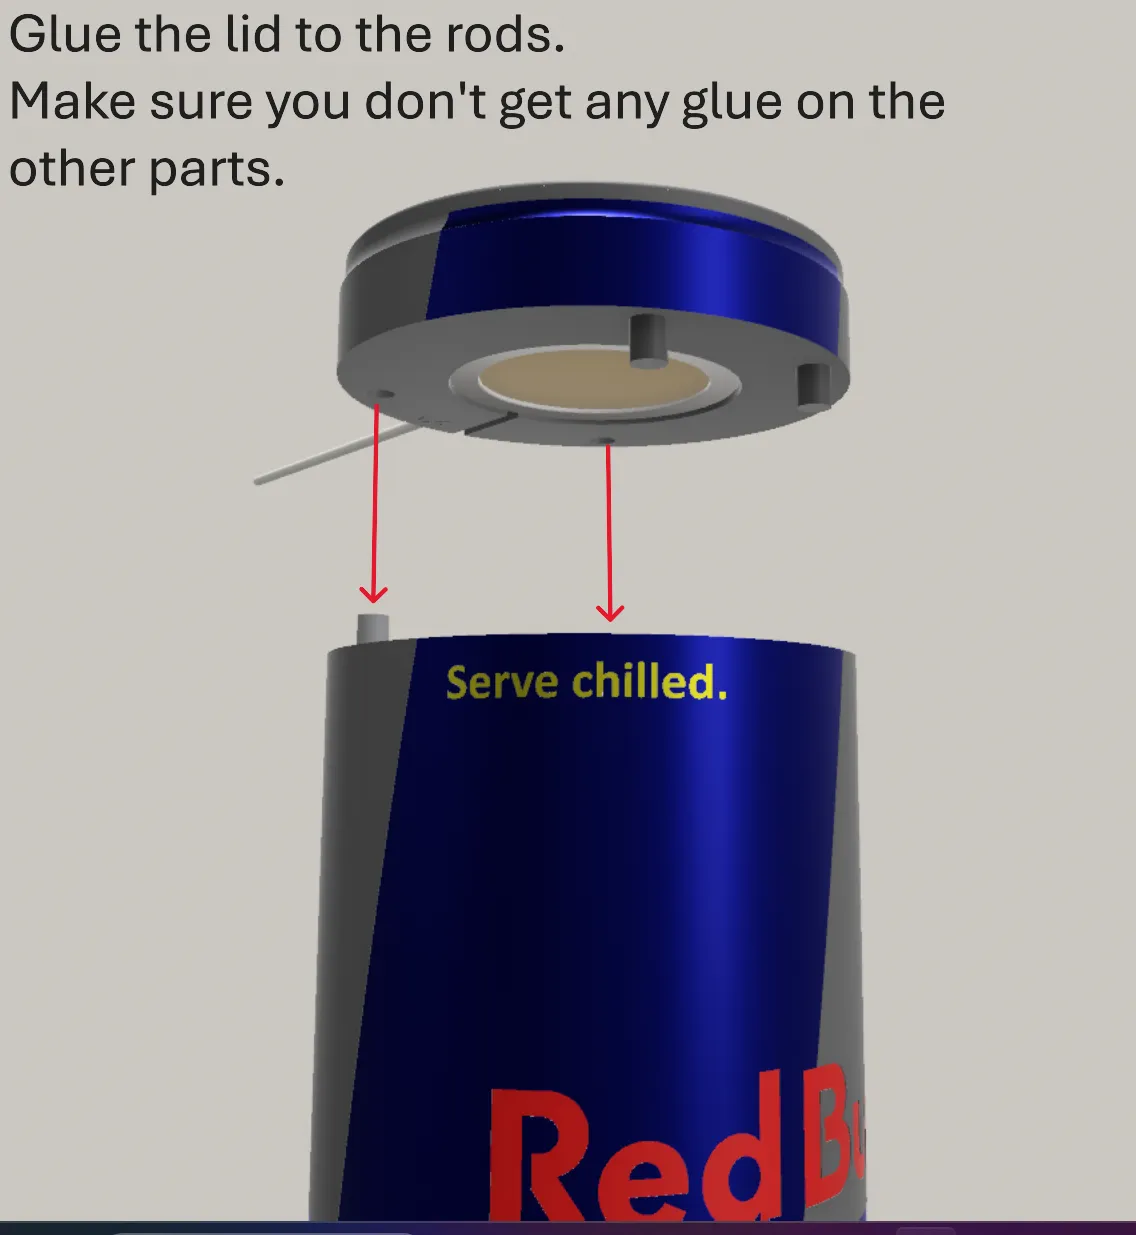
- Ca glue.
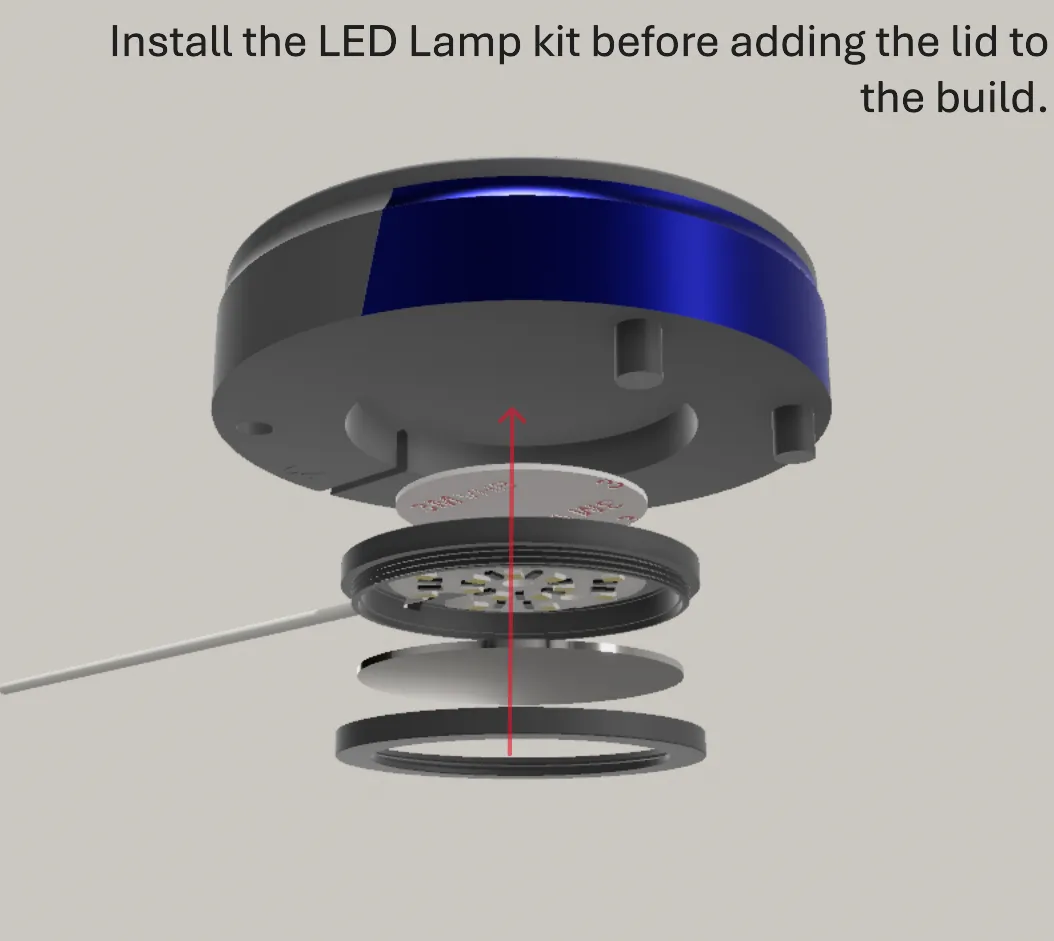
Optional : Led Lamp Kit 001 or KC007
You can find the steel rods you need here → (affiliate link)
If Bambu i out of stock, buy LED here → (affiliate link)
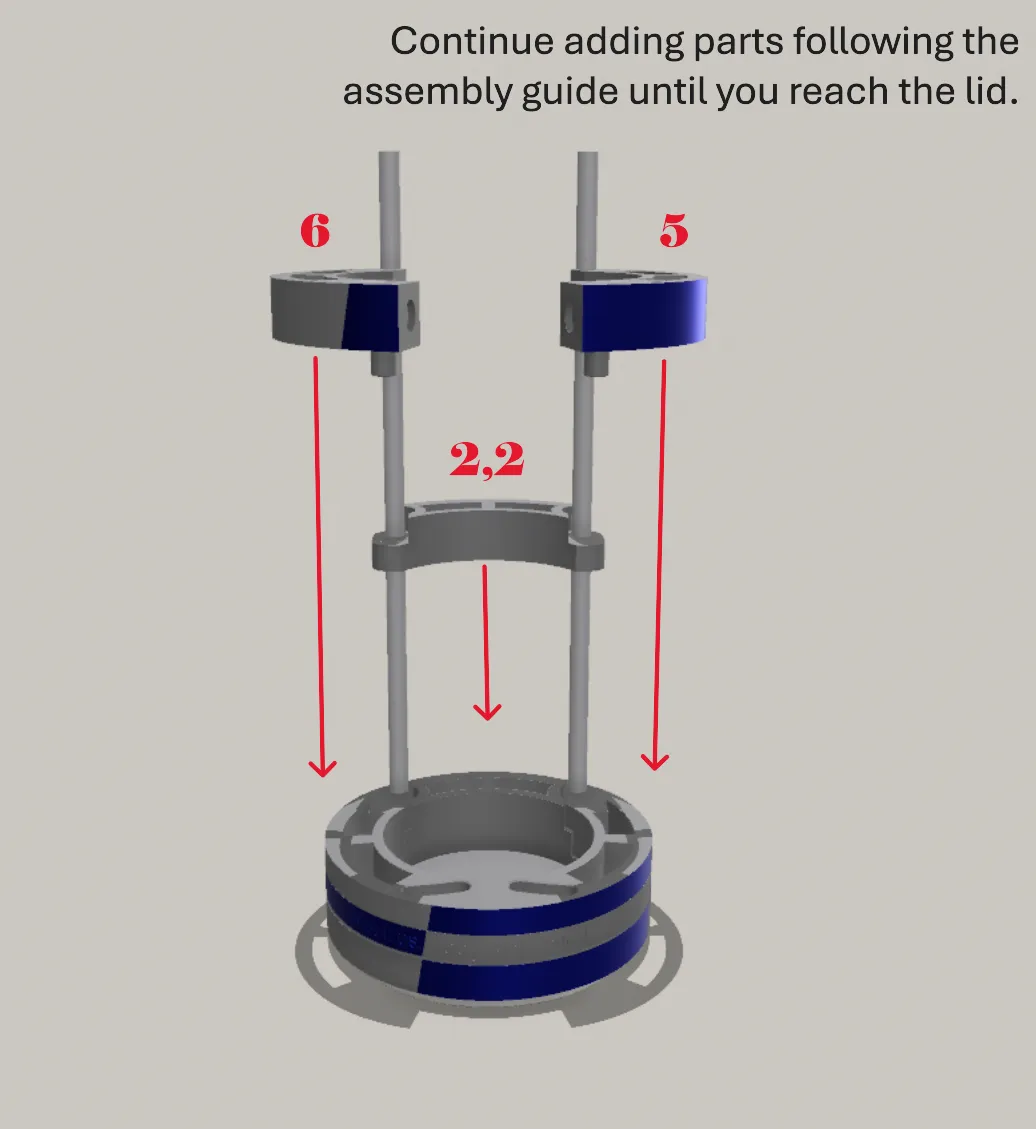
One's you have printed all the parts and acquired the accessories you need, just follow the assembly guide down below.
Each individual part is marked with a number, making it very easy to assemble.
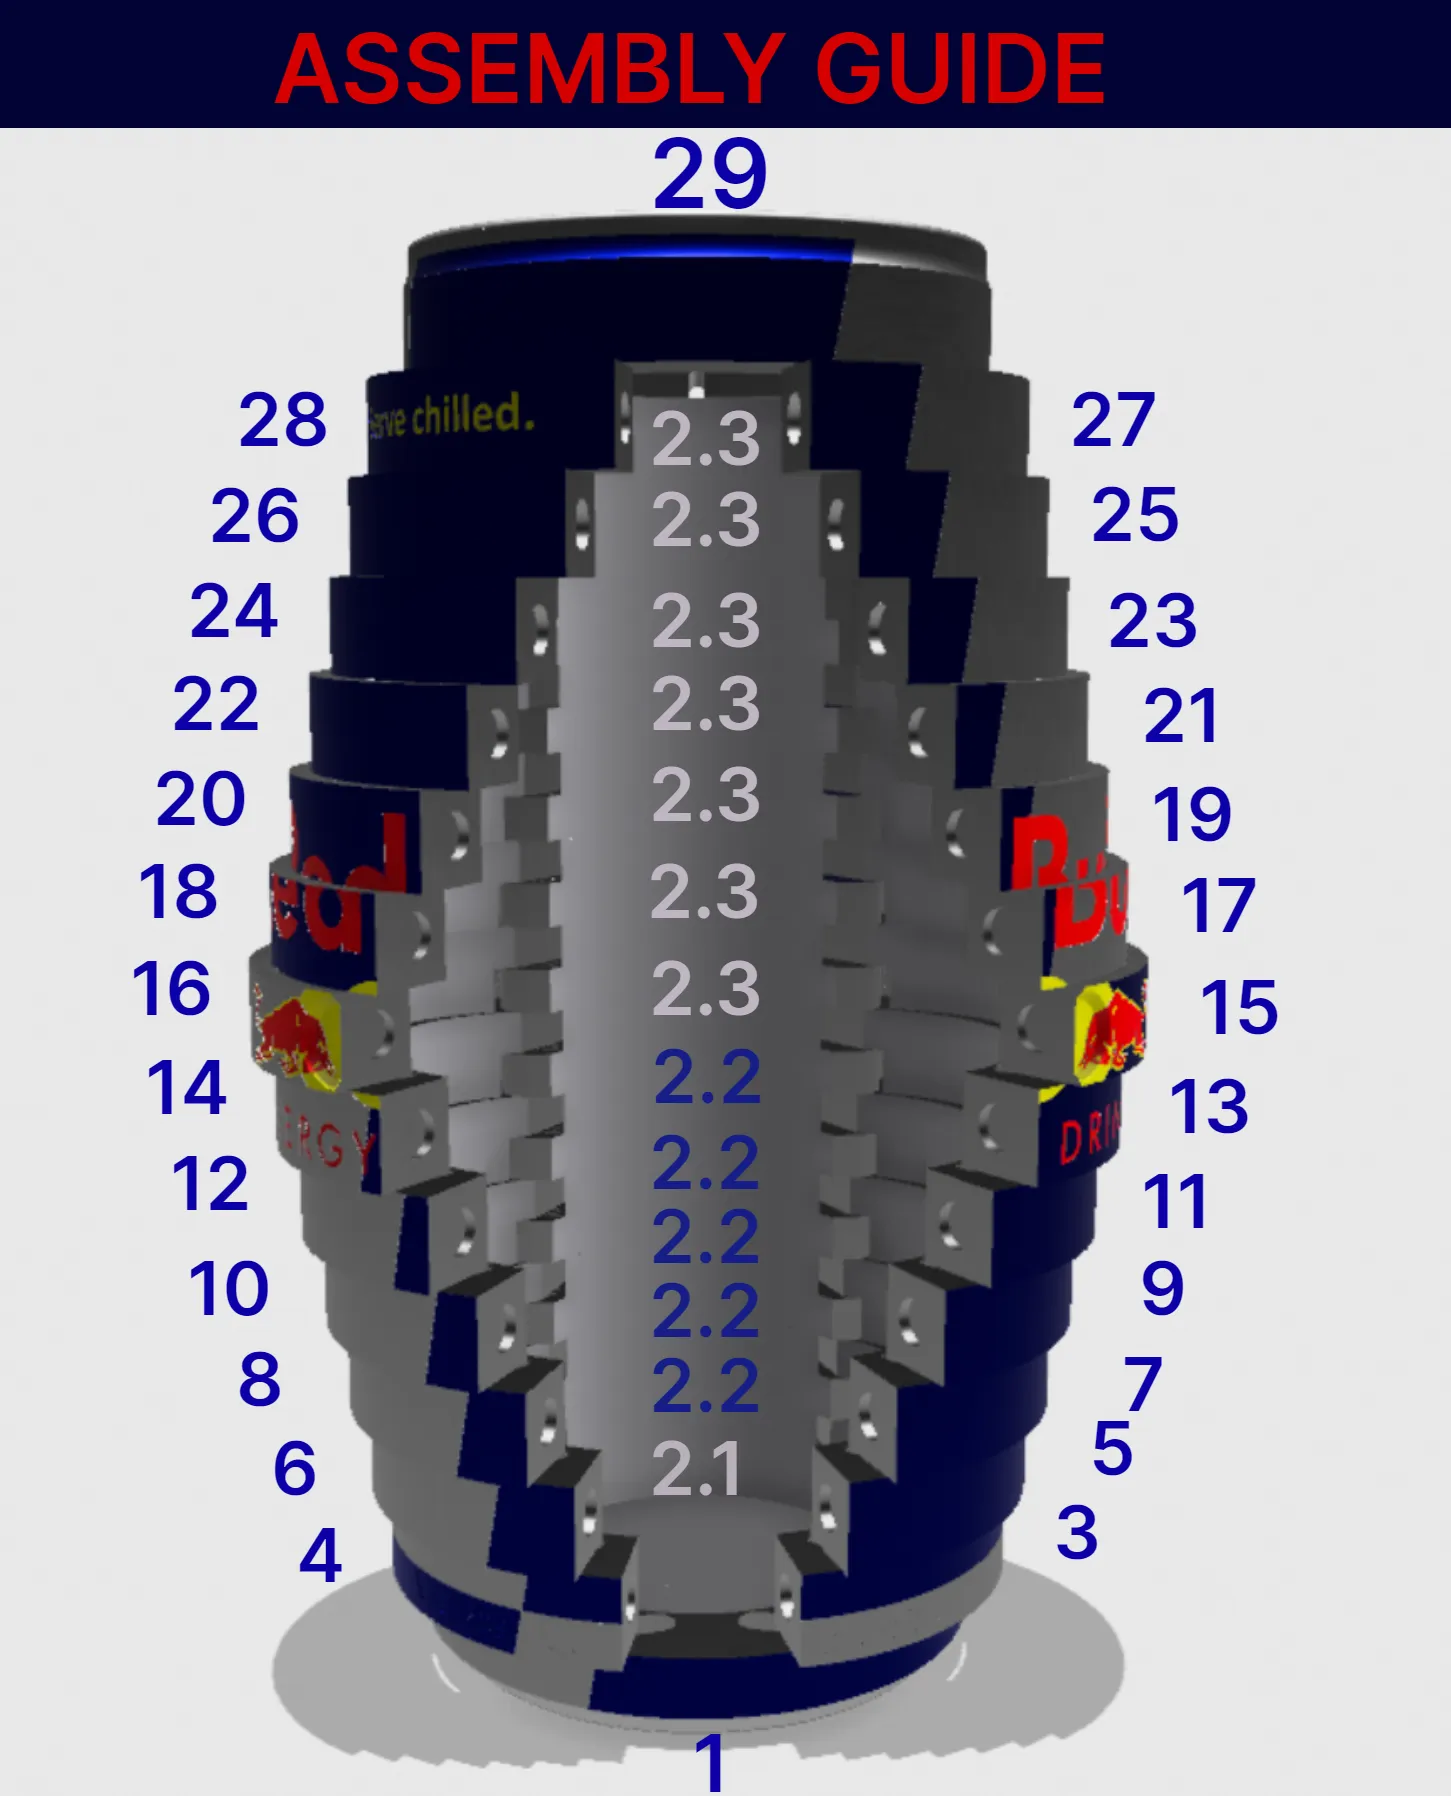
1.
2.
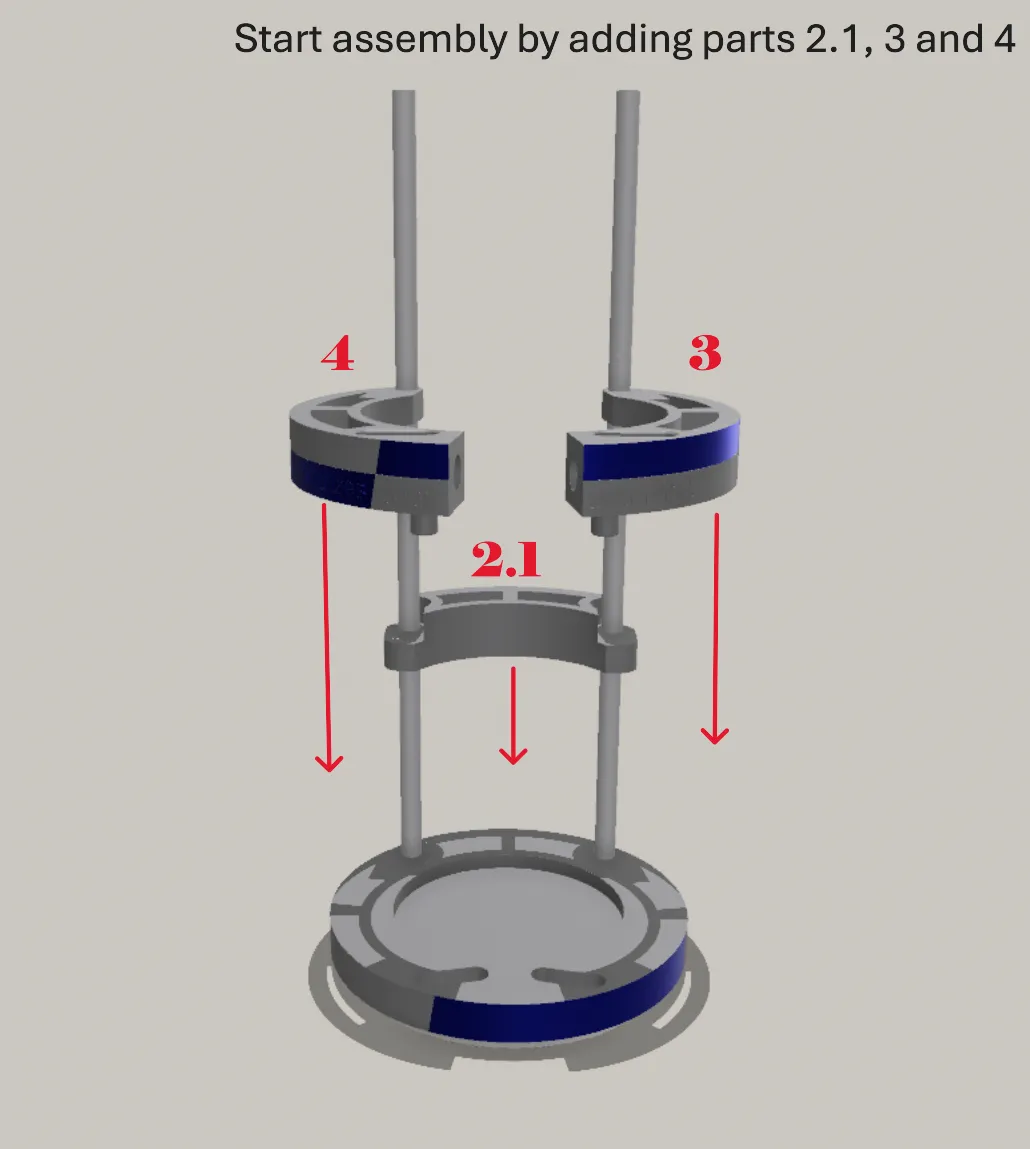
3.
4.

5. Optional
6.
7.
8.
9.
10.
When your done it should look like this.
Follow me if you want to see more of my designs in the future!
License
You shall not share, sub-license, sell, rent, host, transfer, or distribute in any way the digital or 3D printed versions of this object, nor any other derivative work of this object in its digital or physical format (including - but not limited to - remixes of this object, and hosting on other digital platforms). The objects may not be used without permission in any way whatsoever in which you charge money, or collect fees.
Comment & Rating (110)