
Snapmaker U1 - Toolhead Cable Boot Protectors
Print Profile(1)


Description
Until Bambu Studio supports Counterbore bridging, it is suggested that users do not use uploaded print profiles, and instead use settings described below in Orcaslicer/SnapOrca!
When the U1 was shipped, it included special instructions cautioning users not to over-torque the screws that secure the toolhead cable to the printer and toolheads.
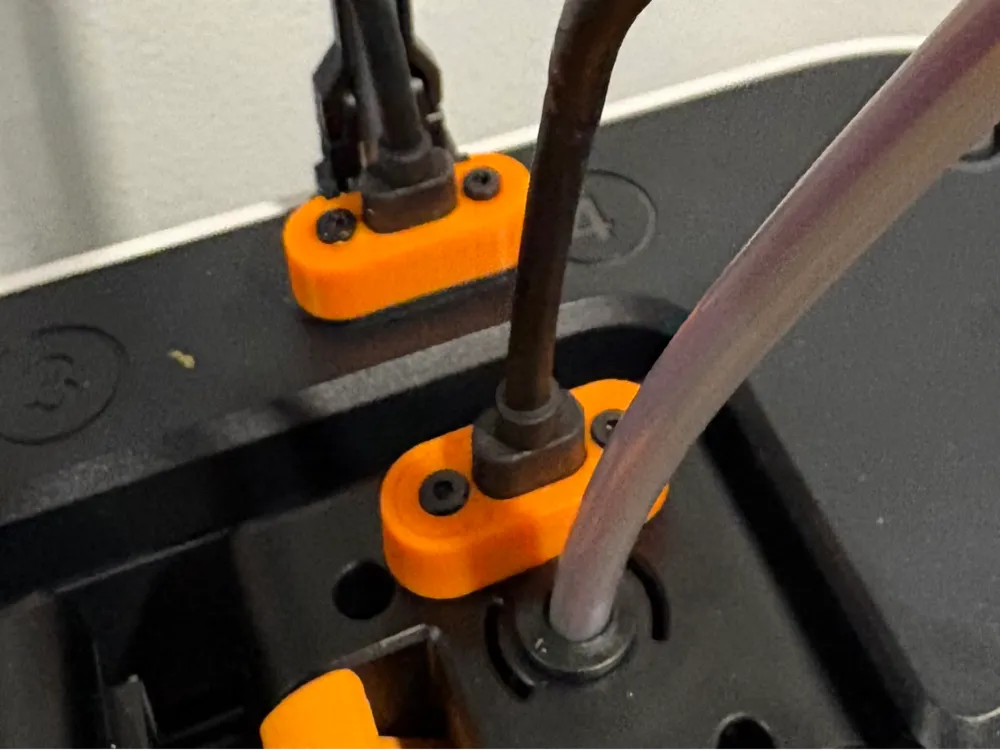
Some early users may have overlooked this. I also found that during routine maintenance, such as removing and reinstalling cables when changing hot ends, it’s easy to over-tighten these screws without realizing it. This can damage the rubber boot that holds the cable in place.
To address this, I designed a set of clips that fit snugly around the boots. These clips help distribute the load from the screws and reduce the risk of damage caused by over-tightening.
There are two versions of the boot protectors for the toolheads:
- Version for the original screws
Because the stock screws are short, some areas of this protector are necessarily thin. Even so, it still offers better protection than leaving the boot uncovered. You may need to press down a bit on the cover to get the screw to seat and grab. - Version for M2.6×12 mm or M2.6×15 mm self-tapping screws
This design is stronger and more robust than the version that uses the original screws.
Please note that it’s still possible to over-torque these protectors. They are designed to fail before the rubber boot does. For best results, tighten the screws by hand rather than using an electric driver. Some walls, especially on the original front units, are thin due to the tight tolerances and the 10 mm screw length.
I have not included a print profile with these because Bambu Studio does not support Bridging of Counterbore Holes (from what I can find), so it is suggested to use OrcaSlicer to print these with the following settings:
- Filament: PETG if your printer is open-air. ASA/ABS if you plan on enclosing the Printer. PETG will probably be fine being enclosed, but old habits die hard.
- Layer Height: 0.2mm
- Walls: 3
- Top Solid Layers:5
- Bottom Solid Layers: 5
- Bridge Counterbore Holes: Partially Bridged
These will need minor post-processing after printing, just to make them easier to install.
Take the existing screws and screw them completely into and then back out of the holes to make sure they are clear, as partial bridging can sometimes still block holes.
Links for the self tapping screws. These are NOT affiliate links:
Changelog
2025-12-19: Add Front versions for use with M2.6x12mm or M2.6x15mm self tapping screws.
License

You may create derivative works based on this object, provided that all such derivative works are published exclusively on the MakerWorld platform and include proper attribution to the original creator. You may not share, upload, host, distribute, or publish this object—or any derivative work of this object—on any other digital platform, marketplace, or distribution channel. Commercial use of this object and any derivative works is strictly prohibited. This includes, but is not limited to, selling, renting, sublicensing, or using the object in any context in which you receive monetary compensation or other financial benefits.


Comment & Rating (23)