Garage or Workshop for Model Cars Scale 1:24


Print Profile(1)

Description
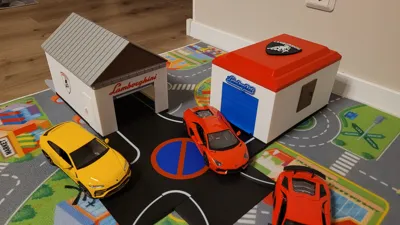
Large Garage for Model Cars for Playing or for a Diorama
Scale 1:24
The model consists of various individual parts, almost all of which can be easily assembled without glue
The structure is modular; the side, front, and rear walls can be combined as desired. There are side panels with a door or a window
A drive-through is also possible, with one gate each at the front and back
There are two different roofs:
- A flat roof, consisting of a roof frame and a lid that is simply placed on top
- Or a hinged pitched roof, consisting of a roof base, roof sides (2x), and gable parts (2x)
The gate is designed to open as a rolling gate with individual slats that are clipped together
The guide parts of the rolling gate must be printed once normally and once mirrored. These parts must be glued into the designated grooves with superglue. Attention: observe the correct installation position, grooves facing inwards! After gluing the guides, the clipped slat gate can be pushed into the guide grooves from below before the front is attached to the base

For the pitched roof, the roof sides are carefully clipped together with the roof base
The driveway can be attached to the front of the garage, or if you have two garages, you can use the forecourt to connect them and attach the driveways to the forecourt
The decorations with sports car emblems visible in some photos are not included in the parts due to copyright reasons. Anyone who wishes can decorate the garage with stickers
The gate slats must absolutely be printed with a layer height of 0.12 mm. The same applies to the pitched roof parts. Otherwise, the hinges will not engage optimally
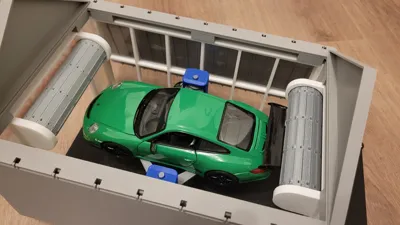
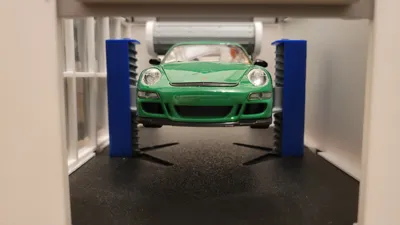
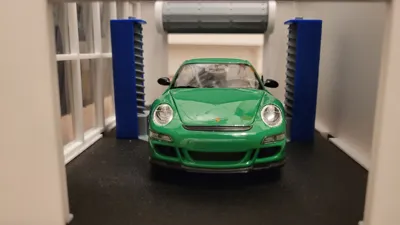
Lifting Platform Extension:
There are additional components for the garage with which you can integrate a functional lifting platform
The platform with a model car can be moved up and down from the outside by turning the gear
Window Front Extension:
The process can be observed through a window front, which has also been added
Only the following additional parts need to be printed:
Lifting Platform:
Floor_Platform.stl 1x
Platform_Spindle.stl 2x
Guide_Platform.stl 2x
SpindleNut.stl 2x
SpurGear16.stl 2x
SpurGear26.stl 2x
Spindles and spindle nuts should be printed with a layer height of 0.12mm!
Window Front:
Side_WindowFront.stl
Side_WindowFrontFrame.stl
Assembly:
The floor must be replaced; all other parts of an existing garage can still be used if they have not been glued
Assembling the lifting platform is easy
Carefully snap the spindle guides into the slots in the base. Do not break off the locking tabs
Insert the spindles from below through the base and guide them into the upper guide holes. At the same time, screw them through the lifting arms. Finally, the spindles must be in the upper guide holes, and both lifting arms must rest at the bottom of the base in the recess
Place the small gears onto the hexagonal shafts of the spindles. Insert the large gears onto the axles in the base
Secure the gear cover with small countersunk screws
The window front should be fitted with a thick (approx. 0.5mm) clear vinyl or PVC film. To do this, cut a piece of film to fit the frame, insert the film, place the smaller window part on top, and glue it all around the outside with superglue. An activator is very helpful here
Comment & Rating (5)