Wind Tunnel in low speed for lab


Print Profile(1)

Description
Introduction
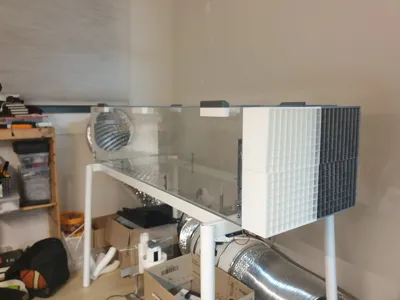
This wind tunnel was built by me for personal research purposes. It performs perfectly in the low-speed range, and with the addition of extra fans, the high-speed range can also be achieved. The wind tunnel has a large scale of 1200 × 300 × 400 mm, making it very suitable for observing aircraft wake flows. By adjusting the acrylic panels, additional equipment can be installed inside (in my case, I am conducting research with specialized equipment).
You can build this wind tunnel for under 800$, and since transparent acrylic is used, laser-based visualization is also possible. For smoke visualization, you can use a fog machine.
Required Parts
- M3 bolts: 10
- M4 bolts: 50
- M4 nuts: 50
- M4 washers: 50
- Acrylic sheets:
- 1200 × 410 × 5 mm (2 pieces)
- 1200 × 300 × 5 mm (2 pieces)
- First-layer sheets (several, used as adhesive tape)
- Instant adhesive
- HF-315 fan (fan link)
- Pipe: diameter 300 mm, length at least 1 m
Assembly Instructions
The parts I provided are mainly assembled into two components:
- Flow straightener (grid)
- Connector
The connector is assembled from four parts, and the flow straightener is assembled in the same way.
Apply glue appropriately to the flat surfaces (the parts that close together), then cut the first-layer sheet to a suitable size and attach it on top.
Need Help?
If you want assistance, please send me an email!
I will gladly help you in every possible way.
Comment & Rating (0)