Star Wars/The Mandalorian Grav Charges/Grav Ladung


Print Profile(1)

Bill of Materials


Description
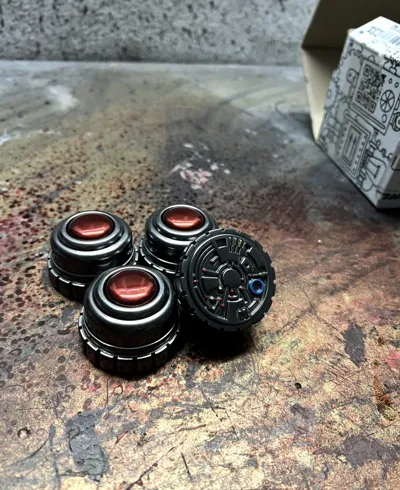
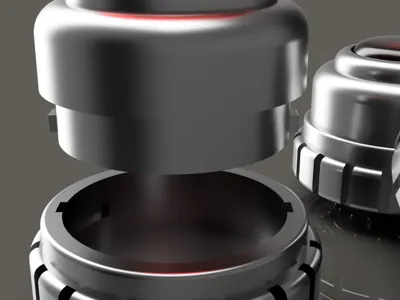
I have already painted some Grav Charges, but the problem was always with the file because I wanted to install flashing LEDs, and here is the problem: there is no proper closure that sits tightly but is easy to open to change the battery... but now I've sat down and built the Charges in such a way that you can open and close them again and again without them falling apart at the event...
I use car door warning flashing LEDs, I'll put the Amazon link in the description...
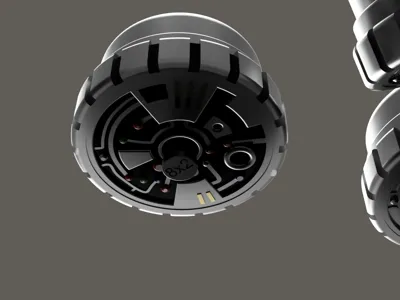
You need to glue an 8X2mm magnet into the lower part of your charge (see pictures) because the LEDs have a magnetic switch...
You also need to install a magnet on your belt where the charge is supposed to sit, so that the magnet on the belt and the magnet on the bottom of your charge touch, because only then do the LEDs turn off, and that's exactly what we want... so the magnet on the bottom of your charge transfers the magnetic force to the magnetic switch on the flashing LEDs... so Grav in hand, light on... Grav on belt, light off...
please remove all plastic parts from the flashing warning LEDs so that you only have the chip, and glue it with a tiny drop of hot glue to the inside of the lower body...
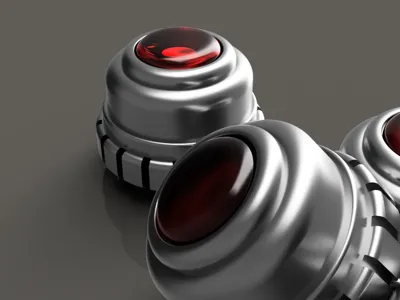
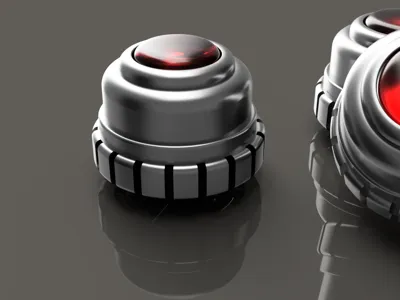
if you want to use LEDs, you naturally have to use transparent material for the lens...
The file is easy to print, so have fun... The belt holder is also coming soon, so follow me so you don't miss anything...
Here is the link for Amazon:. https://www.amazon.de/Holdes-LED-Warnleuchten-kabellos-Sicherheitsleuchte-Kollisionsschutz/dp/B0FXTJ93CF/ref=sr_1_2?__mk_de_DE=%C3%85M%C3%85%C5%BD%C3%95%C3%91&crid=3CONUC8U4SWVP&dib=eyJ2IjoiMSJ9.OTRIrVeyiScGXQRWgs3Li36c4Vjbe4ZaL6Mr4hs6eXKEhJ6Asj52-FUmocUpuePdY1WLMkSW8x2LKUOO6Nr5l8n5XO7cRo0M4VHBwGGpSweAAkKx87bim85hFmZUZ1cb2_uOnevNhHVfW0JcvonMACCcOvErP8drq7NtDJltCVUhOo3pCLZ8GdHBavzI2GMJK3AT7SNWmlVWwRO912dhzJRya53mDvu6zC46f5KZVeY.2hbpUoO9O5zcPND933cZObEqrPVukj0LzgYAiUQLG8o&dib_tag=se&keywords=autot%C3%BCr%2Blicht%2Brot%2Bwarnlicht&qid=1765260302&sprefix=autot%C3%BCr%2Blicht%2Brot%2Bwarnlicht%2Caps%2C108&sr=8-2&th=1
License
You may create derivative works based on this object, provided that all such derivative works are published exclusively on the MakerWorld platform and include proper attribution to the original creator. You may not share, upload, host, distribute, or publish this object—or any derivative work of this object—on any other digital platform, marketplace, or distribution channel. Commercial use of this object and any derivative works is strictly prohibited. This includes, but is not limited to, selling, renting, sublicensing, or using the object in any context in which you receive monetary compensation or other financial benefits.
Comment & Rating (29)