Torchère in gilt bronze, champlevé enamels, Belle Époque


Print Profile(1)

Bill of Materials


- Vallejo 71.040 Burnt Umber x 1:
- Metallic Water Colors x 1:
Description
Lot No. 2092706 |
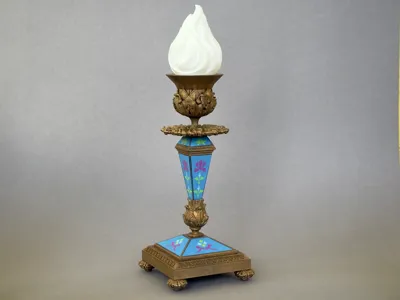
Recreate the luxury of 19th-century France with this highly detailed 3D printable model of an antique table torchère. This design meticulously mimics the opulent style of original gilt bronze (ormolu) and champlevé enamel pieces, popular during the Belle Époque. It's a perfect showpiece for antique enthusiasts, or a sophisticated addition to any desk or shelf.
Boost Me (for free)
Achieve the truly elegant look of a complete three-piece garniture by pairing these torchères with the coordinating clock. The centerpiece is available here:
https://makerworld.com/en/models/2132329-kit011-mantel-clock-champleve-enamel-belle-epoque
Design Details
- Authentic Aesthetic:
This model is a faithful recreation of the Neoclassical and Belle Époque styles popular in 19th-century France. It captures the elegant lines and intricate details typical of French decorative arts, including classical acanthus leaf motifs, a square ornate base raised on ornate feet, and panels designed to mimic vibrant champlevé enamel work. - Multi-Color Friendly:
The design is optimized for simple multi-color printing (see BOM). All three tiers of enamel panels fit onto a single small A1 mini print plate, and the color changes are limited exclusively to the very first layer, meaning no complex systems like H2C or Vortek are required. - Functional:
The design is versatile; it can house a small flame-effect LED tea light (see BOM) or a standard 2cm diameter LED candle. It also works great simply as a sculptural piece.

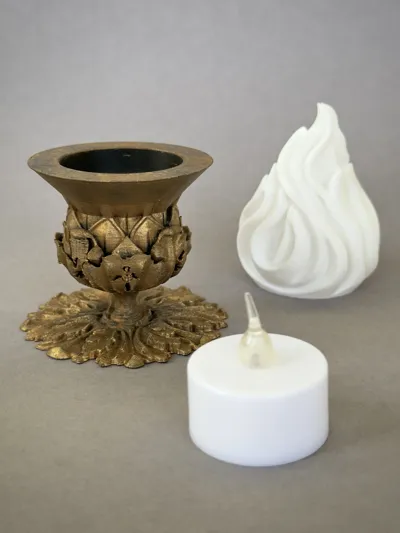
Component View: The image shows the finished, painted base assembly alongside the 3D printed flame attachment and the small LED tea light used for illumination.
Printing & Assembly Tips
- Material:
PLA is ideal for capturing sharp details. I have printed in PLA Basic Black (see BOM) but you can certainly choose PLA Silk+ in Gold or Bronze if you are not into painting your model after printing. - Finishing:
For a premium finish, consider using UV resin on the enamel sections for a deep, glossy look. The bronze sections can be painted using a variety of metallic paints to enhance texture and realism. The parts fit together with simple adhesive (super glue recommended).

Unassembled Parts: A view of the individual 3D printed components before assembly, including the top, the central standard pieces, and the pyramid finial.
License
You shall not share, sub-license, sell, rent, host, transfer, or distribute in any way the digital or 3D printed versions of this object, nor any other derivative work of this object in its digital or physical format (including - but not limited to - remixes of this object, and hosting on other digital platforms). The objects may not be used without permission in any way whatsoever in which you charge money, or collect fees.
Comment & Rating (4)