
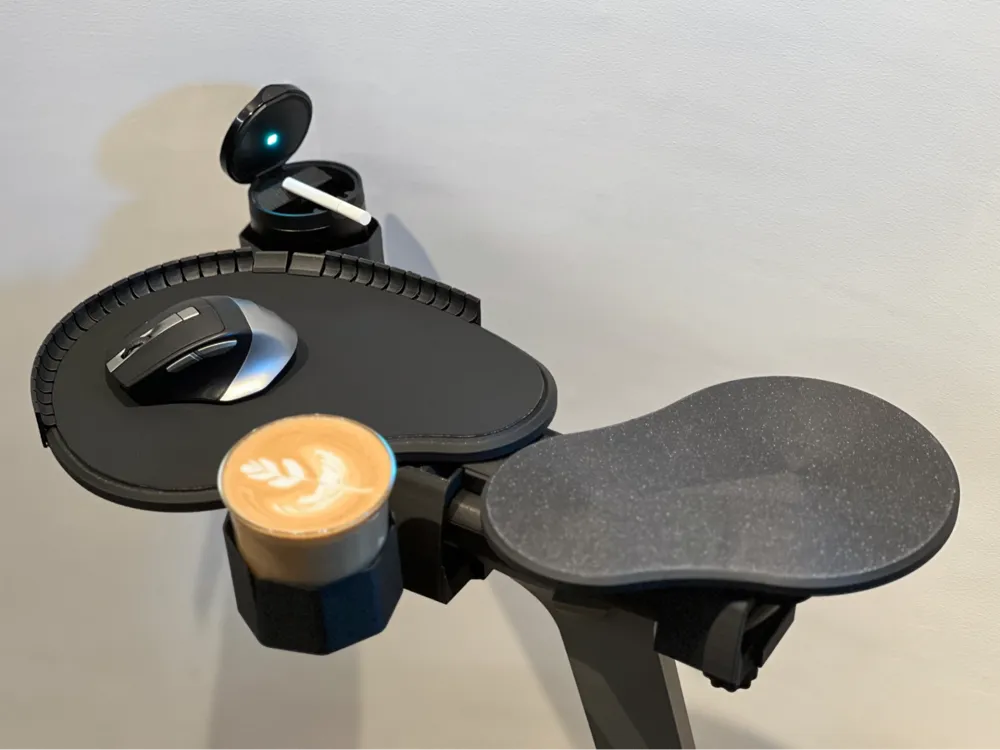
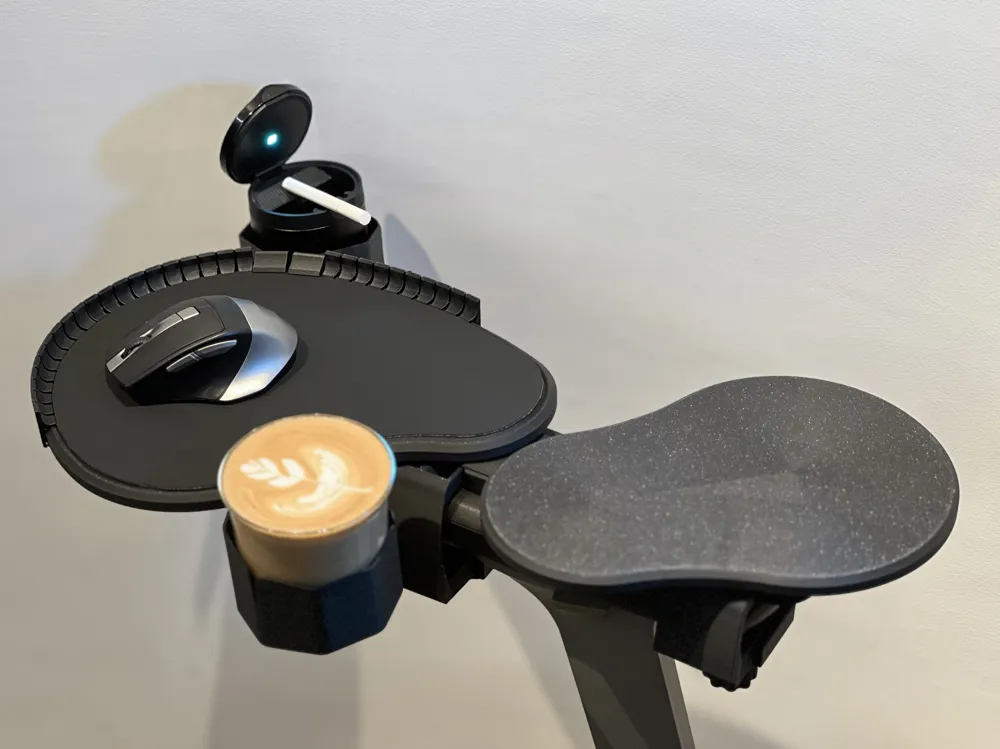
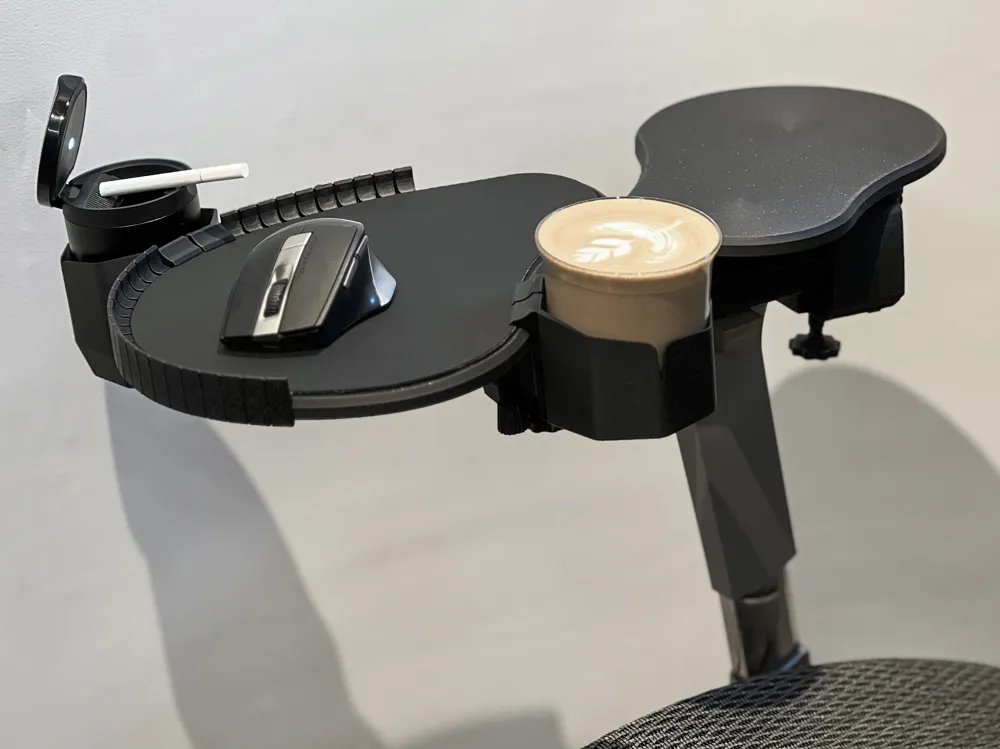
Multi-angle adjustable mouse tray and cup holder extension accessories adaptable to multiple armrest specifications (multiple accessory specifications available, no hardware required, no supports needed)
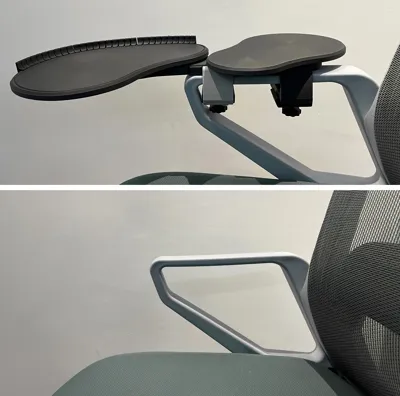
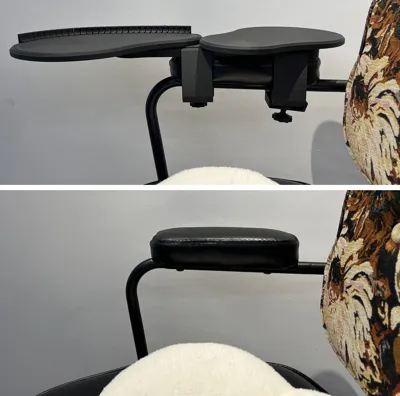
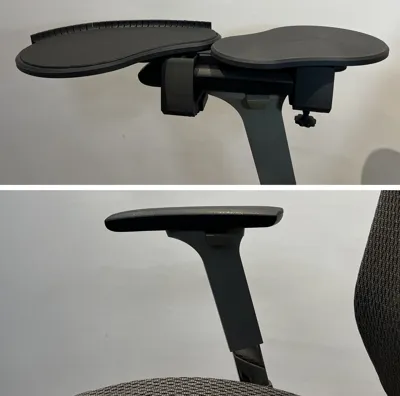
Print Profile(4)


Description
Boost Me (for free)
Save your shoulders, save yourself from occupational diseases, free your mouse hand
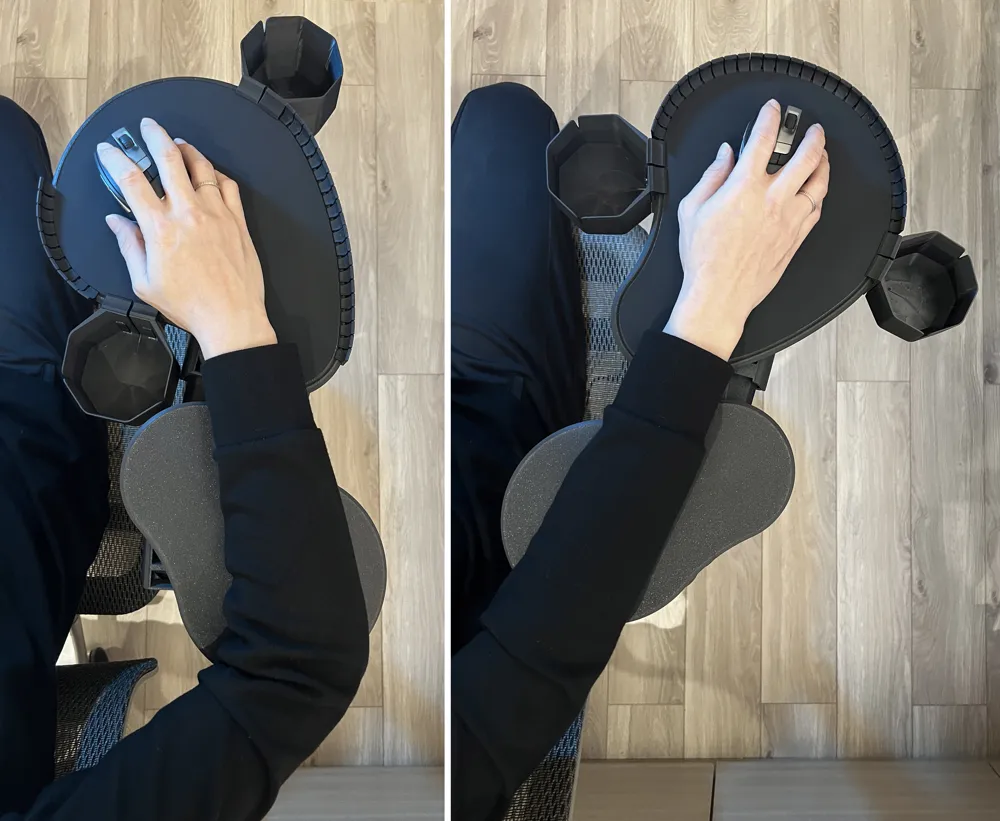
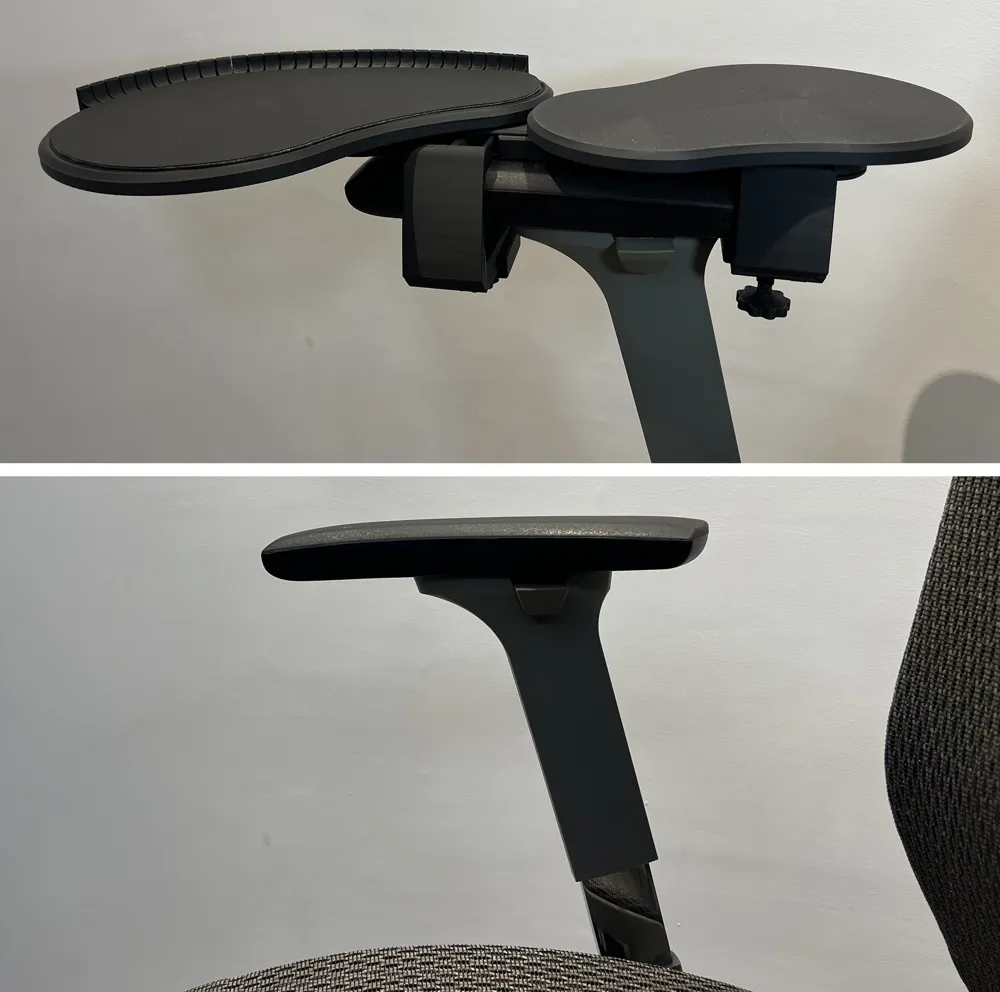
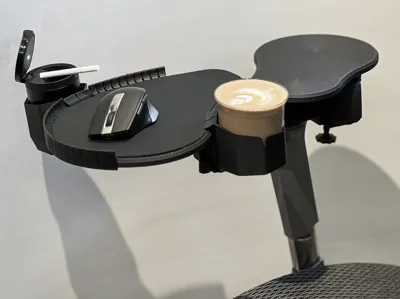
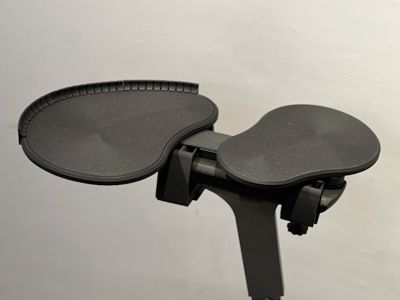
Multi-angle adjustable, full arm support, freely movable mouse tray
Design Purpose:
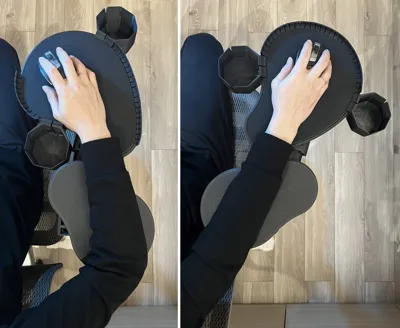
Multi-directional adjustment to adapt to arm and wrist postures at any time, providing more support; avoiding the problem of shoulders and arms being suspended in front of the computer desk for long periods, allowing the arm to rest more naturally and easily when operating the mouse, reducing shoulder pain
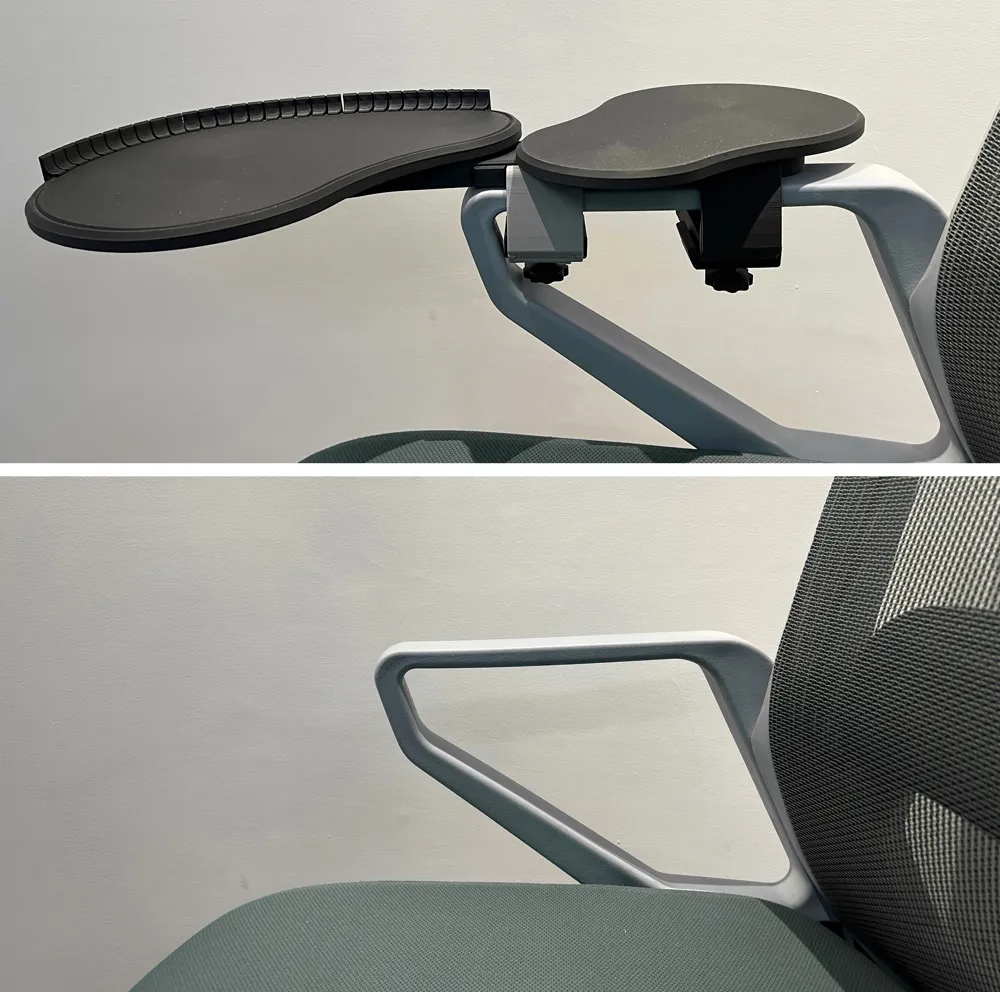
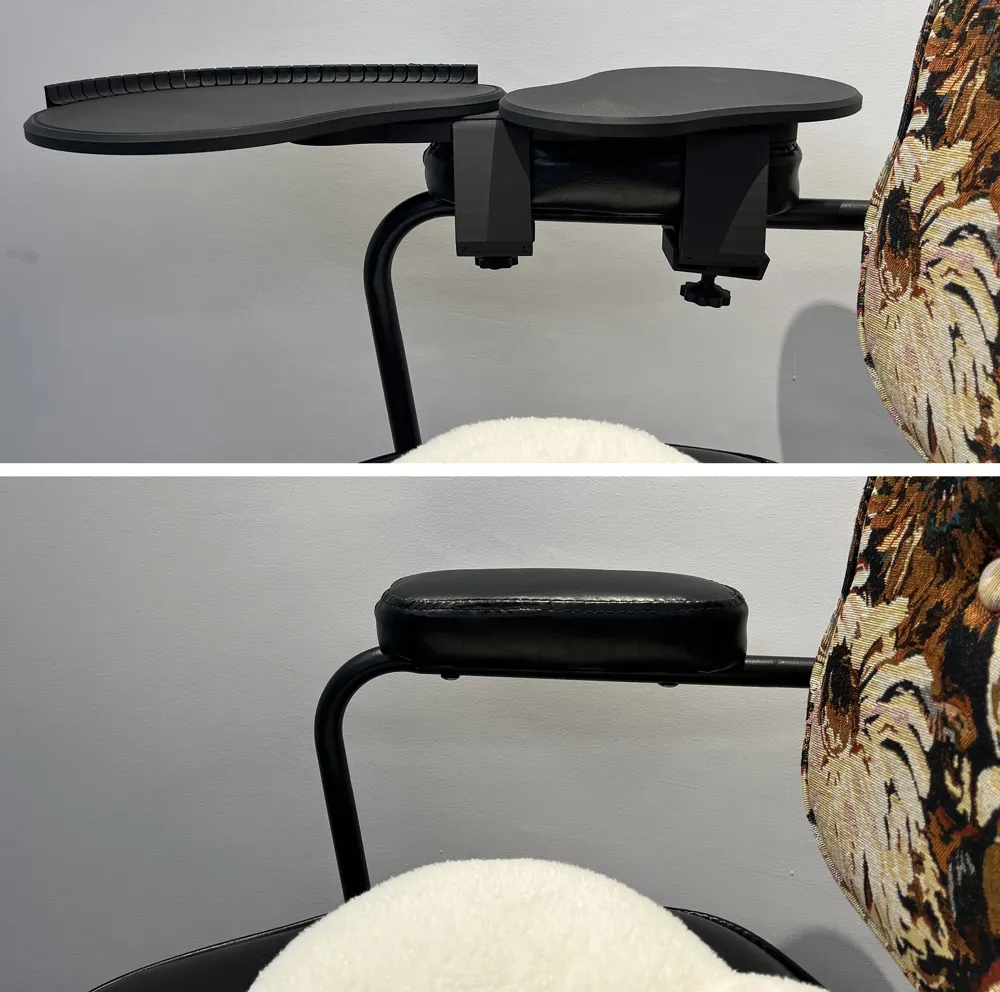
Adopts adjustable and telescopic structures, as well as flexibly replaceable connectors of various specifications, to adapt to chair armrests of more specifications and different styles as much as possible
No need to purchase additional hardware for installation, fully 3D printed, no support printing waste
Can be installed on chair armrests with widths from 35 to 100mm and thicknesses from 15 to 60mm
Origin:
As a heavy computer user, I spend over ten hours a day with a mouse, battling frozen shoulder and cervical spondylosis daily; additionally, my personal habit is to sometimes recline or lean back in my chair while working for long hours, making comfortable mouse use a big challenge, and unfortunately, several products I purchased on the market were always unsatisfactory
Ever since I got a 3D Printer, I've always wanted to make a convenient mouse tray, drawing many drafts and making paper mock-ups, and this time, leveraging the momentum of an event, I brought my idea to life; this is also one of the most complex products I've made in the past six months since I started 3D printing
Because the design initially considered installation versatility, eliminating the hassle of others having to buy various hardware accessories after printing; then my OCD kicked in during design, making it zero-support, so the components were broken down quite finely during design, adding more assembly steps (I dug my own pit and jumped in)
As a new player, I wasted a lot of time researching software and printing sample parts to debug the structure; due to time constraints, I couldn't shoot an installation video, so I took more detailed step-by-step pictures to clearly explain the installation order and the selection criteria for accessory specifications; perhaps the assembly steps might sound a bit verbose and complicated, but I hope it helps everyone assemble and use it quickly and easily, and I'll try to shoot an installation video later if I have time
The following are installation instructions
Product List:
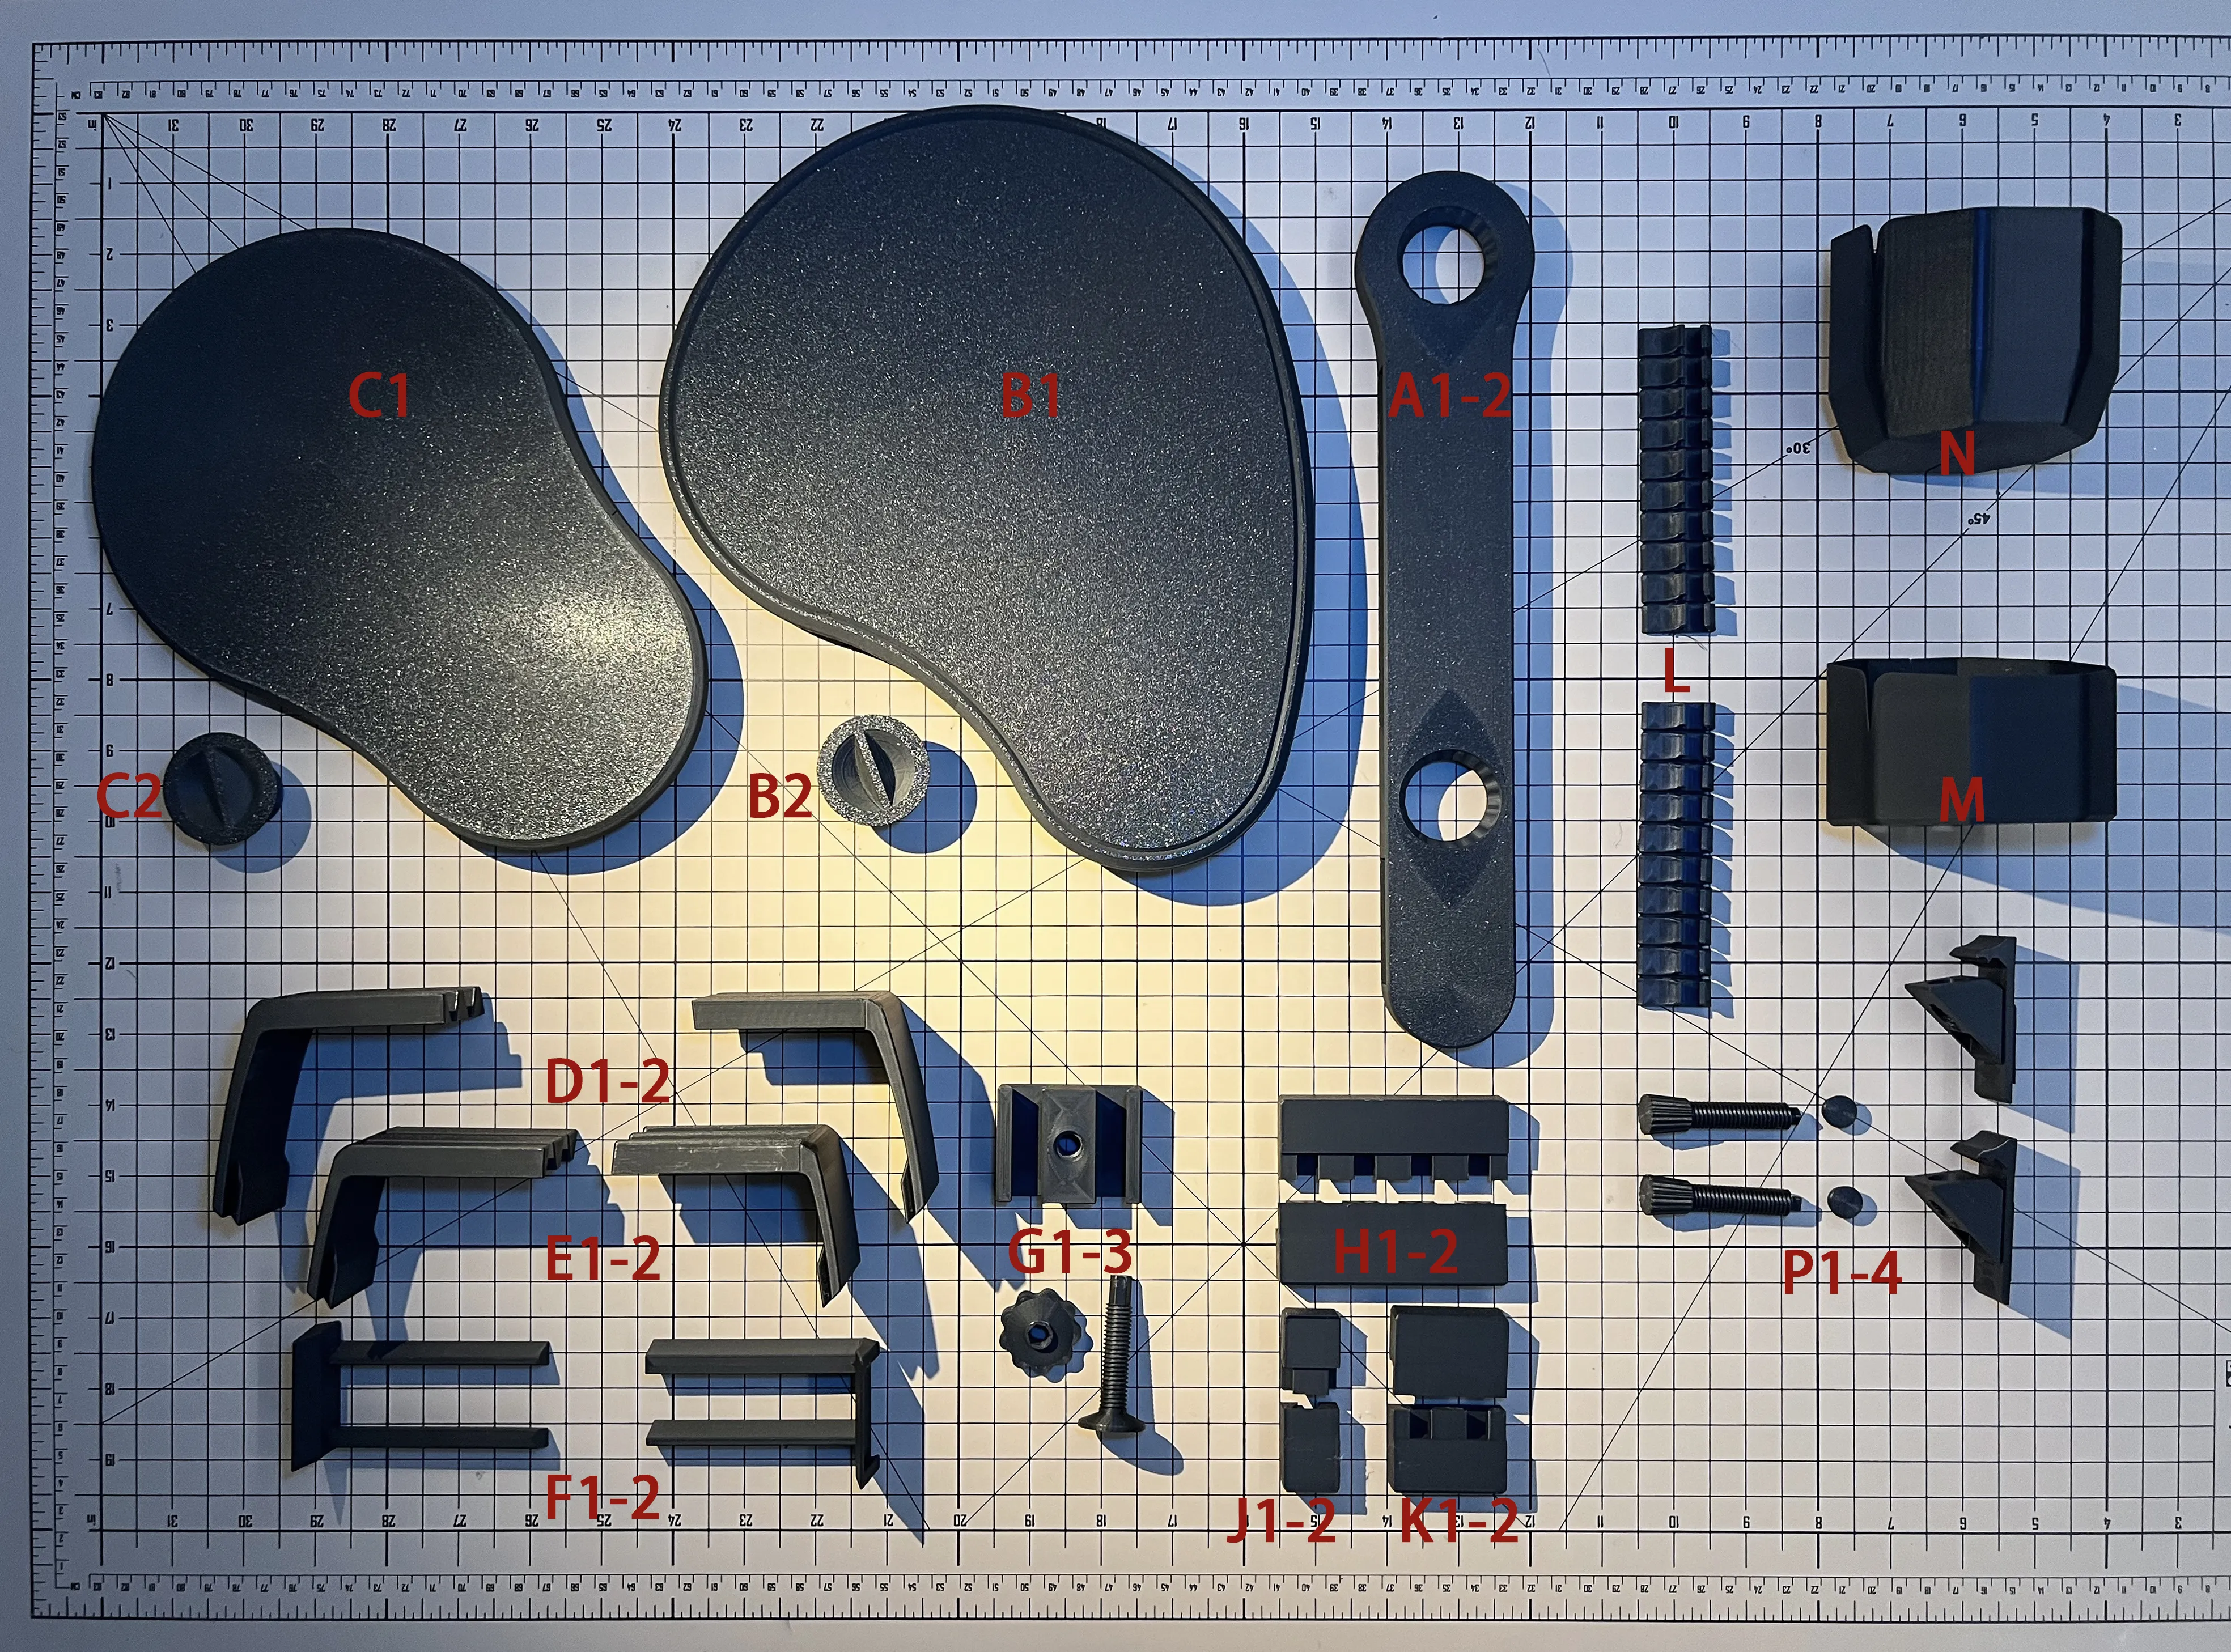
Main Body:
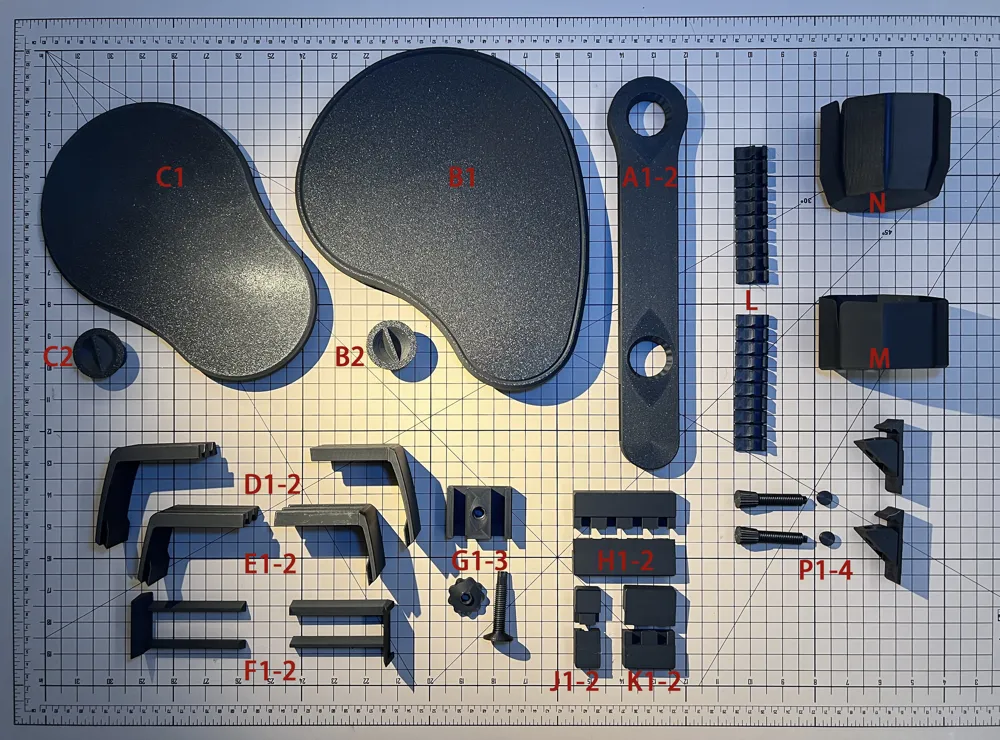
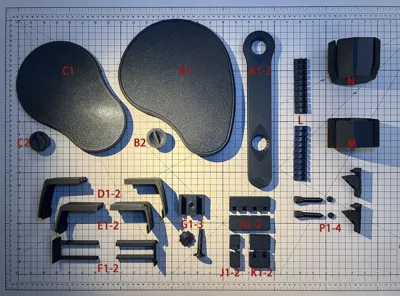
A1-2: Main mounting base, composed of upper and lower interlocking parts, the side with visible limiting teeth faces upwards (This model is 45mm wide and compatible with most armrest widths; there is also a 75mm wide version, if your armrest is wider, you can choose to print that for aesthetic reasons)

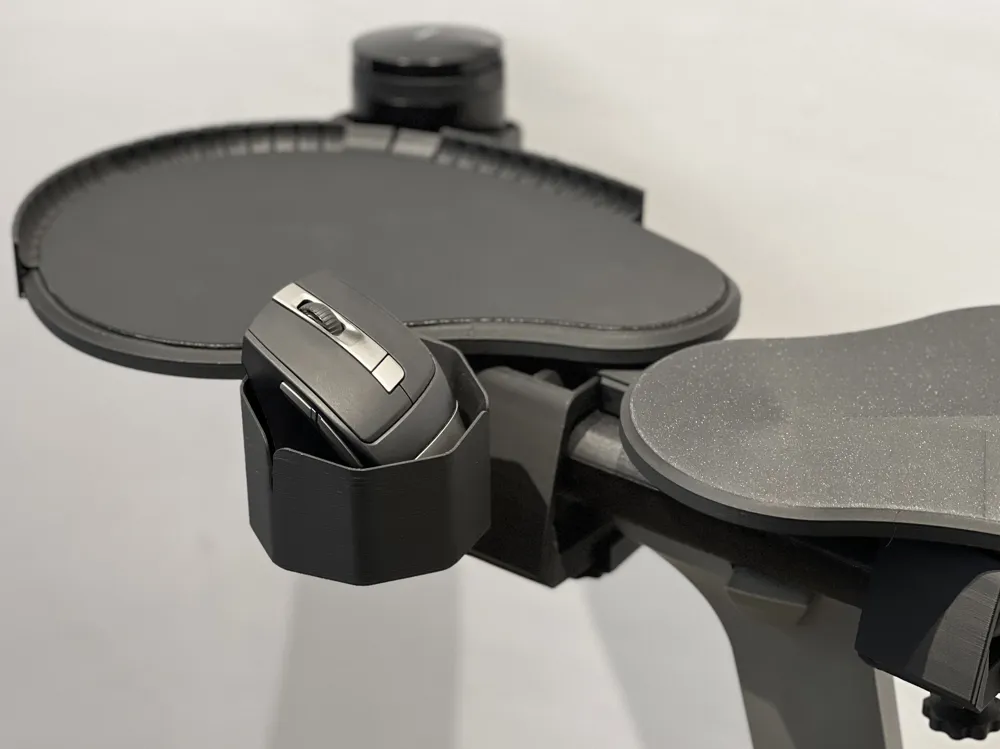
B1: Mouse operating area tray, insert into the front round hole of A and then fix it with B2 from behind by screwing it on. If fully tightened, the tray cannot rotate; loosening it by two turns allows you to adjust the tray angle at any time, and you can also lock it when in use
C1: Elbow support plate, insert into the round hole below the base and fix with C2 in the same way
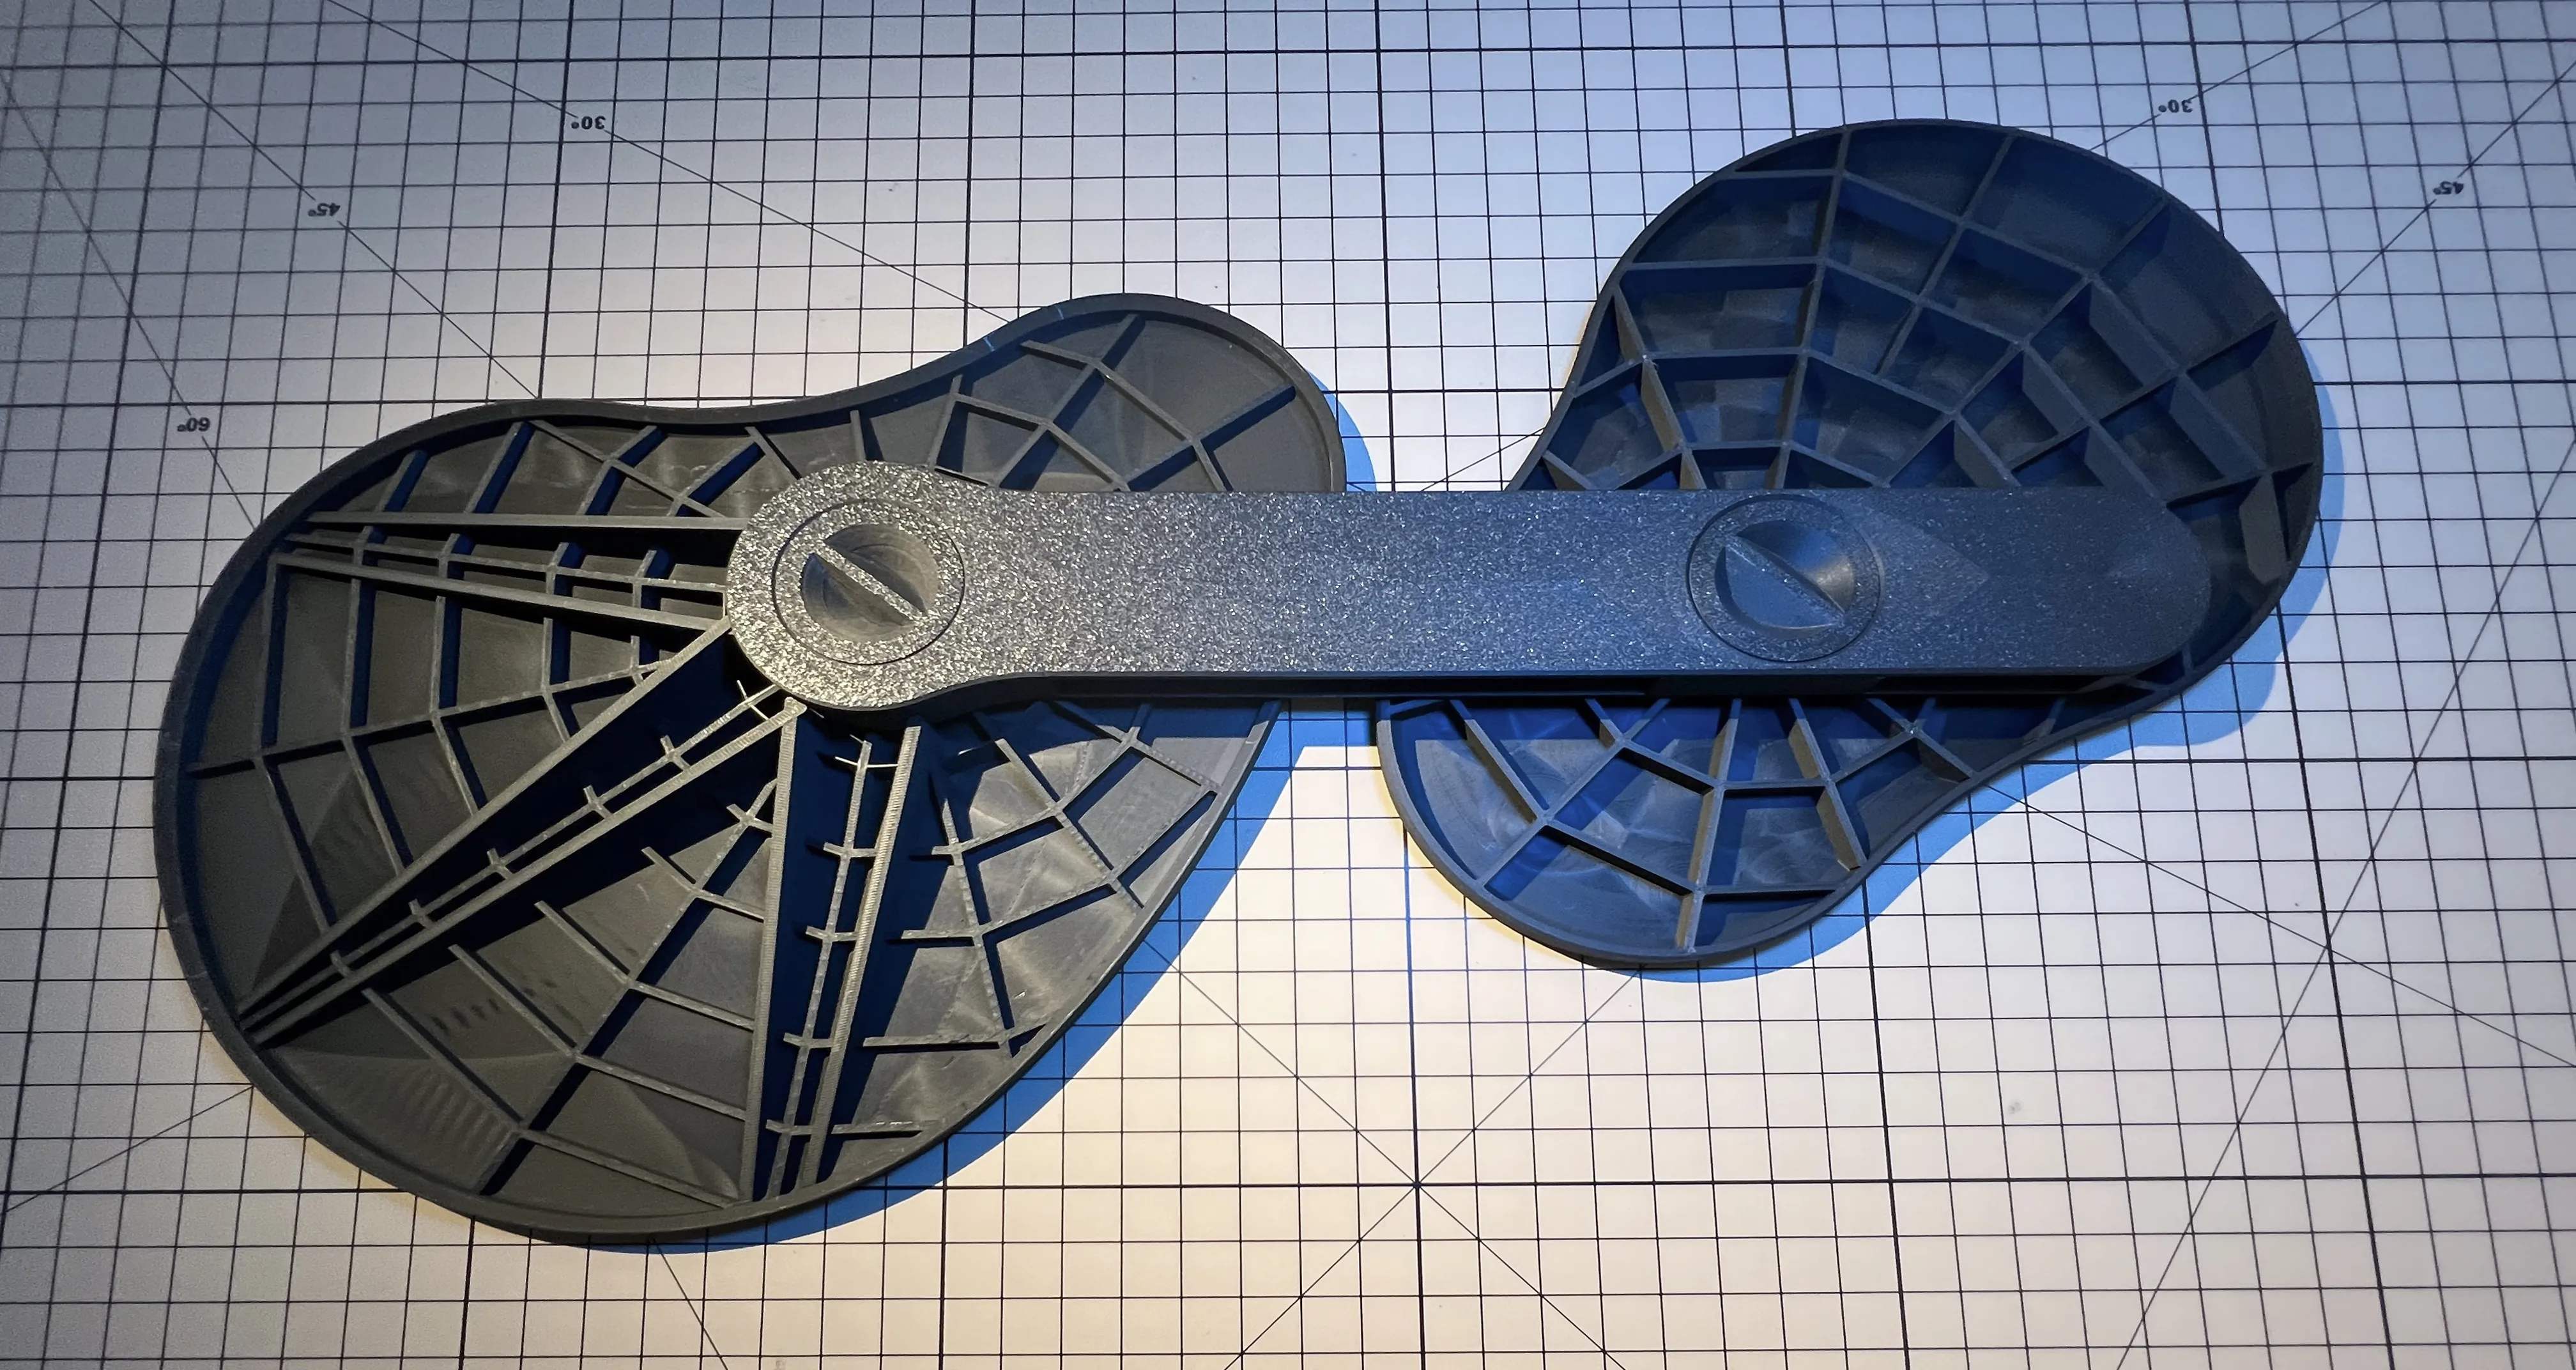
The main body assembly is now complete; you can try placing it on the armrest and adjusting its position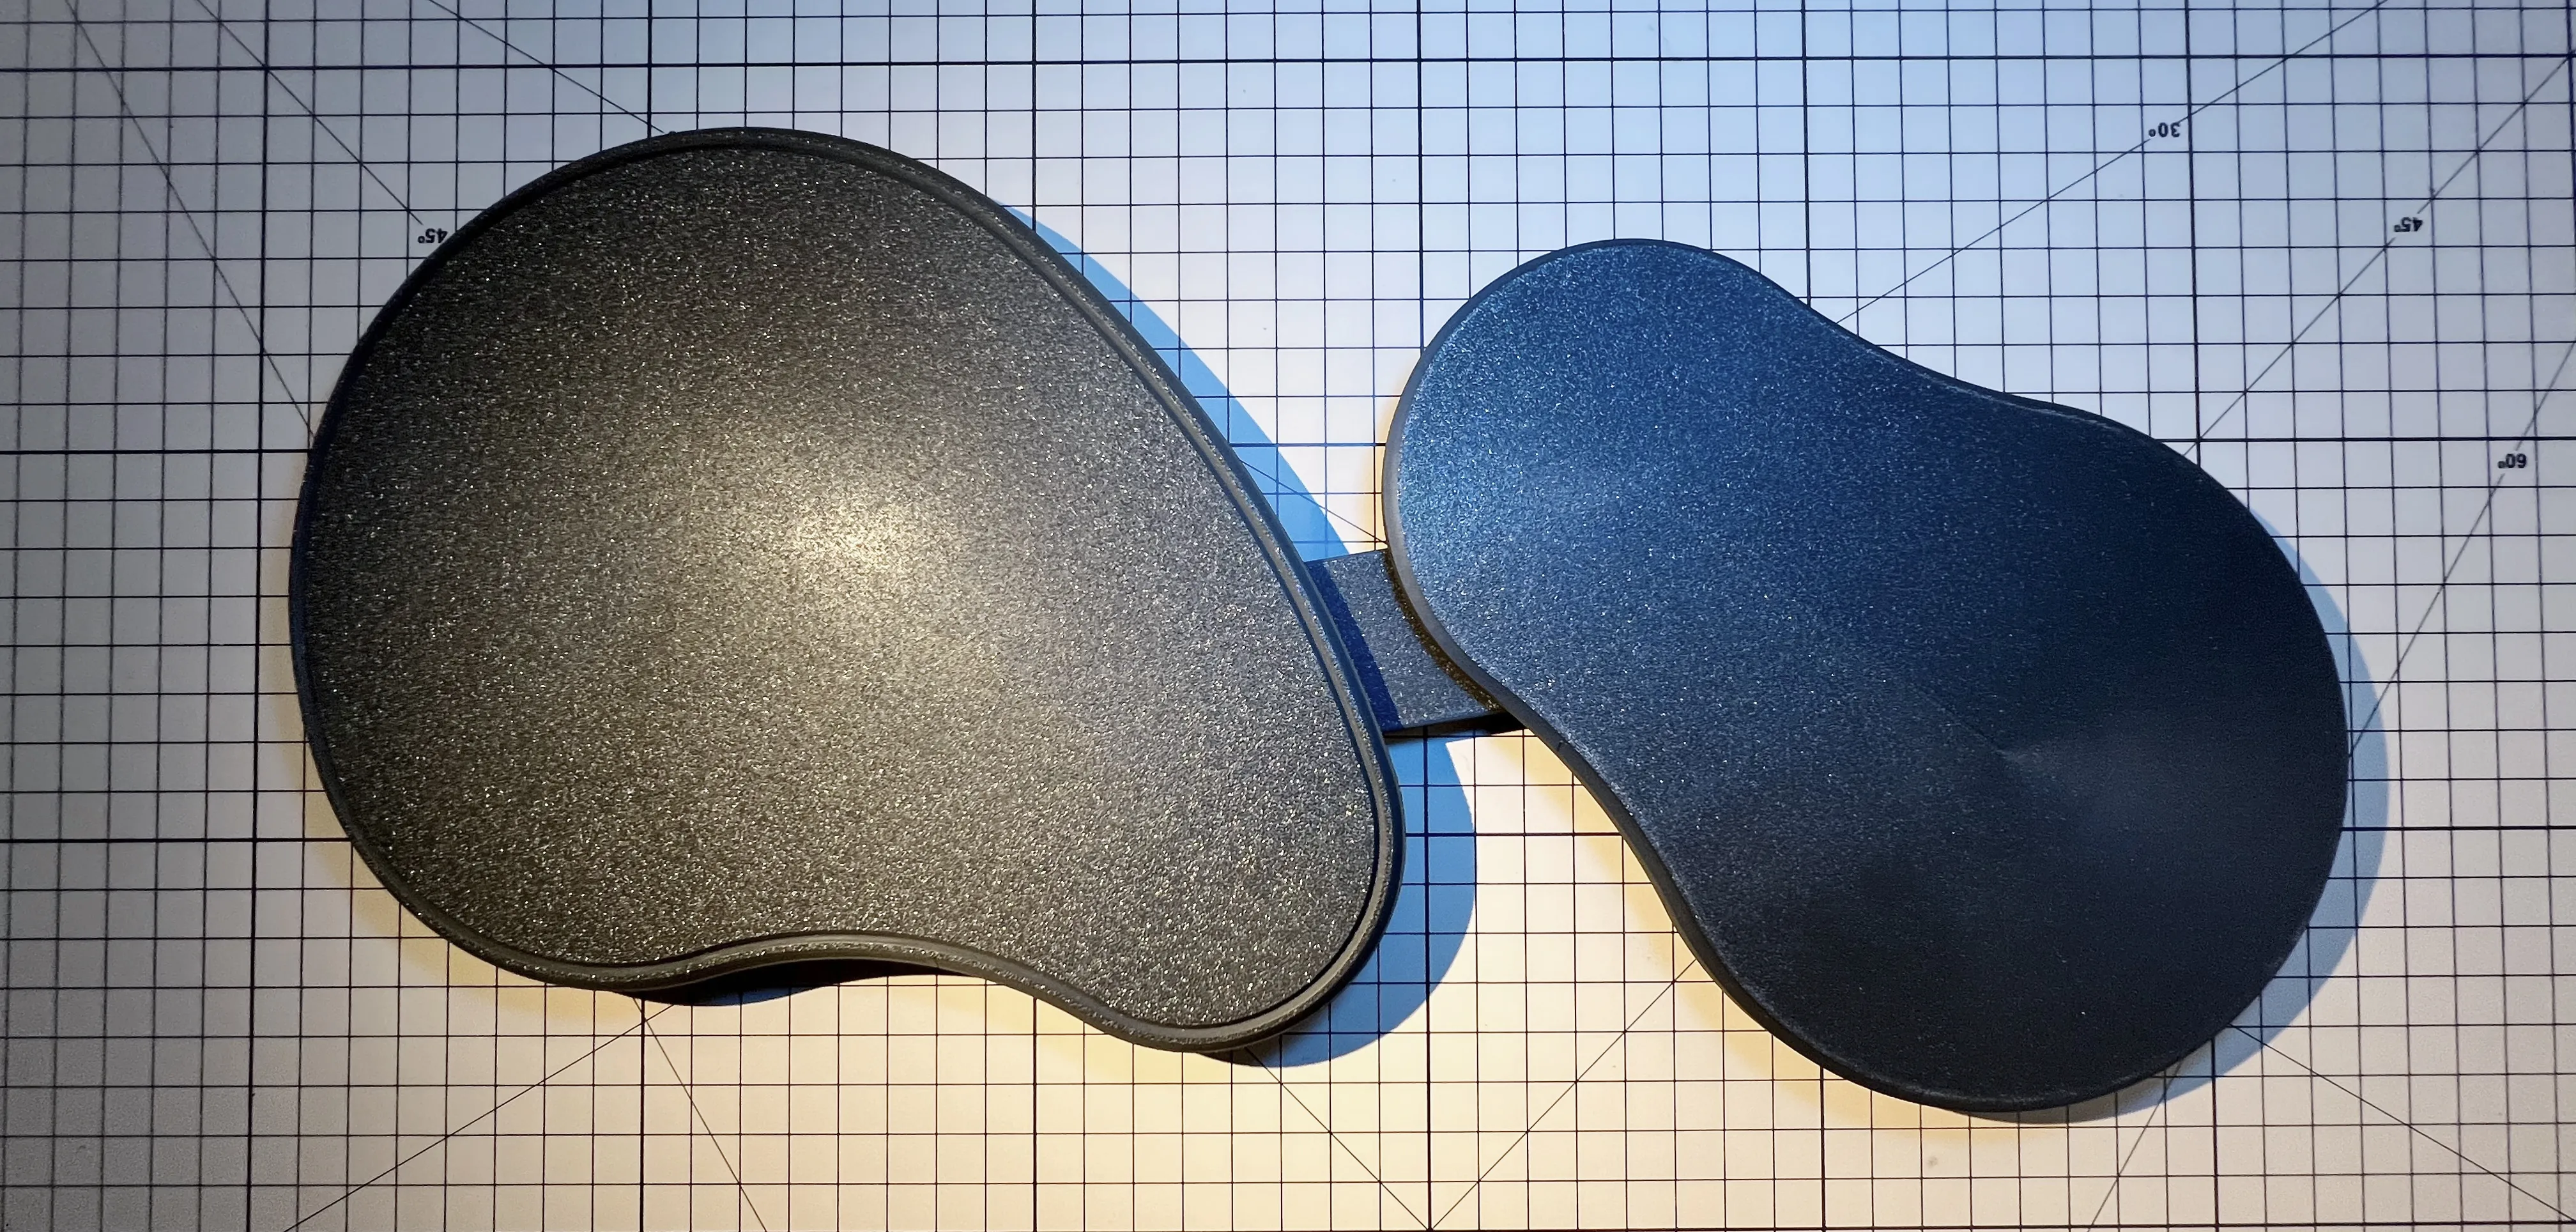
Fixing Accessories:
Please measure the thickness and width of your armrest before choosing the appropriate print(Two sets are needed for front and back installation).
D/E+F+G are the buckles that connect the base to the armrest
(*Model G has been updated and differs slightly from the photos)
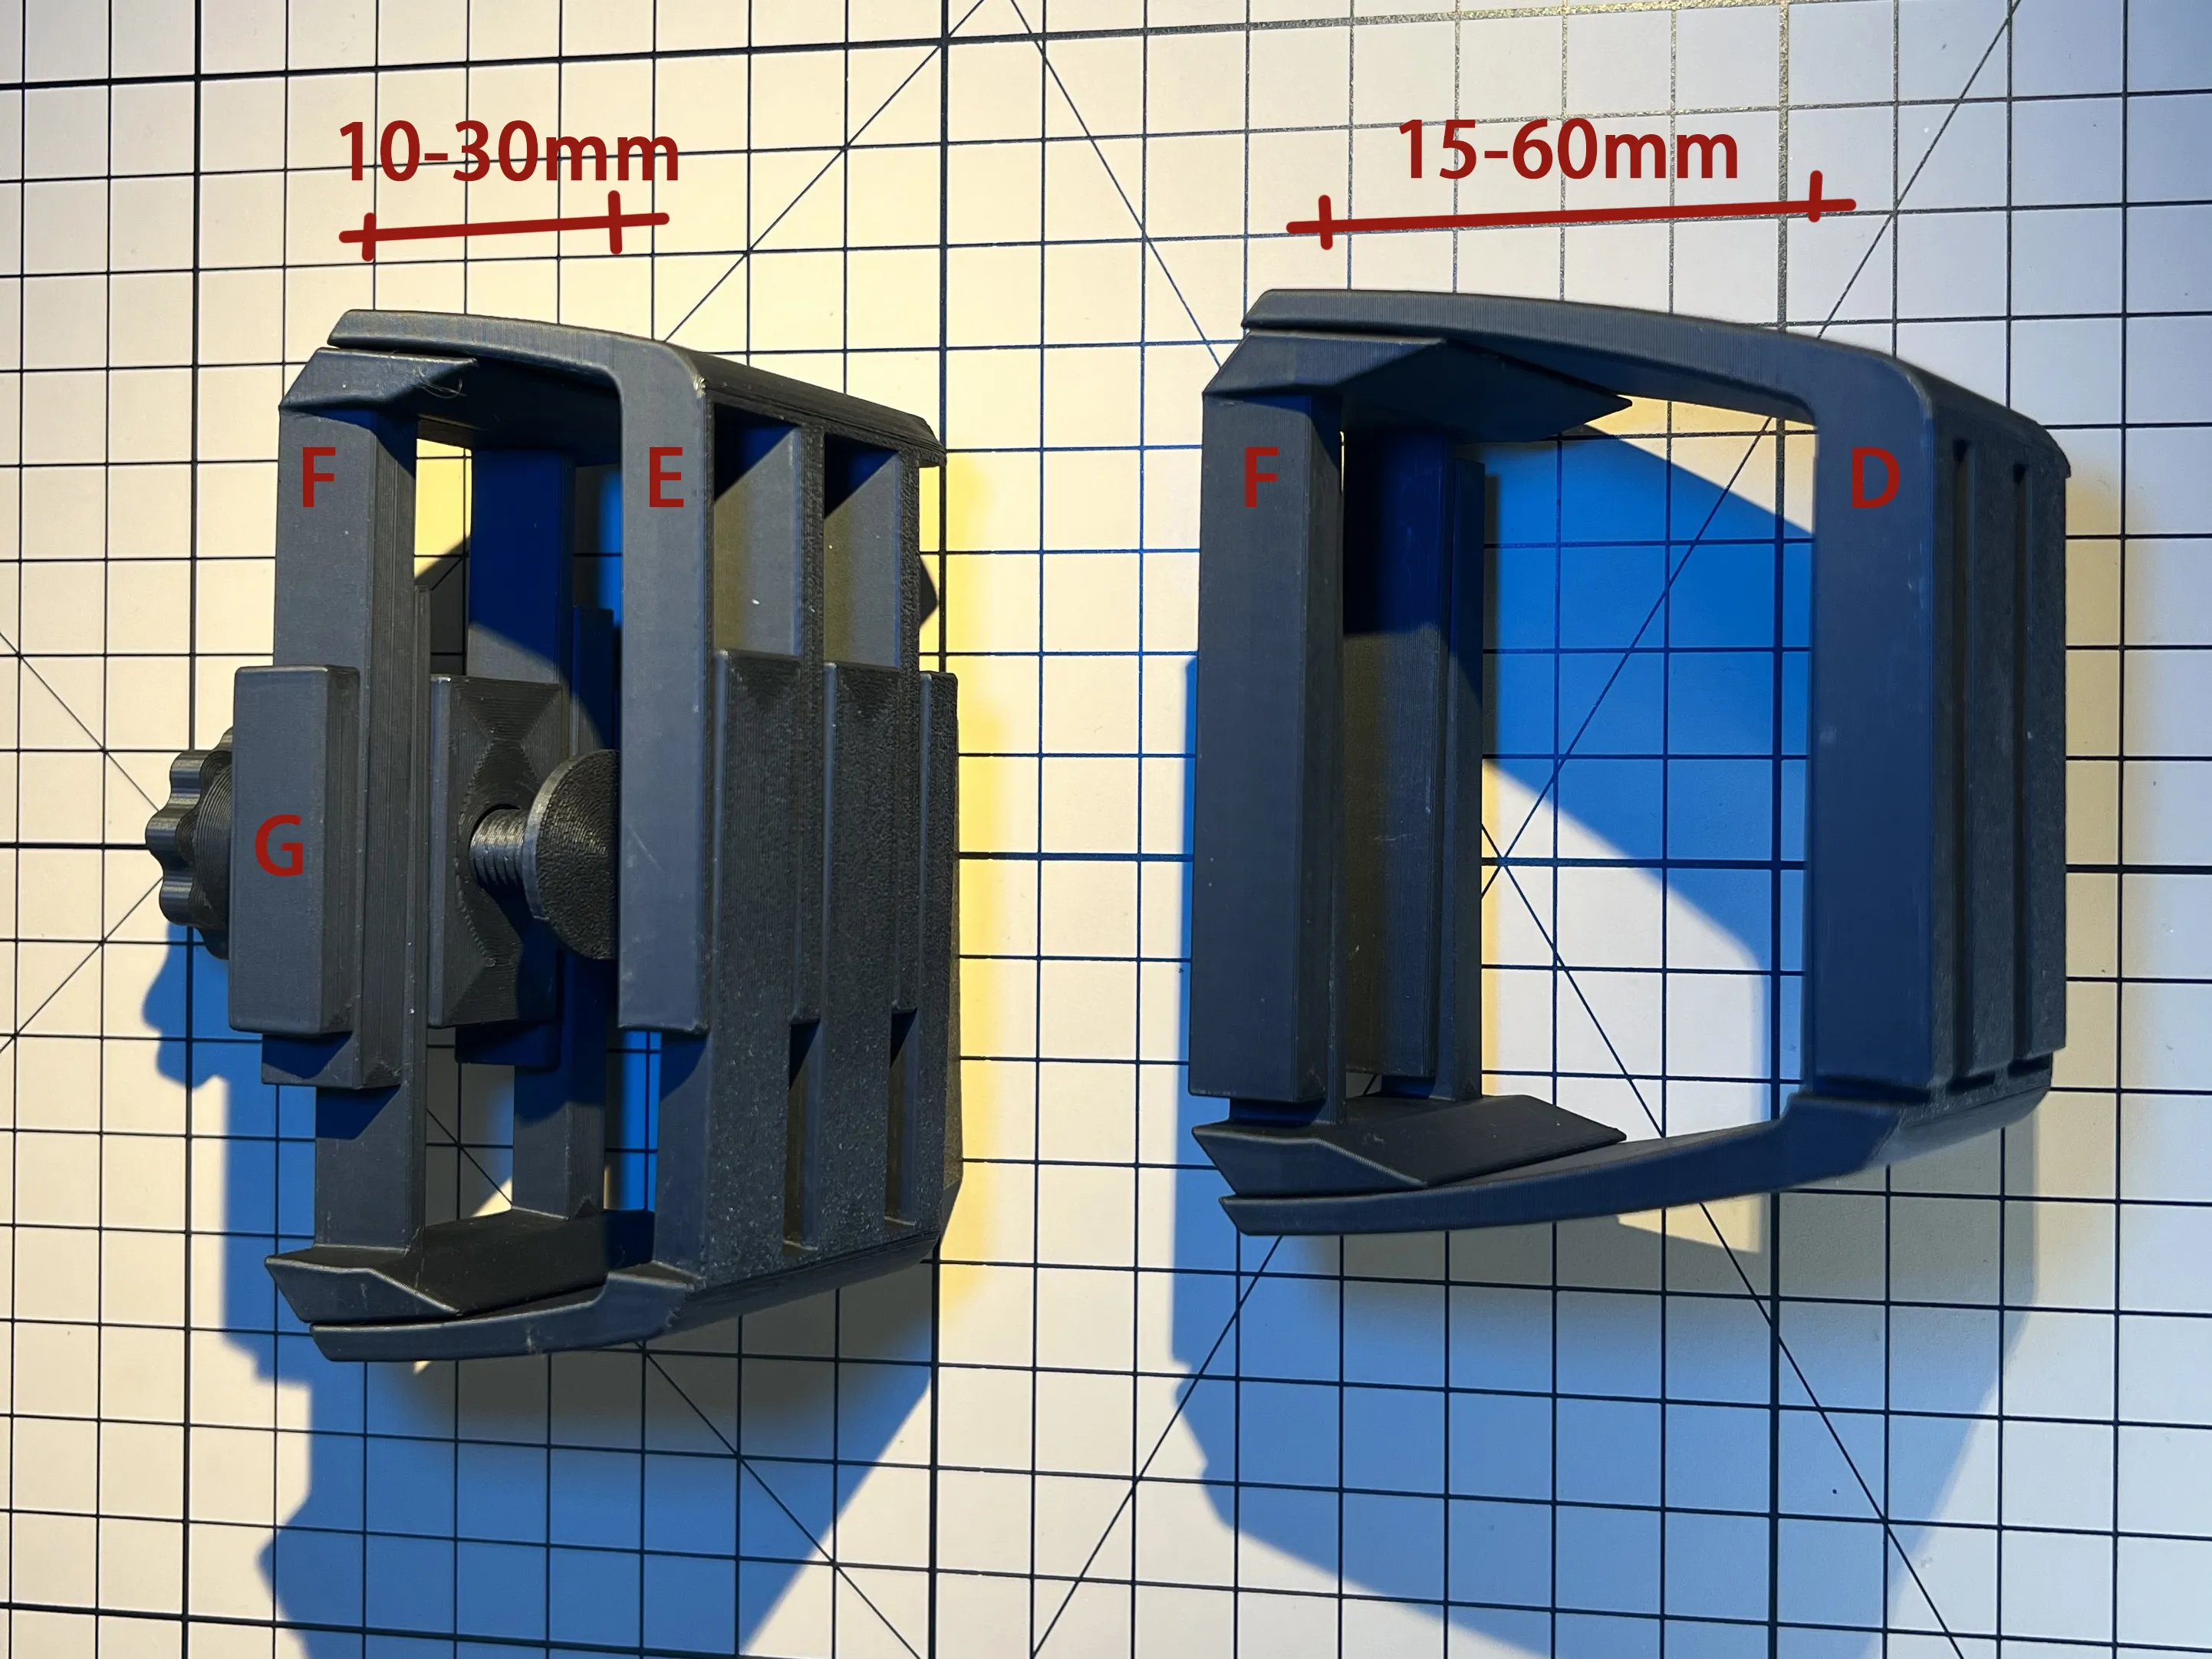
- D/E are two telescopic accessories, left and right, with a total of four specifications in two lengths and two heights to choose from for printing
When printing the D/E series, it is recommended to enable variable layer height, setting the layer height for the rising bottom curve to 0.08 to 0.1 for a more natural curve
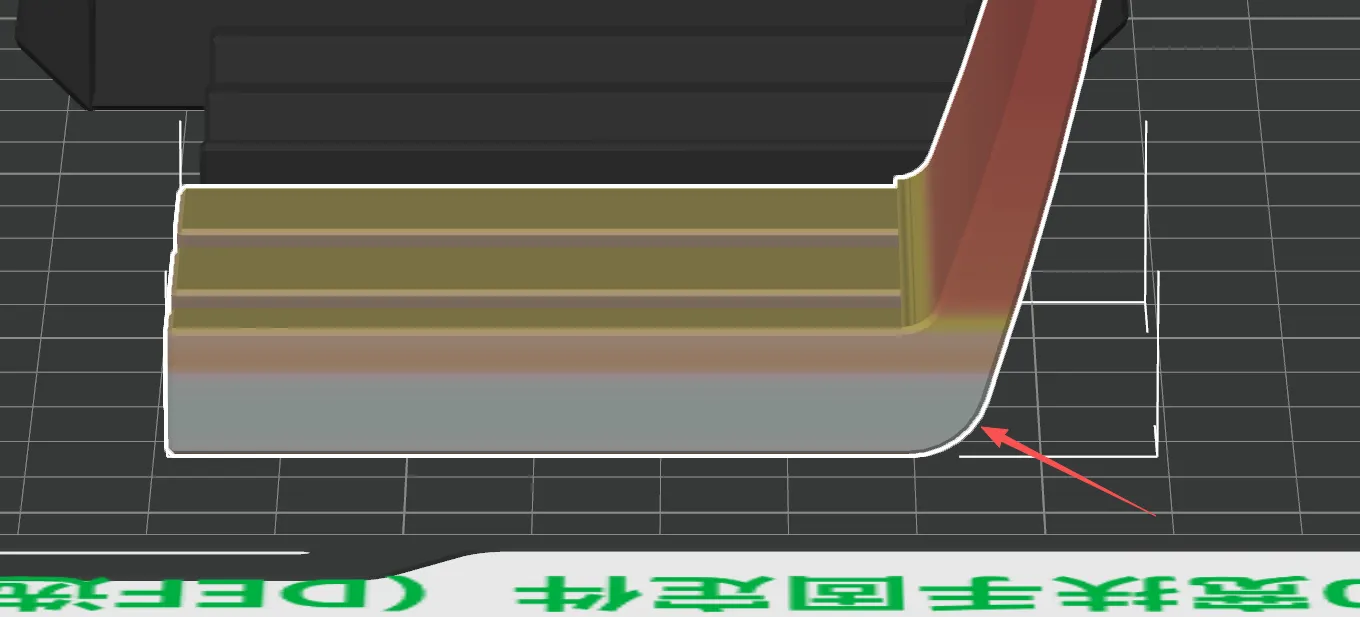
- F also has two telescopic accessories, left and right, with a short version available in the file
In most cases, D+F are suitable for armrests of various specifications (i.e., "chair armrest widths from 35 to 100mm, thicknesses from 15 to 60mm," which covers the range of chair armrest specifications I measured around me)
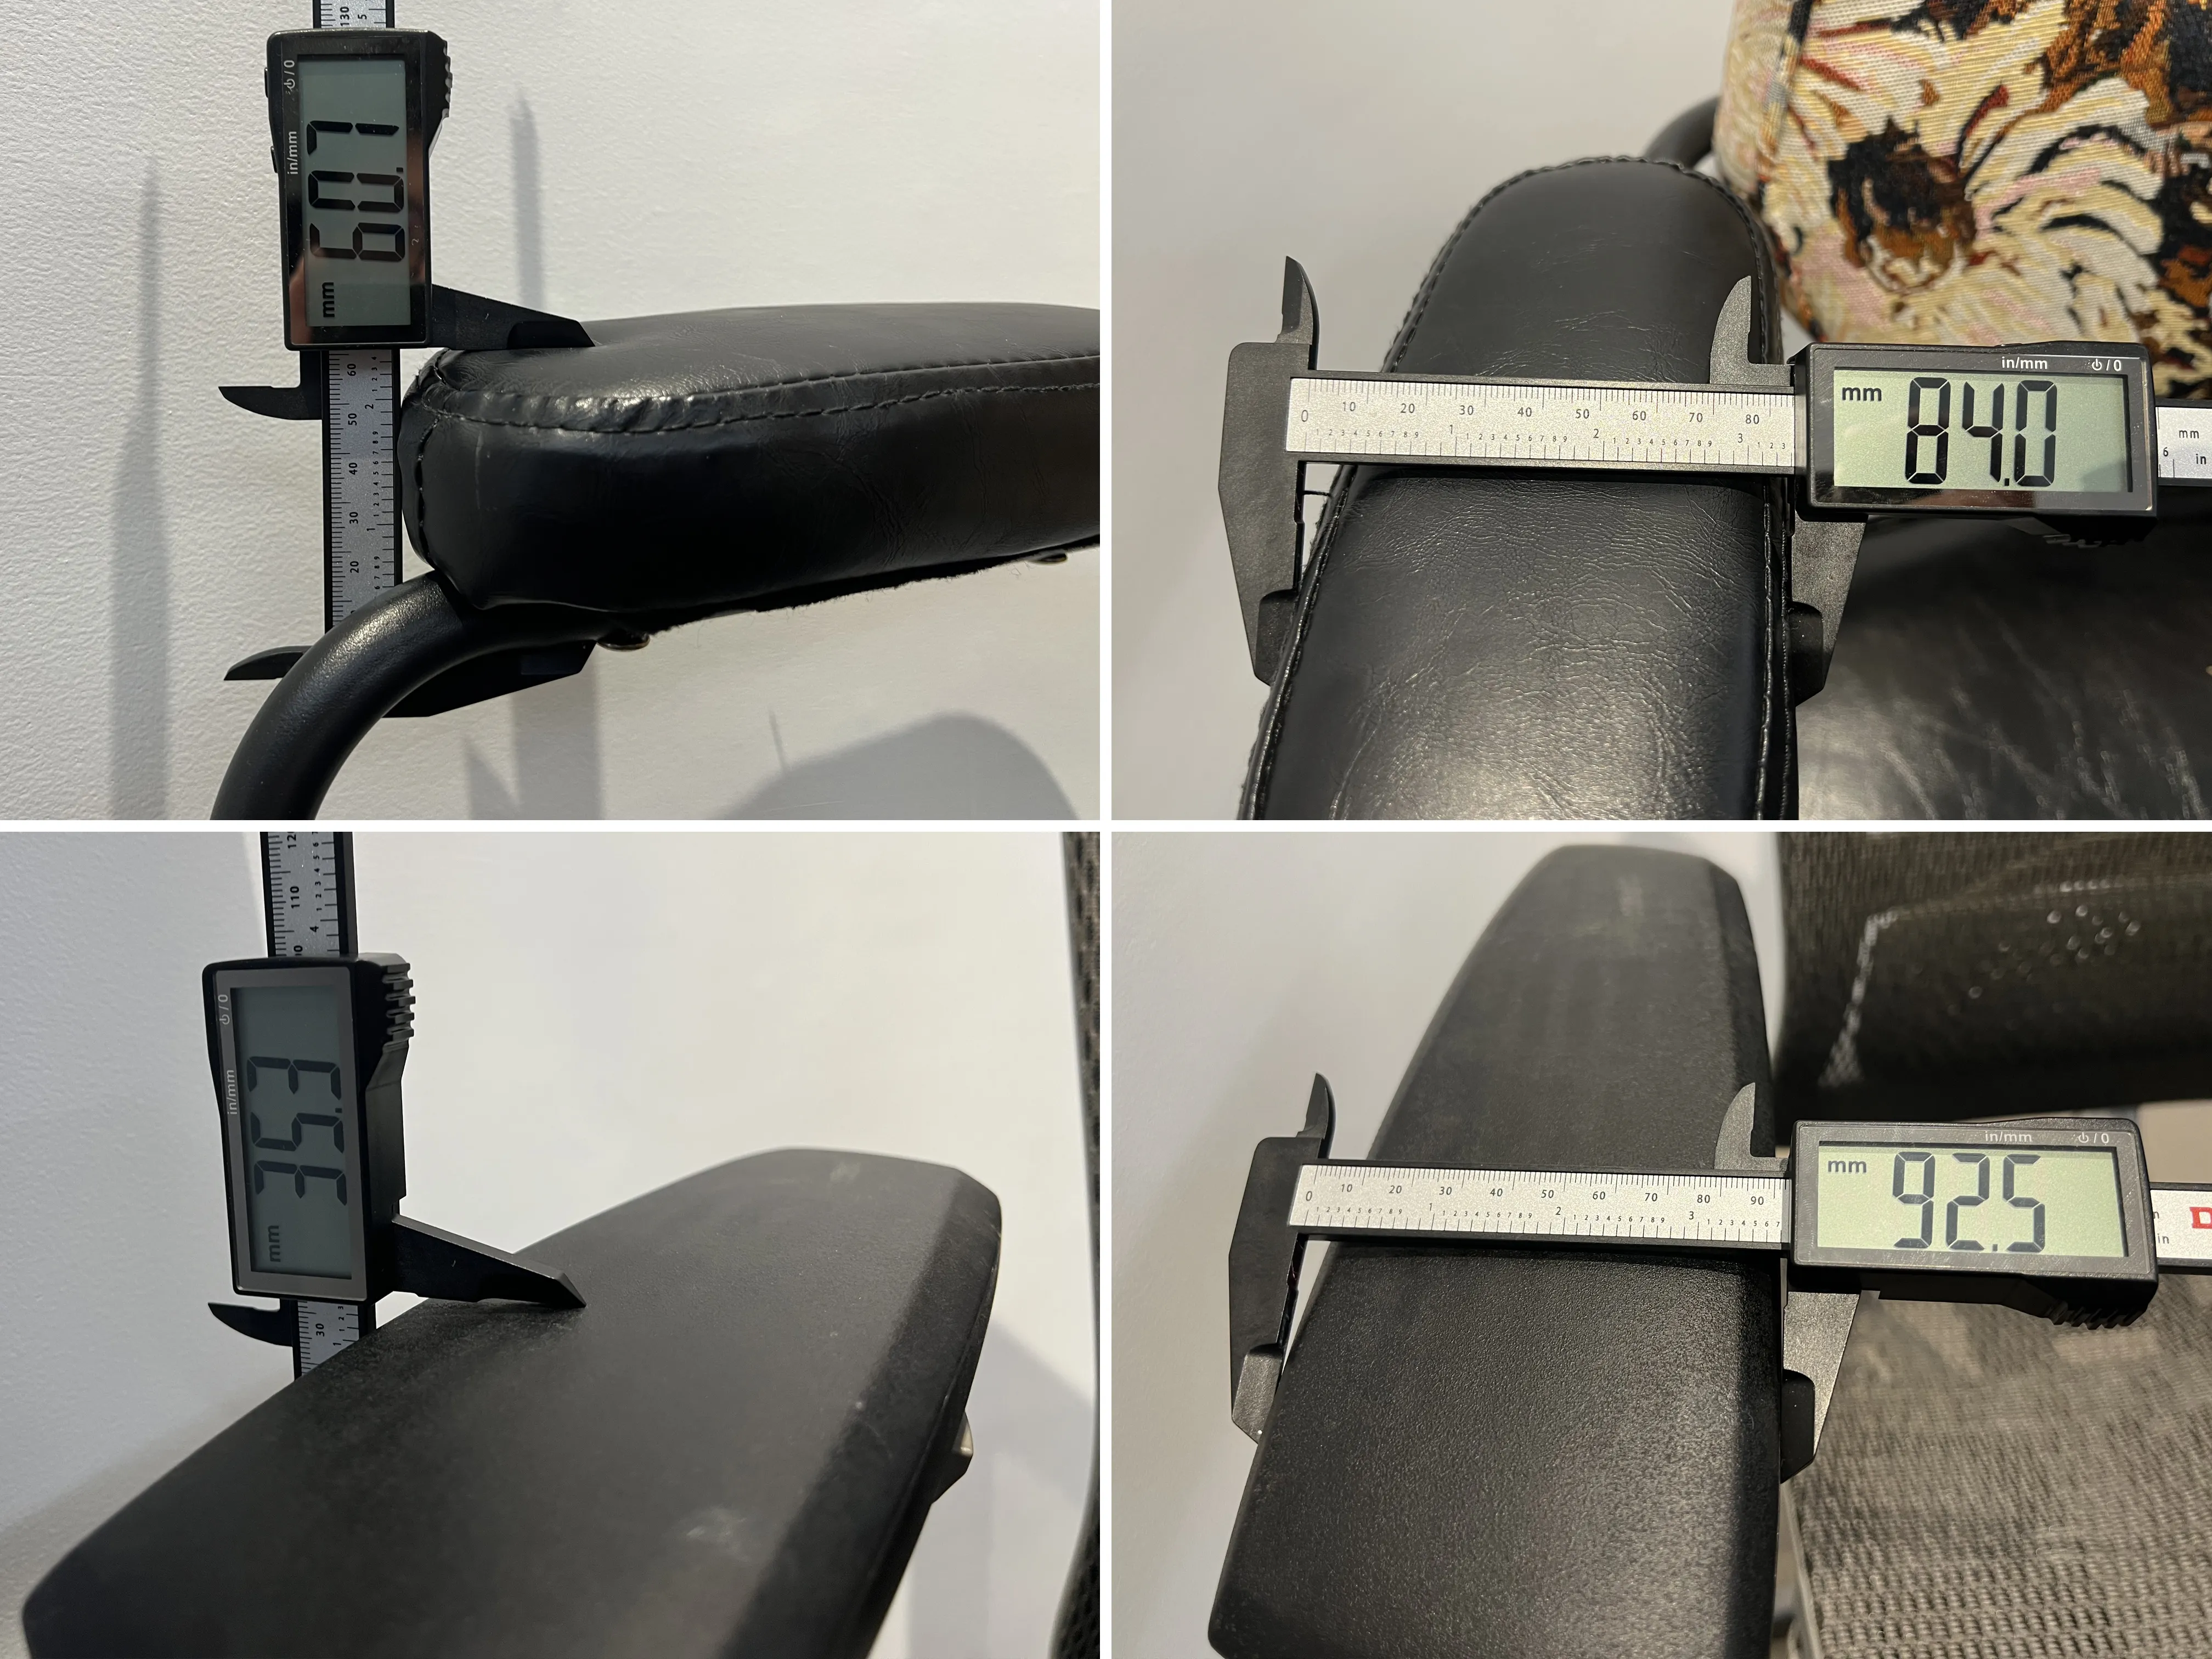
If the armrest thickness is less than 30mm, you can choose the E series short model (F fasteners are universal)
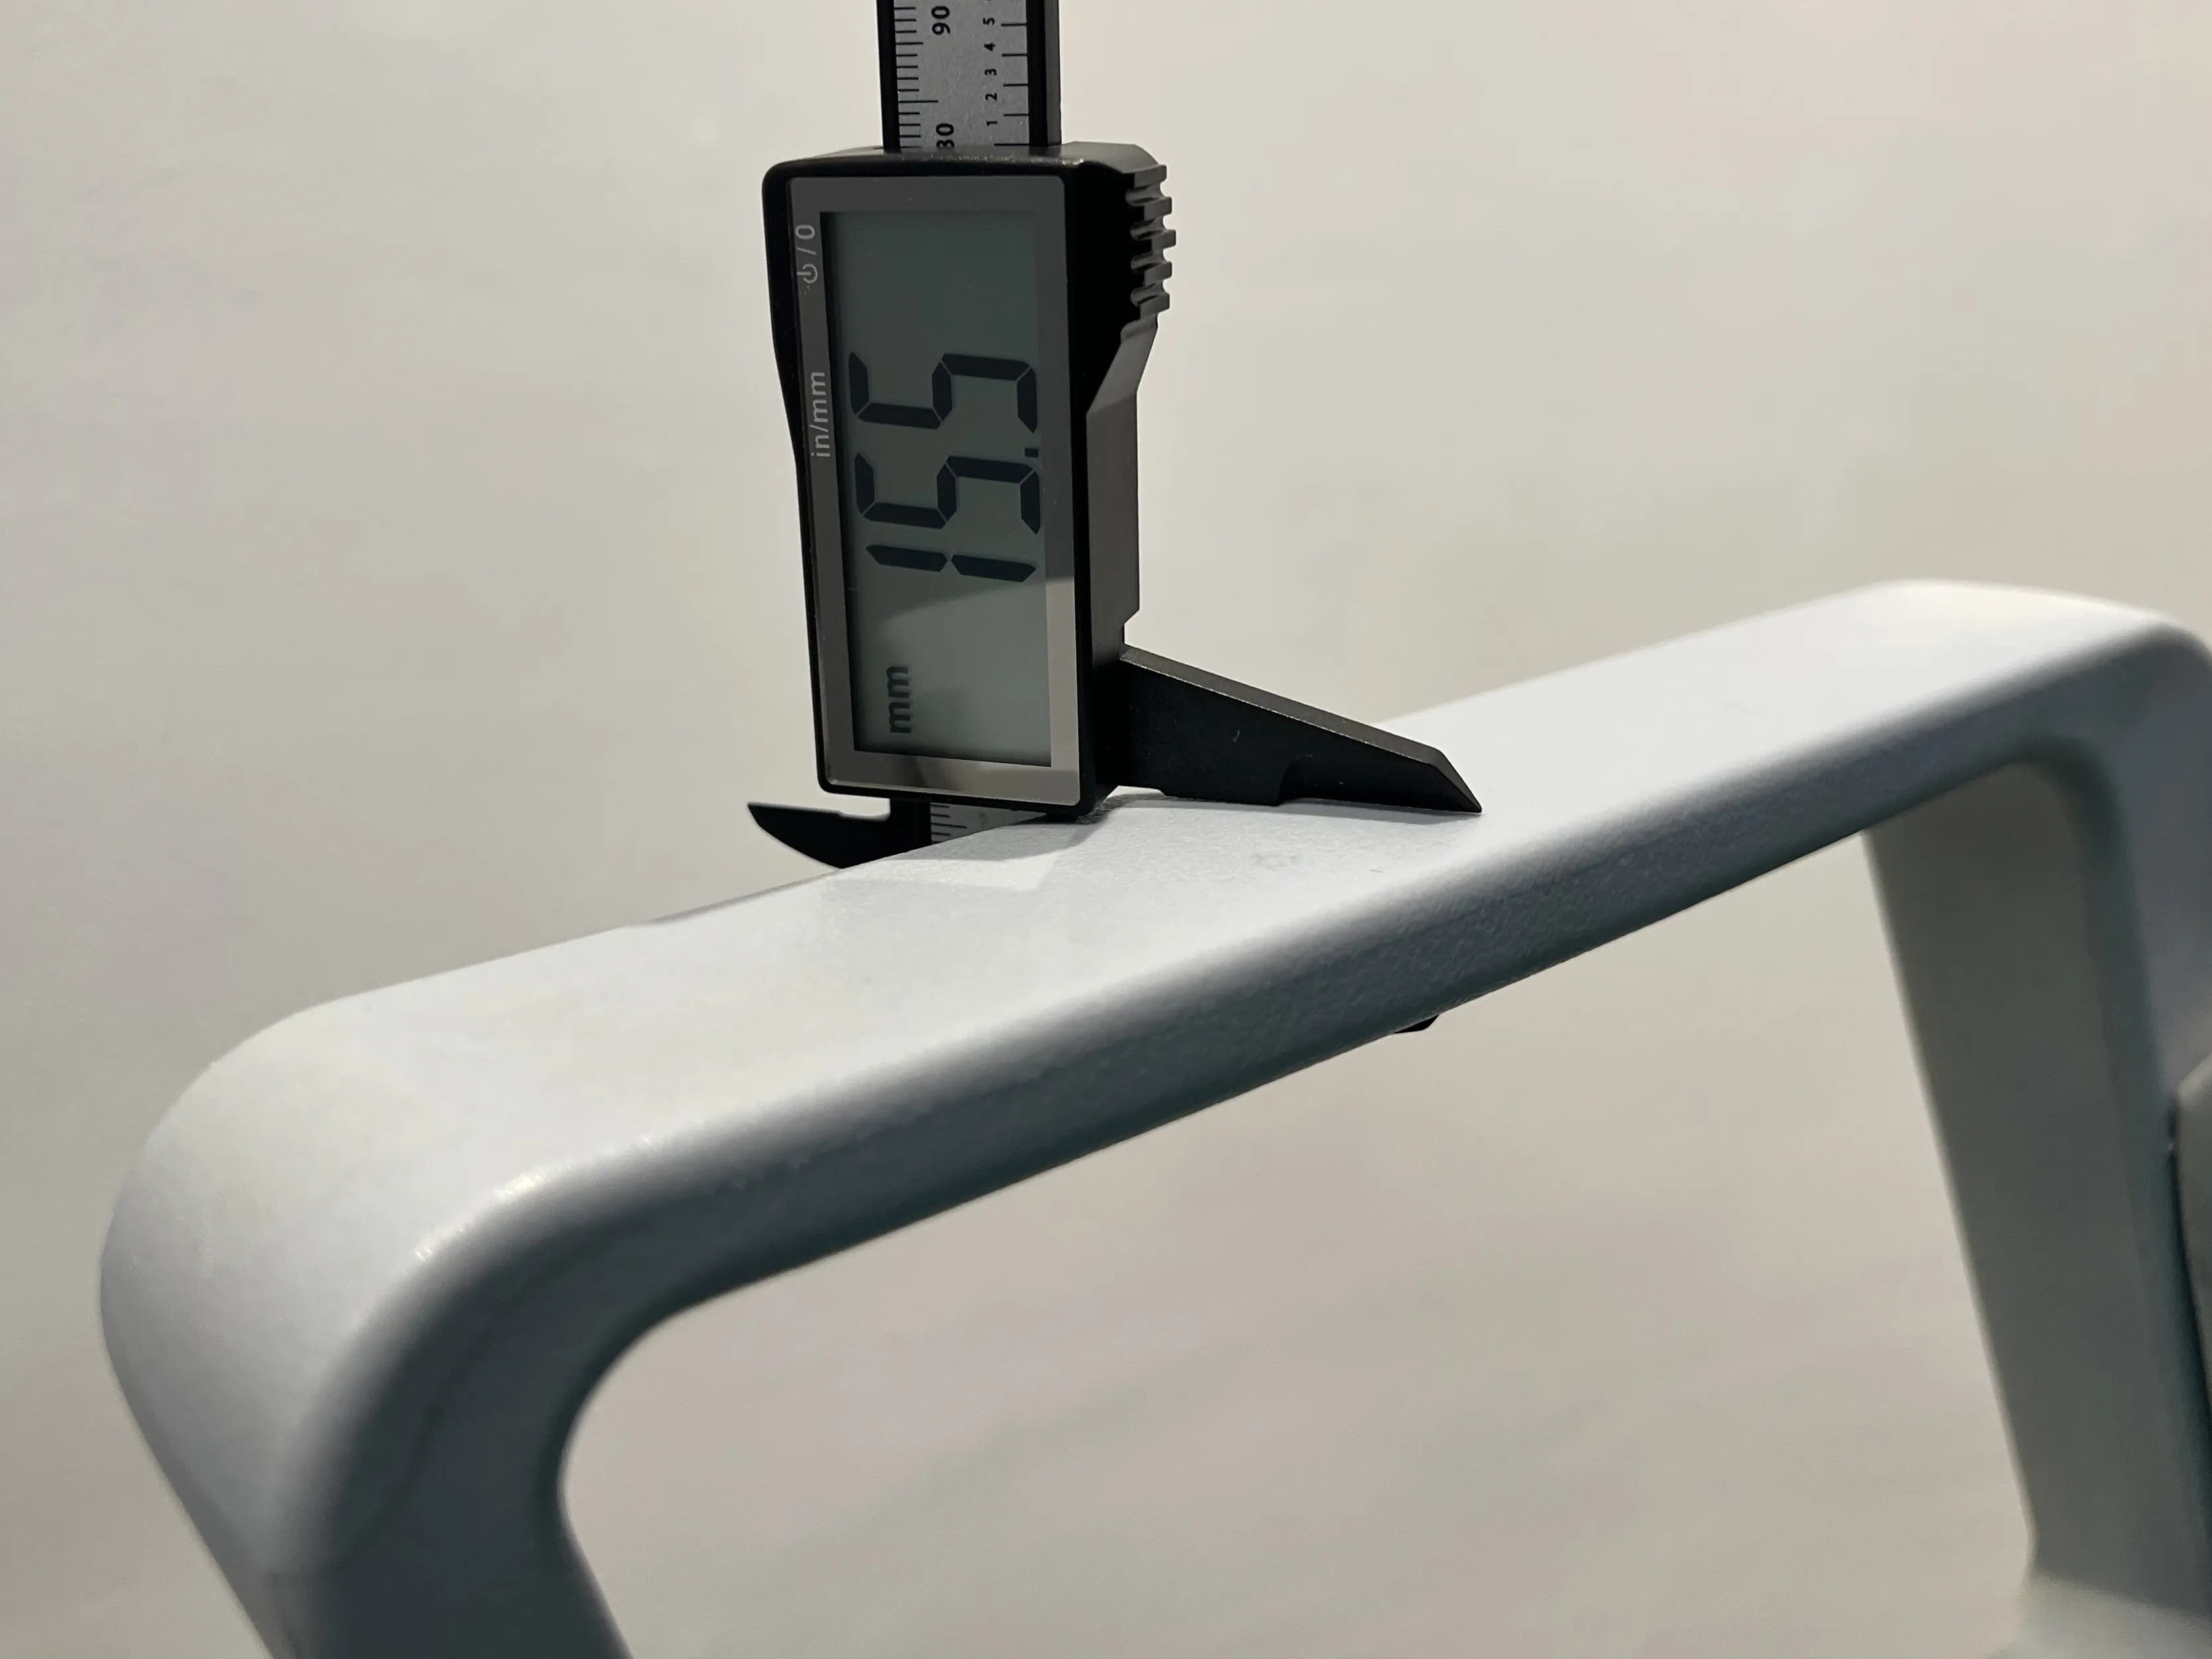
If the armrest width is between 40-50mm, you can choose to print the G-40 series in the file, which also has two specifications, tall and short, based on armrest thickness
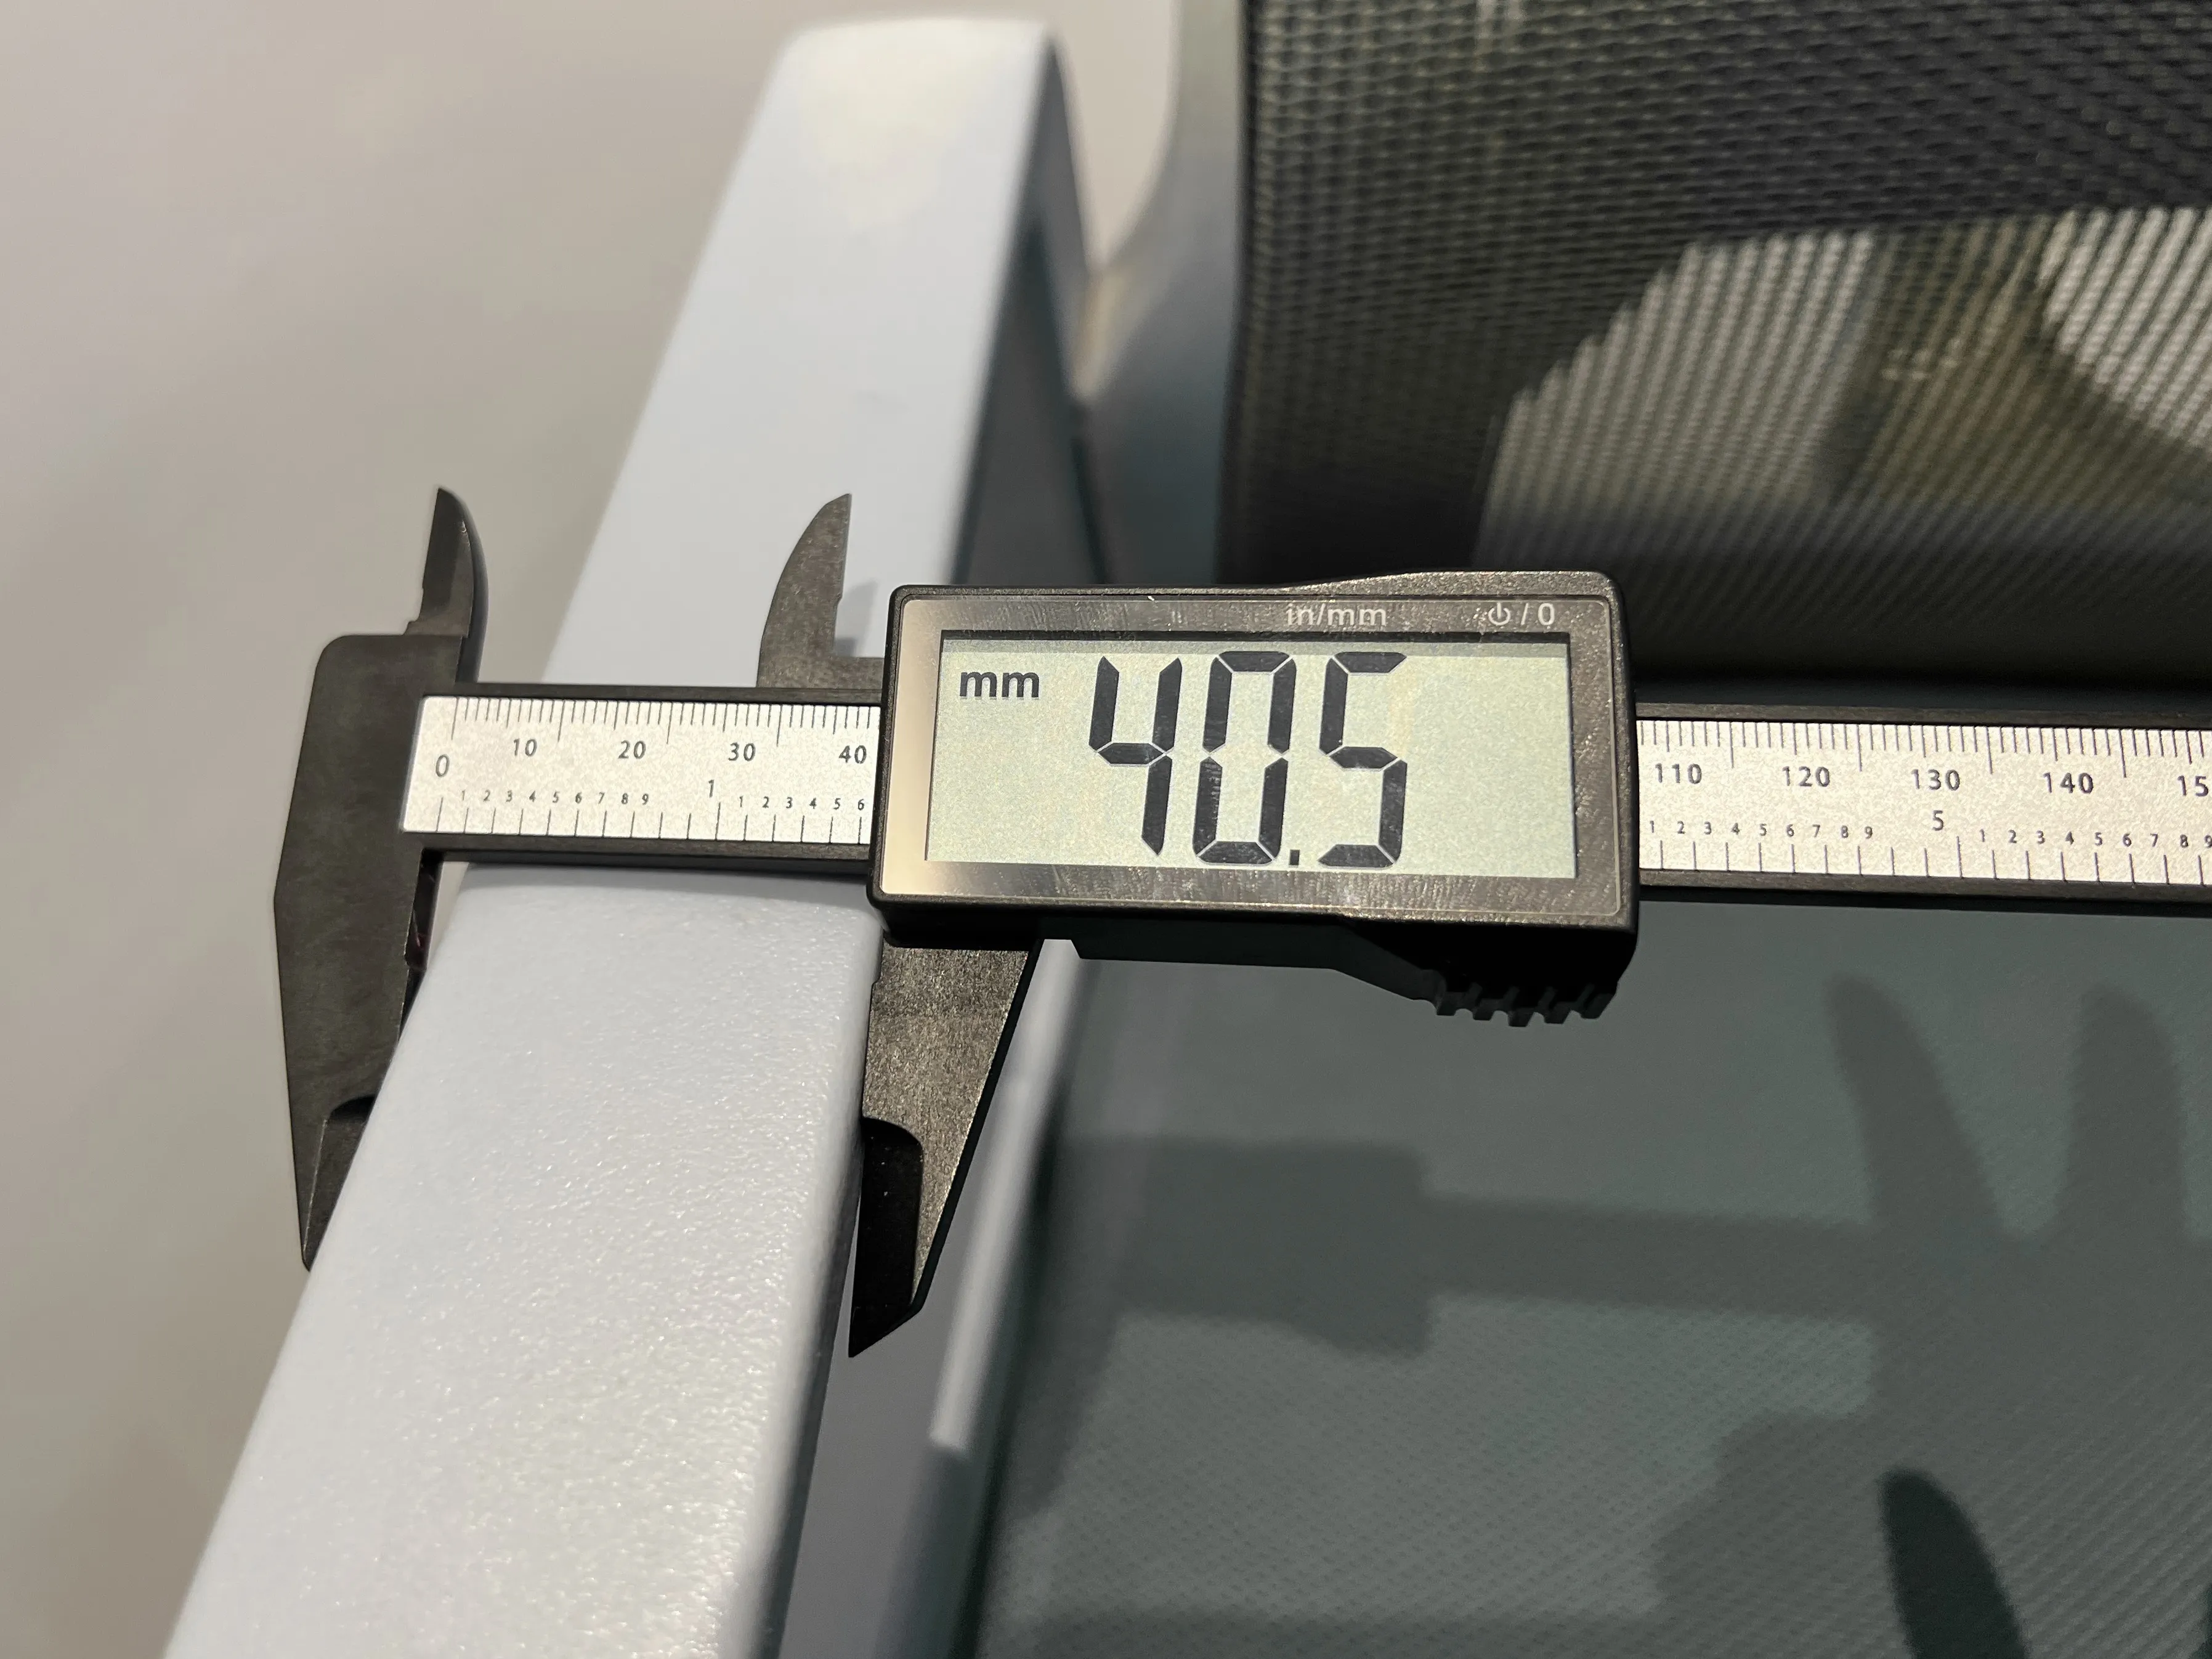
G1-3 accessories are universal, print two copies directly (The bolt base in the file has already had brim manually added; please check if it is missing)
Installation to Armrest:
First, assemble the three parts of G (refer to the up and down installation direction in the pictures); insert F into the corresponding slot of D/E
(*Model G has been updated and differs slightly from the photos)
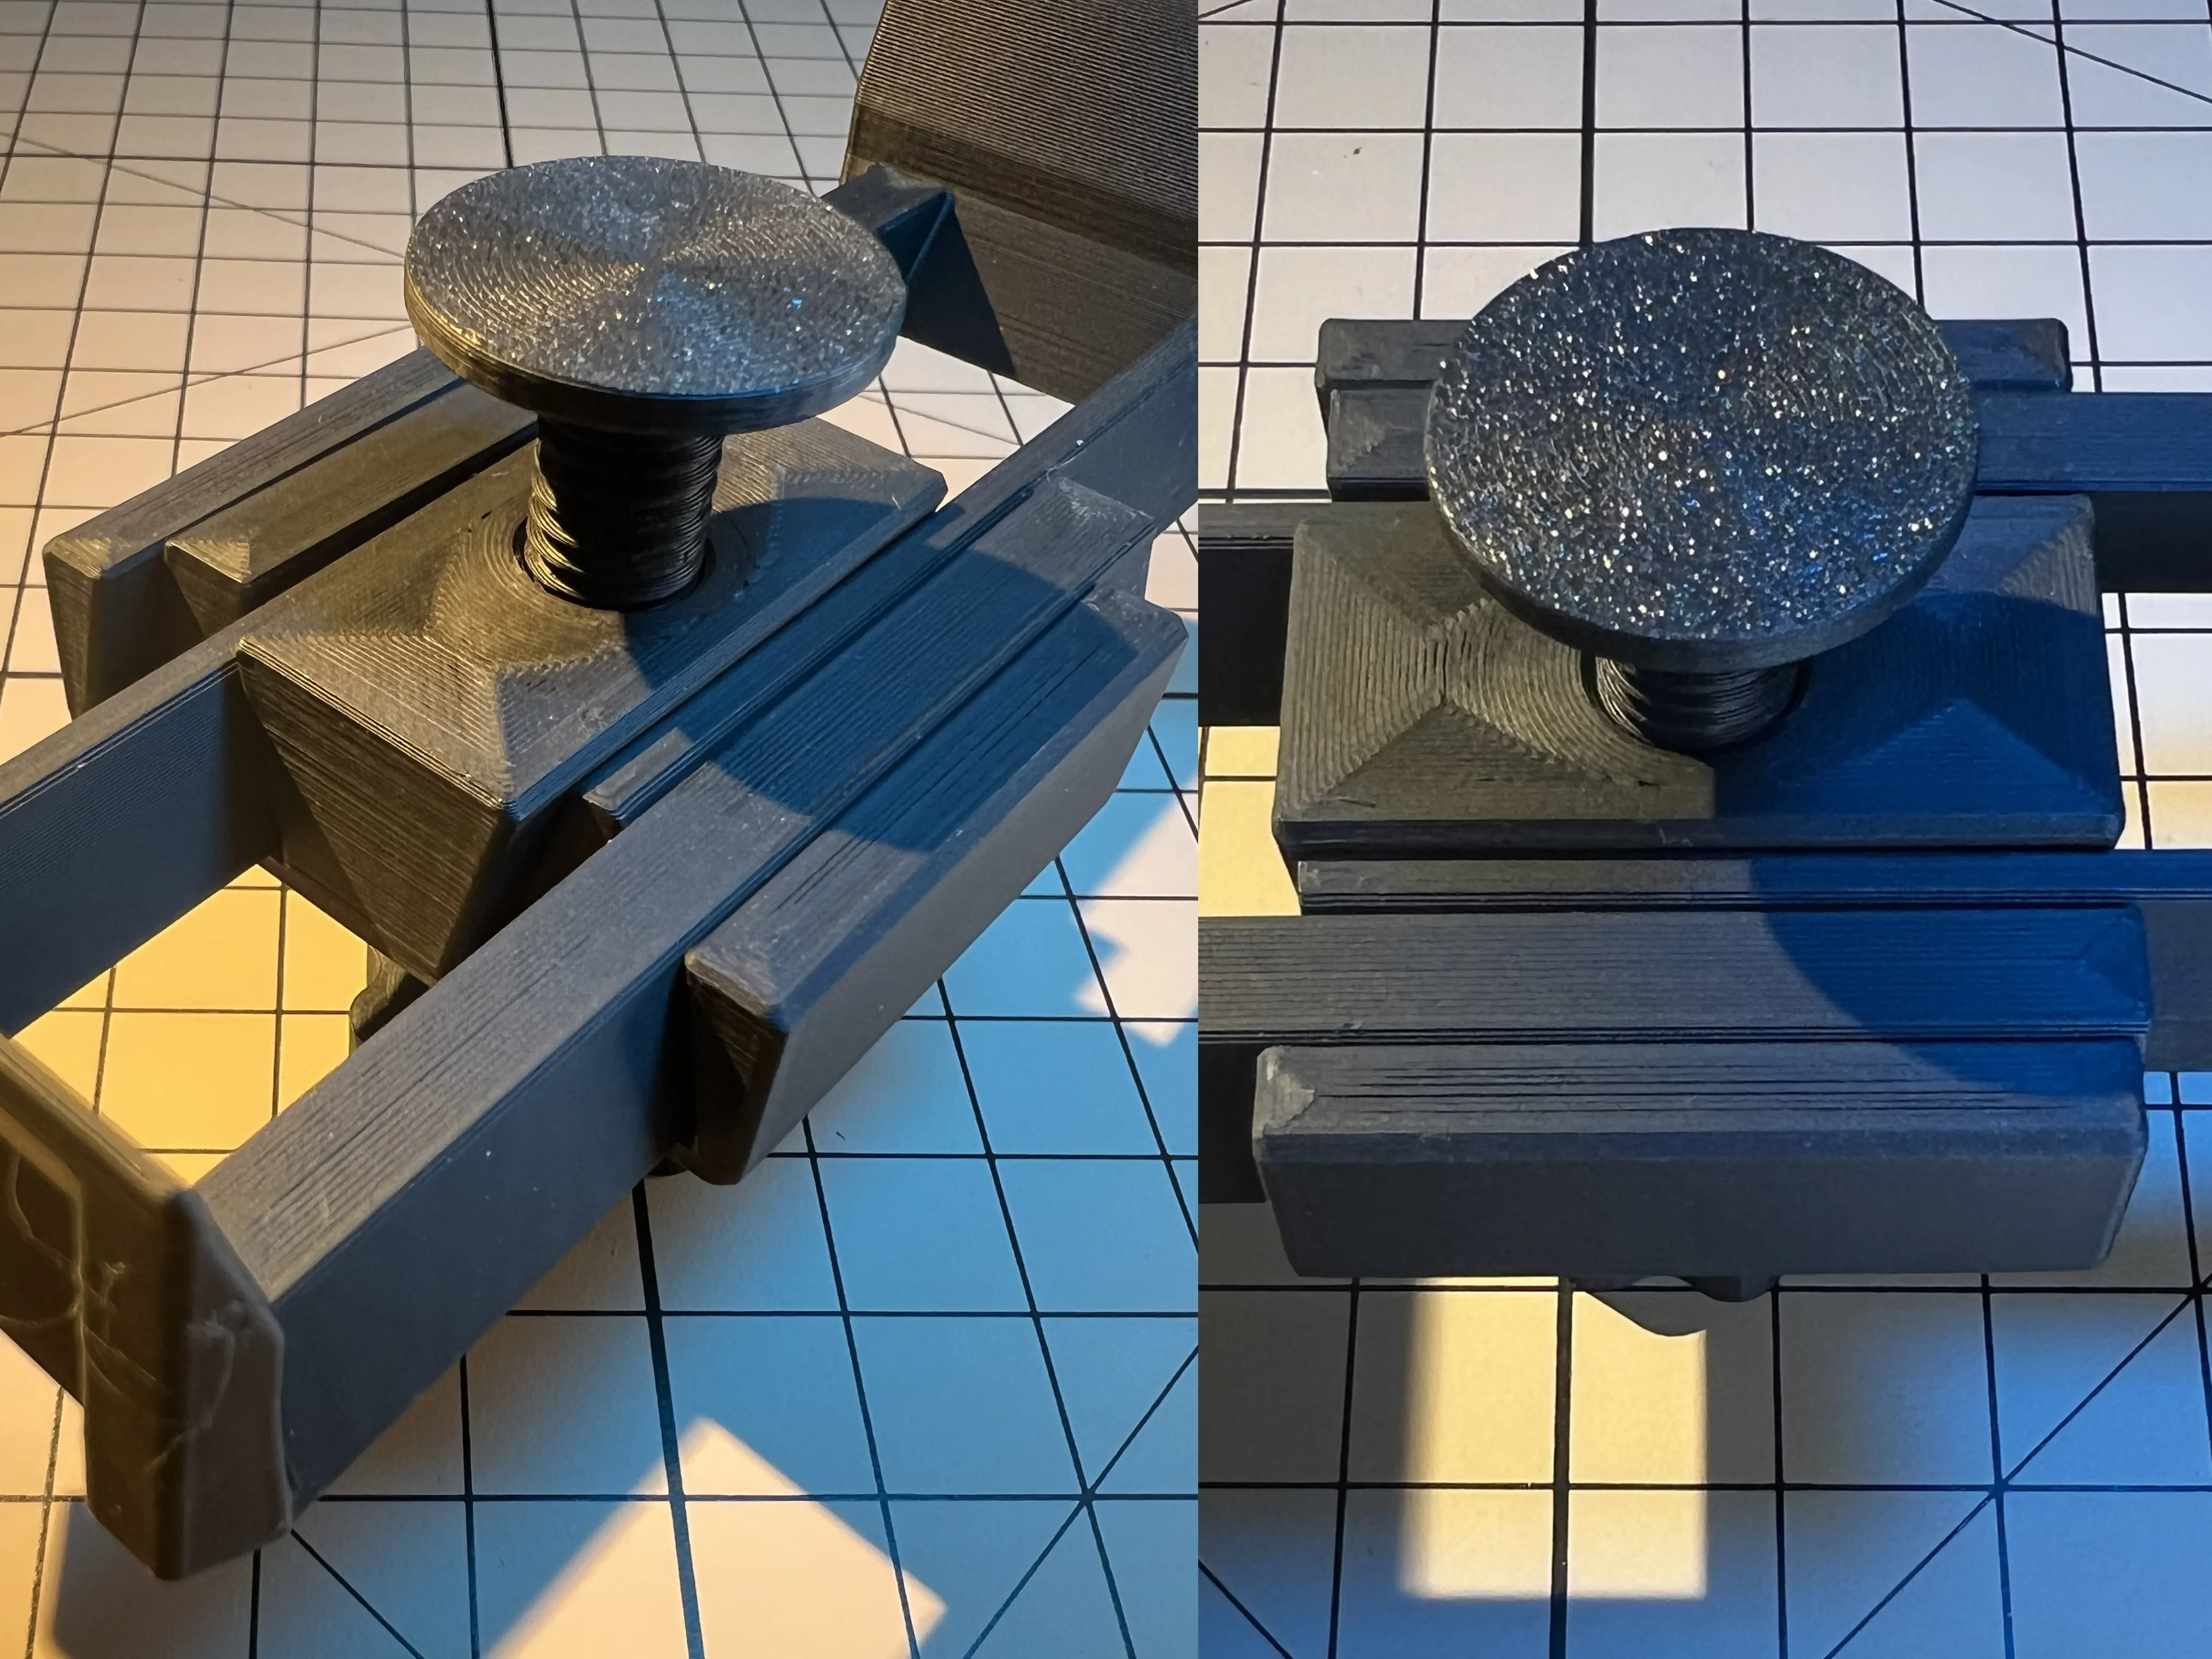
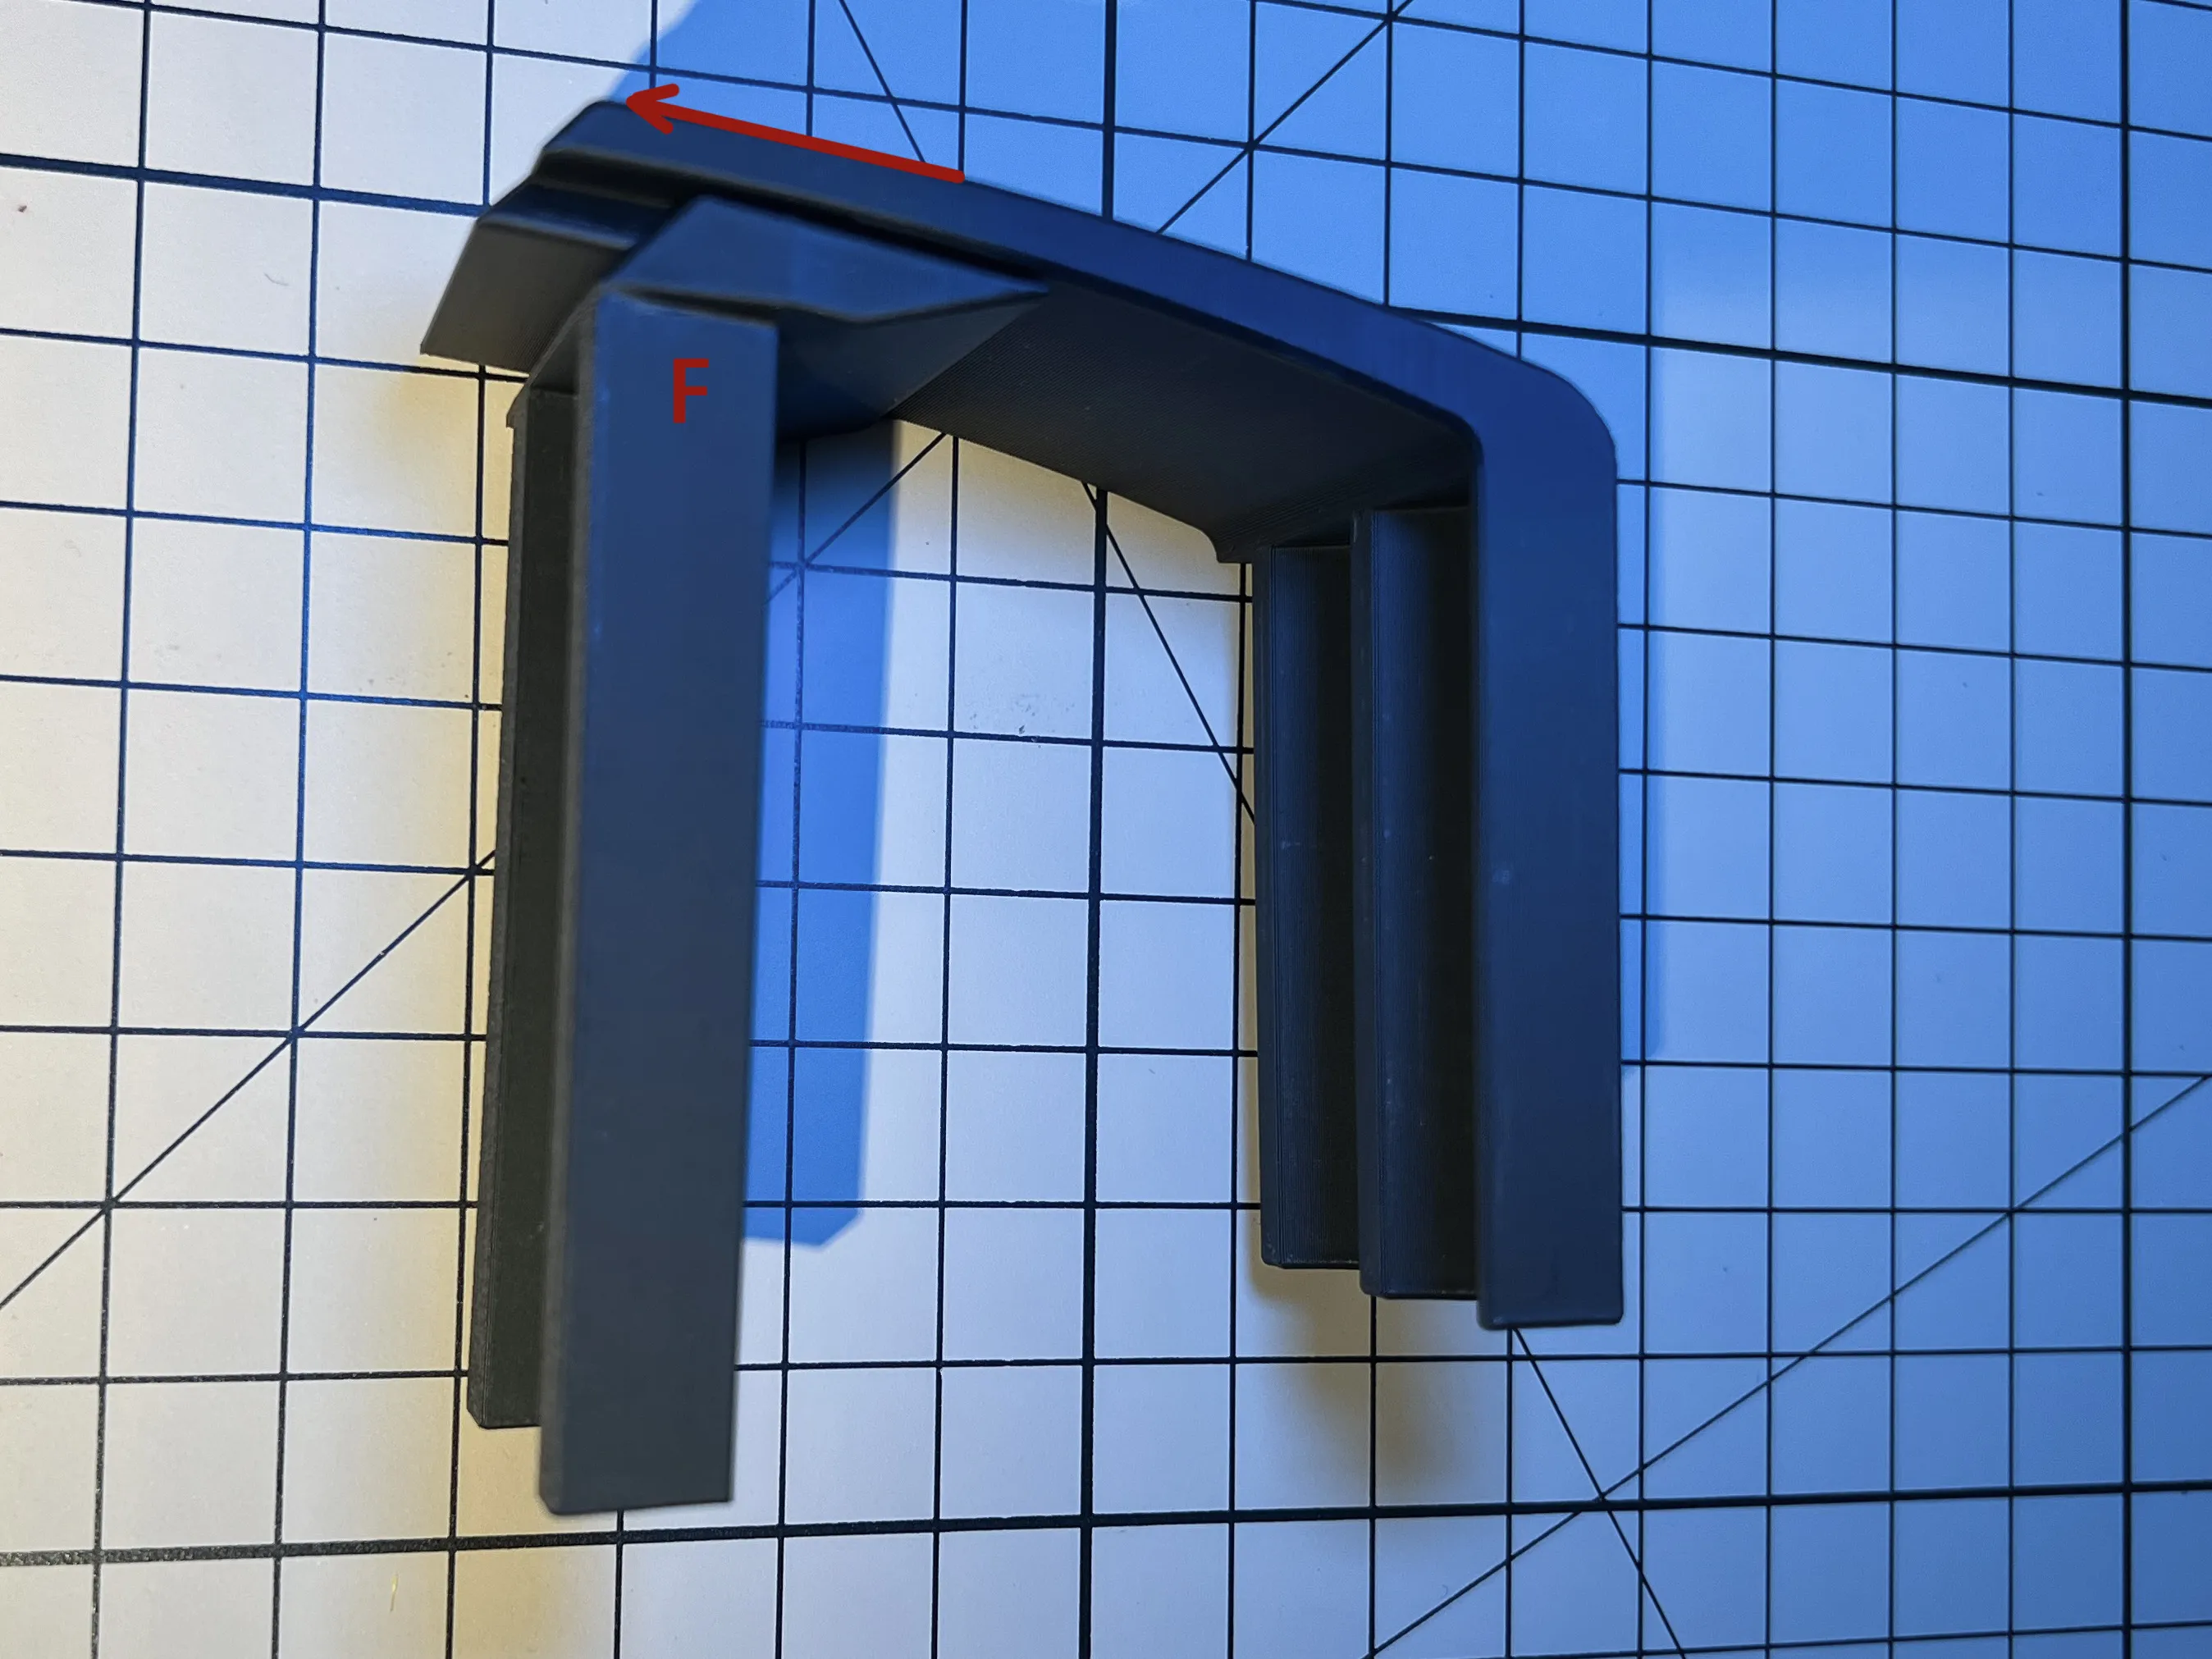
Place the main body in the appropriate position on the armrest, insert one side of D/E+F, then move G into F according to the picture's direction, holding it temporarily with your hand, then insert the other side's D/E+F into the corresponding upper and lower slots, move G to the middle, and finally twist the G bolt to tighten it against the bottom of the armrest
Install two sets of connectors at the front and back of the base to securely fix it to the armrest; to allow for the widest range of adjustable installation positions, the front part of the base was mostly hollowed out by me; after adjusting and fixing the position, many empty spaces will remain inside; at this point, first test whether the overall front-to-back position of the tray allows for comfortable arm placement; after confirming, choose the appropriate H/J/K accessories to print as filling support ribs
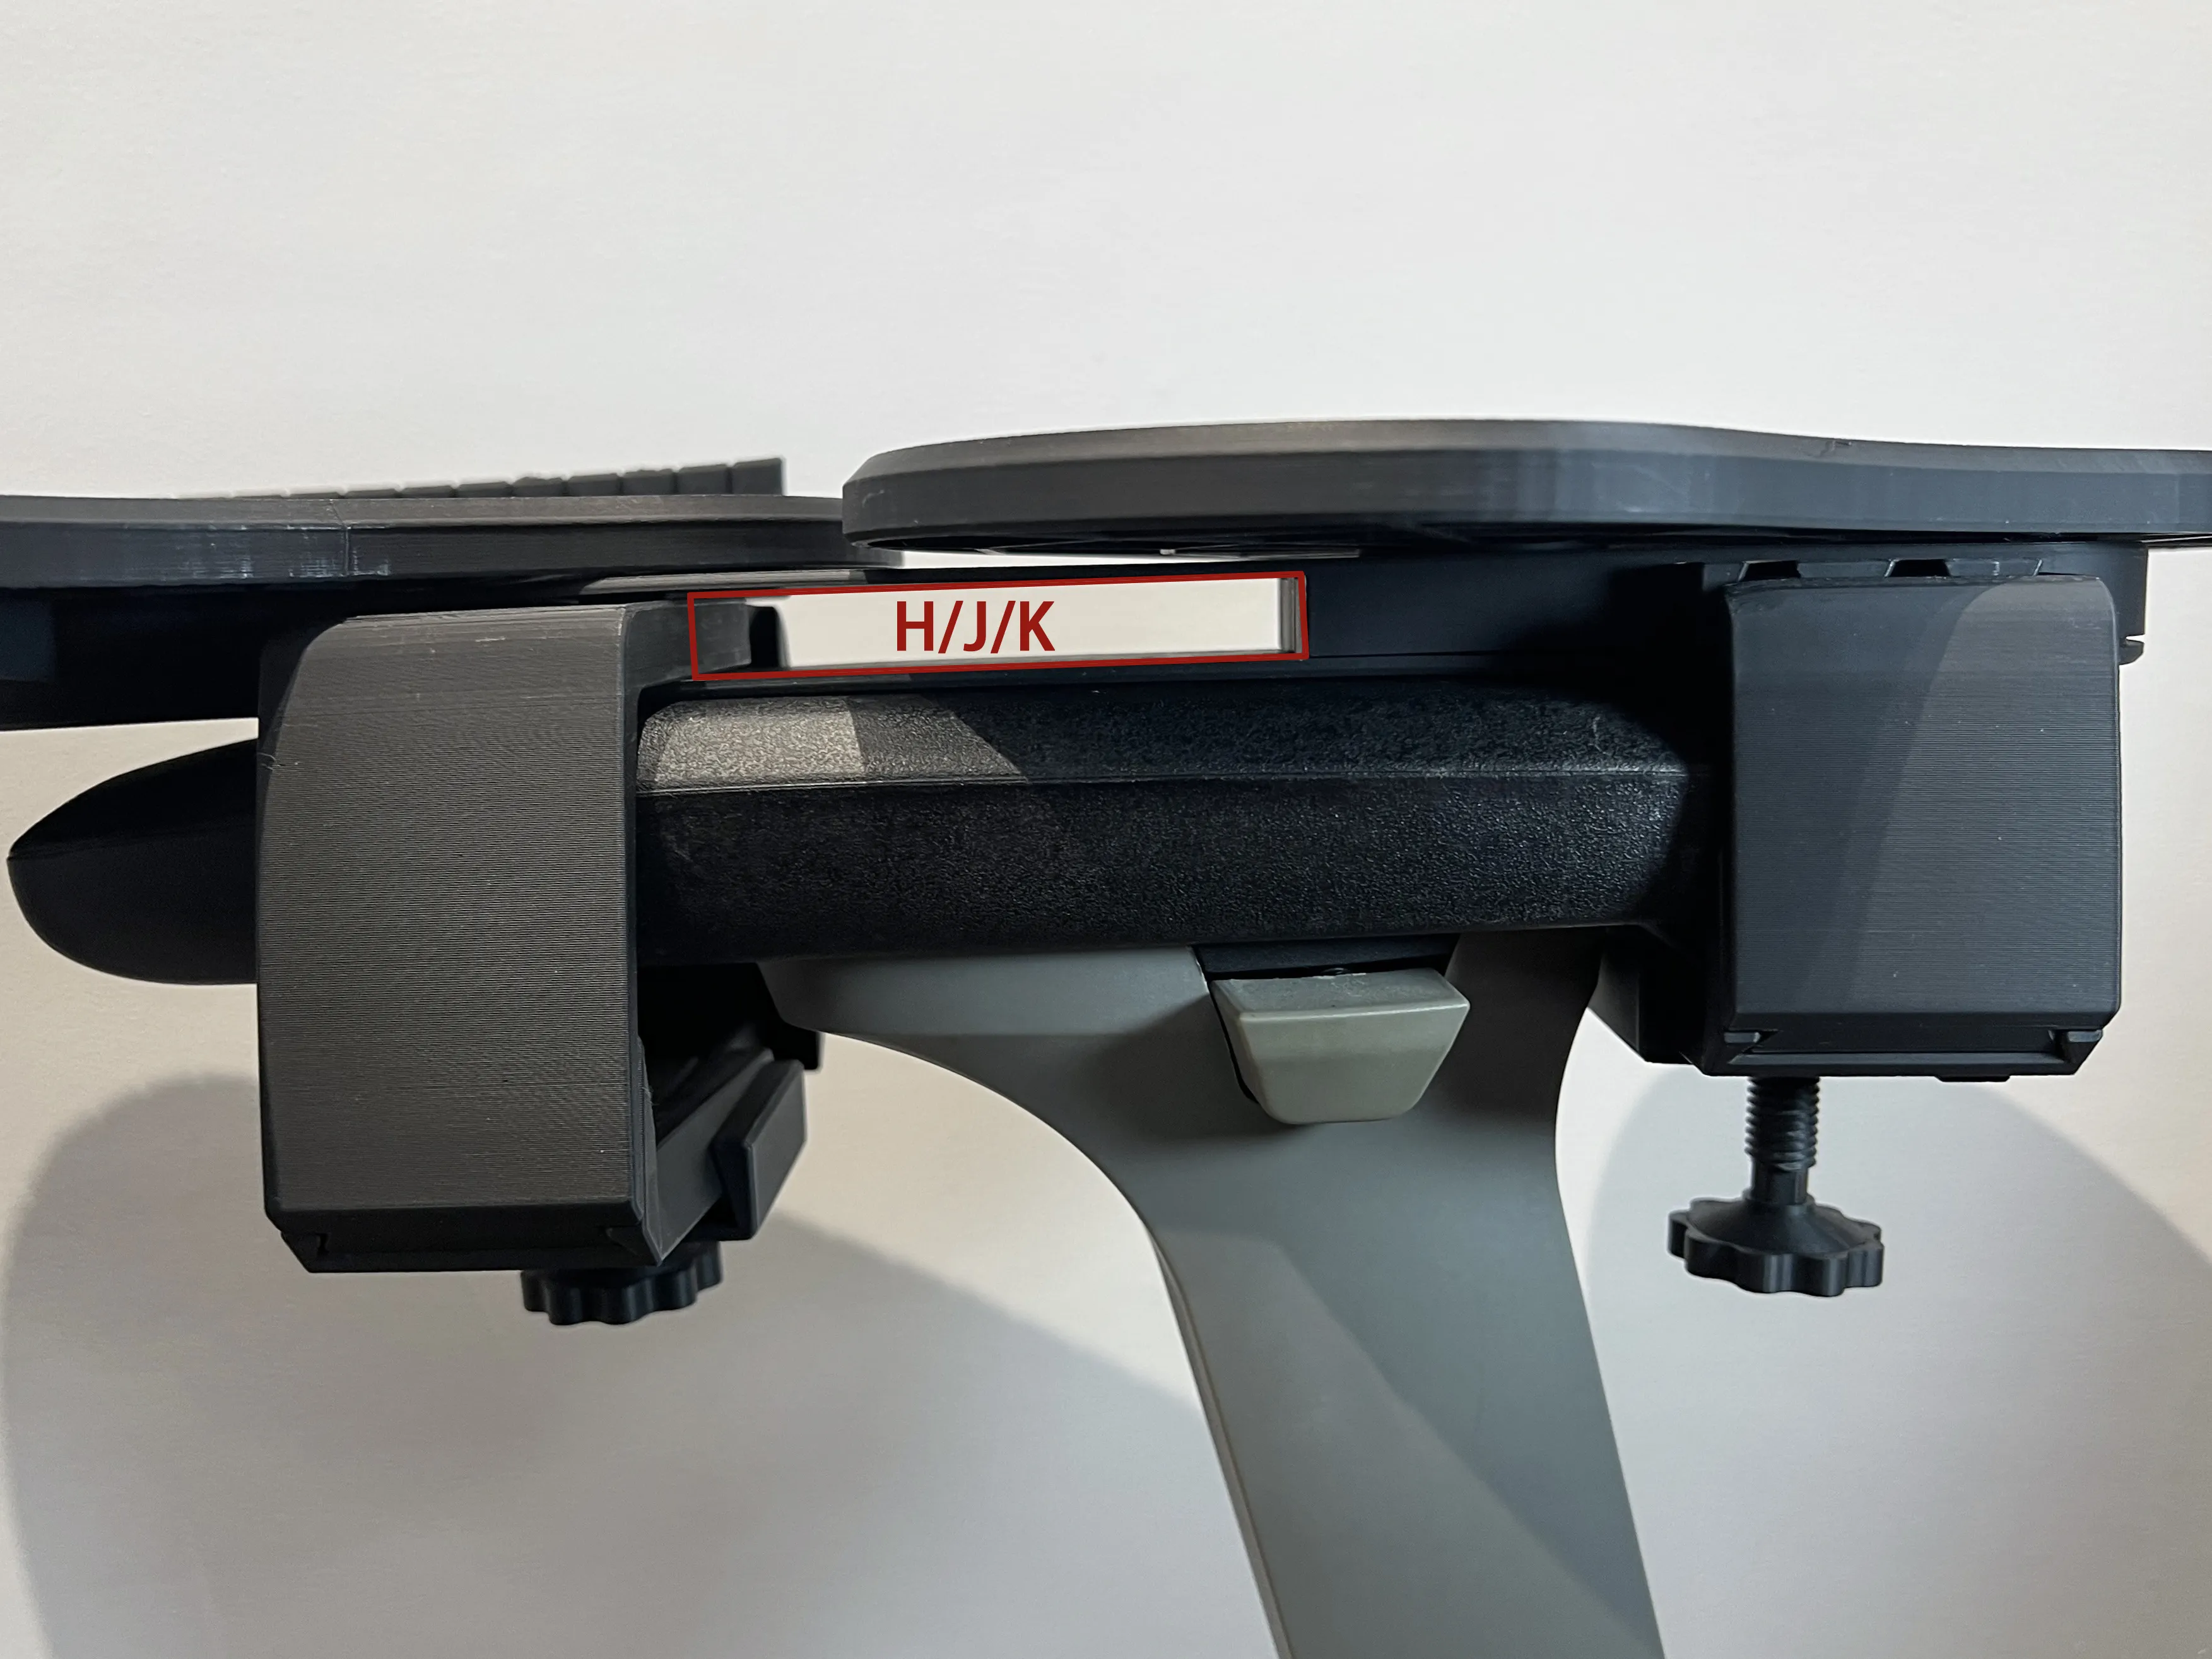
H is an 80mm support, applicable only when the connector is within the range of the two ends of the base mounting holes; K is 40mm, J is 20mm; simply choose to print the matching size based on the remaining space. It is recommended that if the front of the overall base is suspended too far, filling with larger models will better ensure overall stability
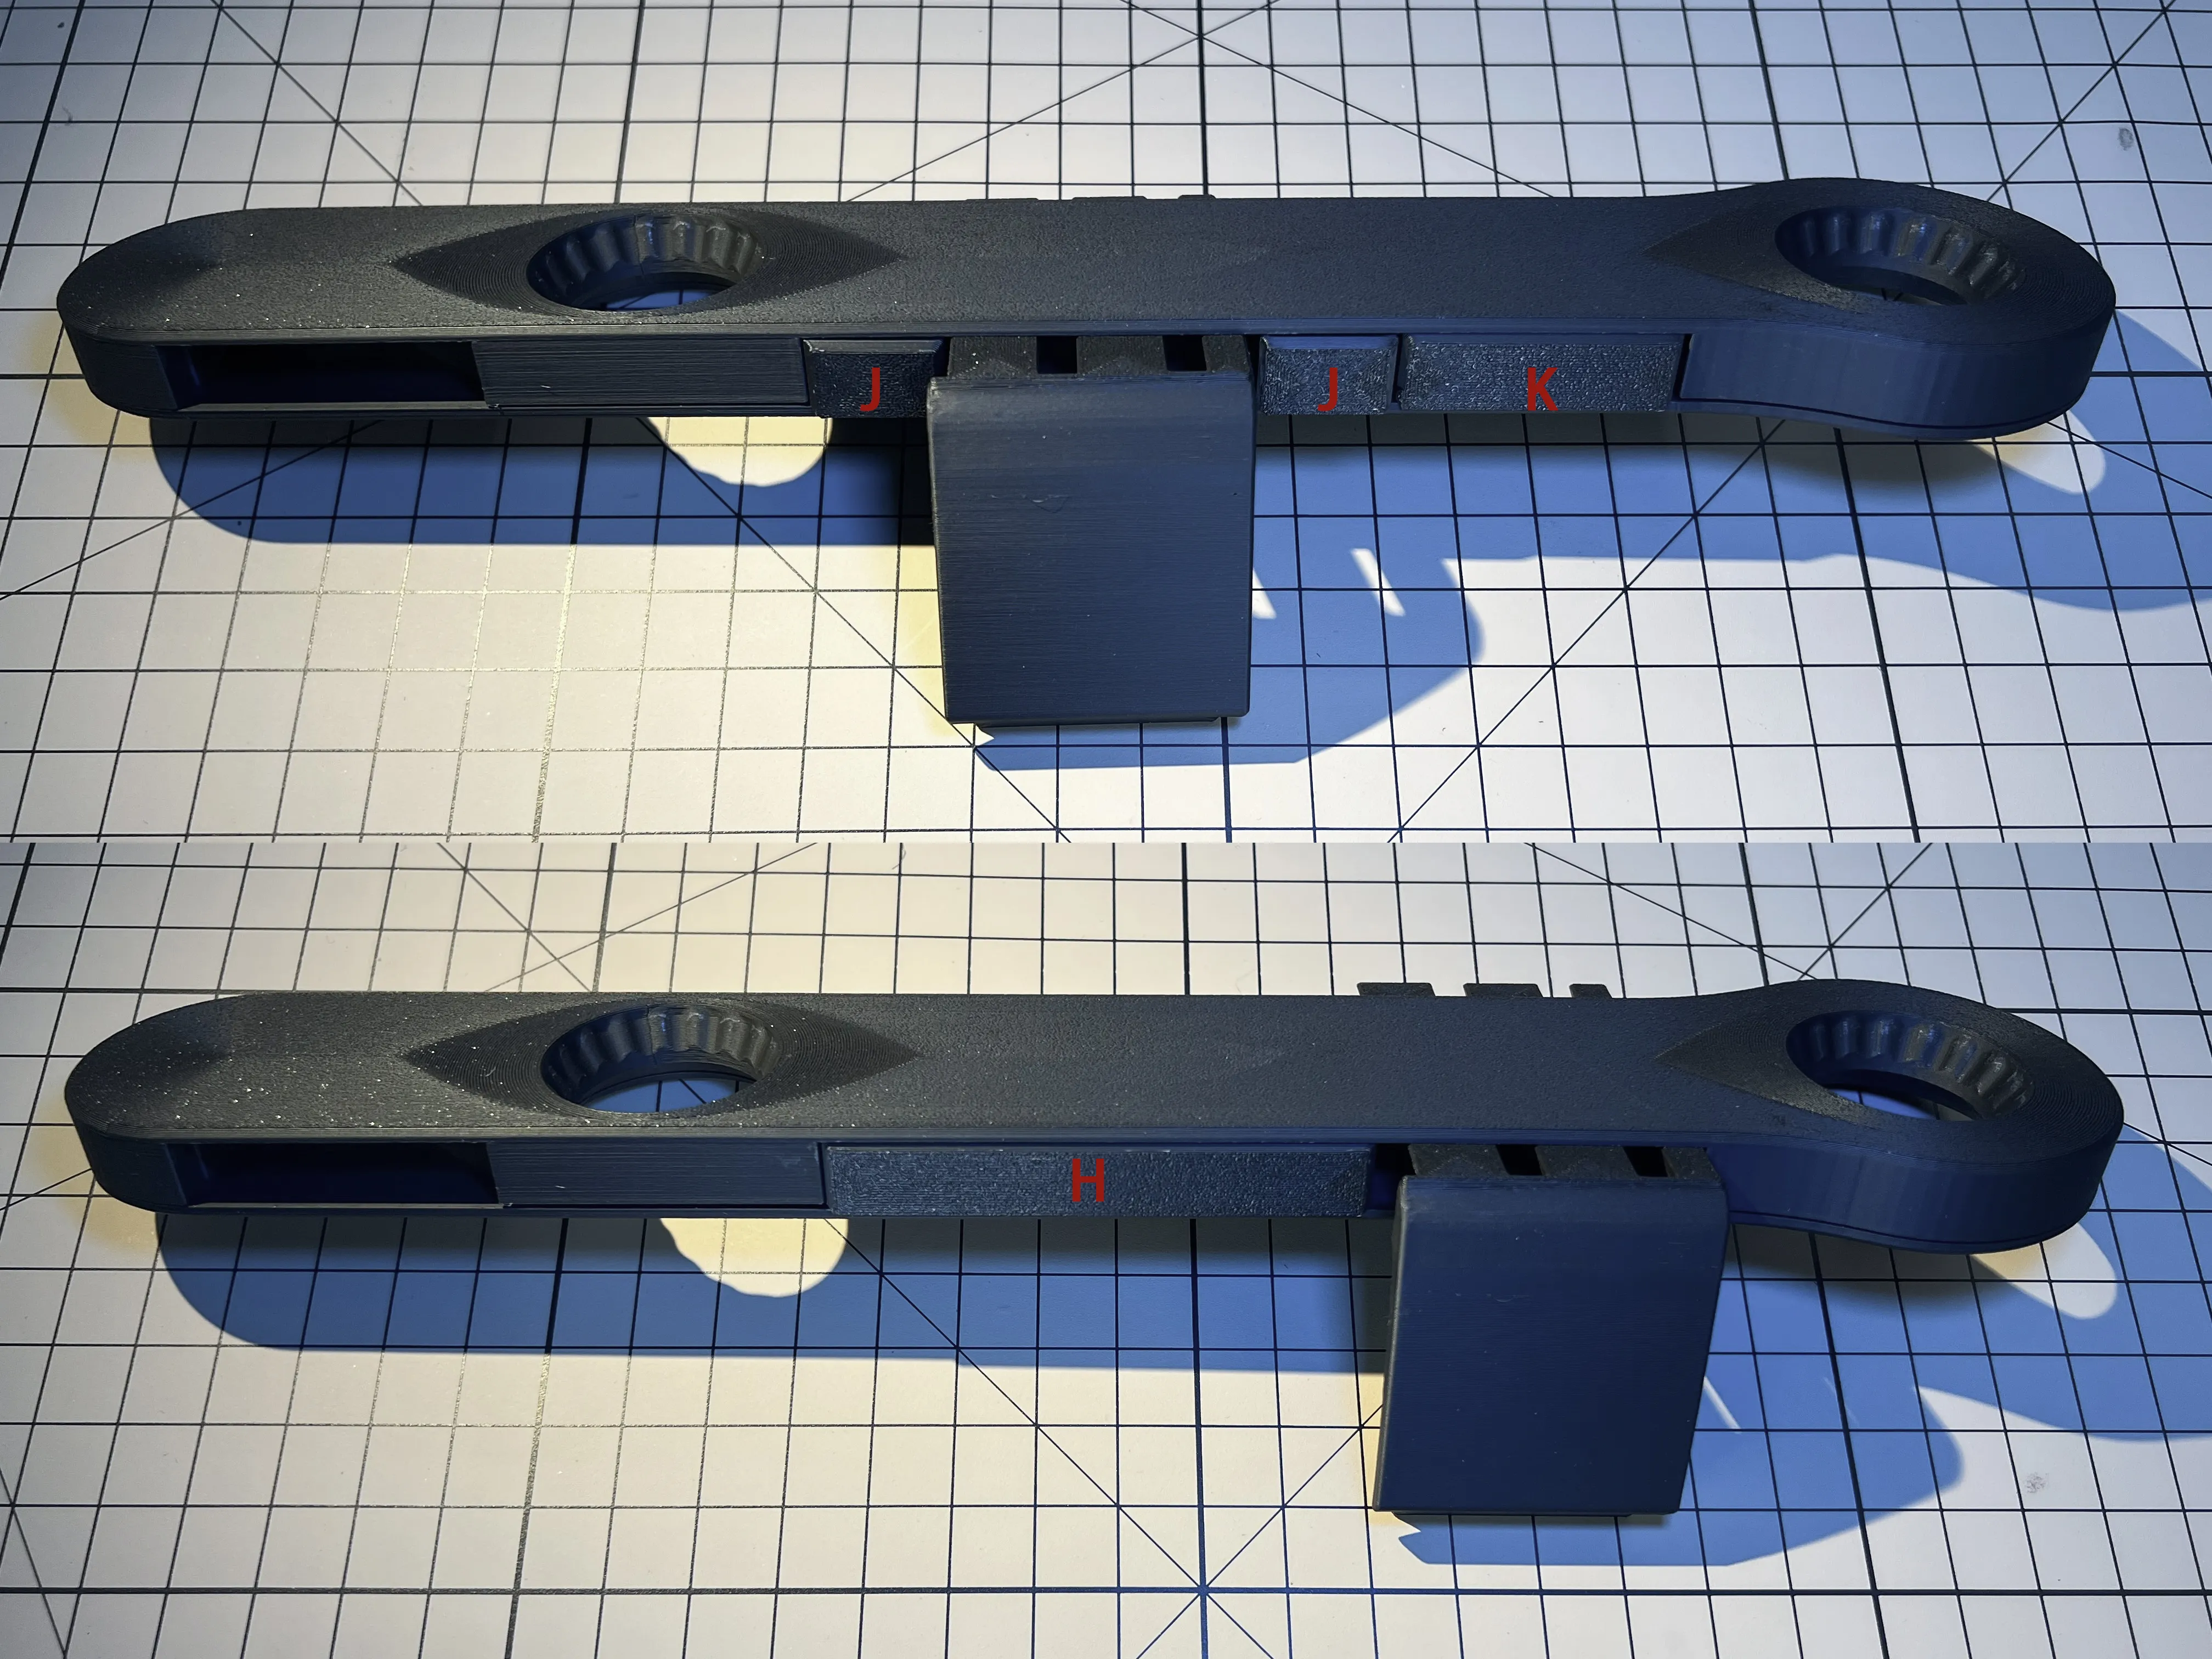
At this point, the overall installation is complete and ready for basic use
Auxiliary Accessories Selection and Installation:
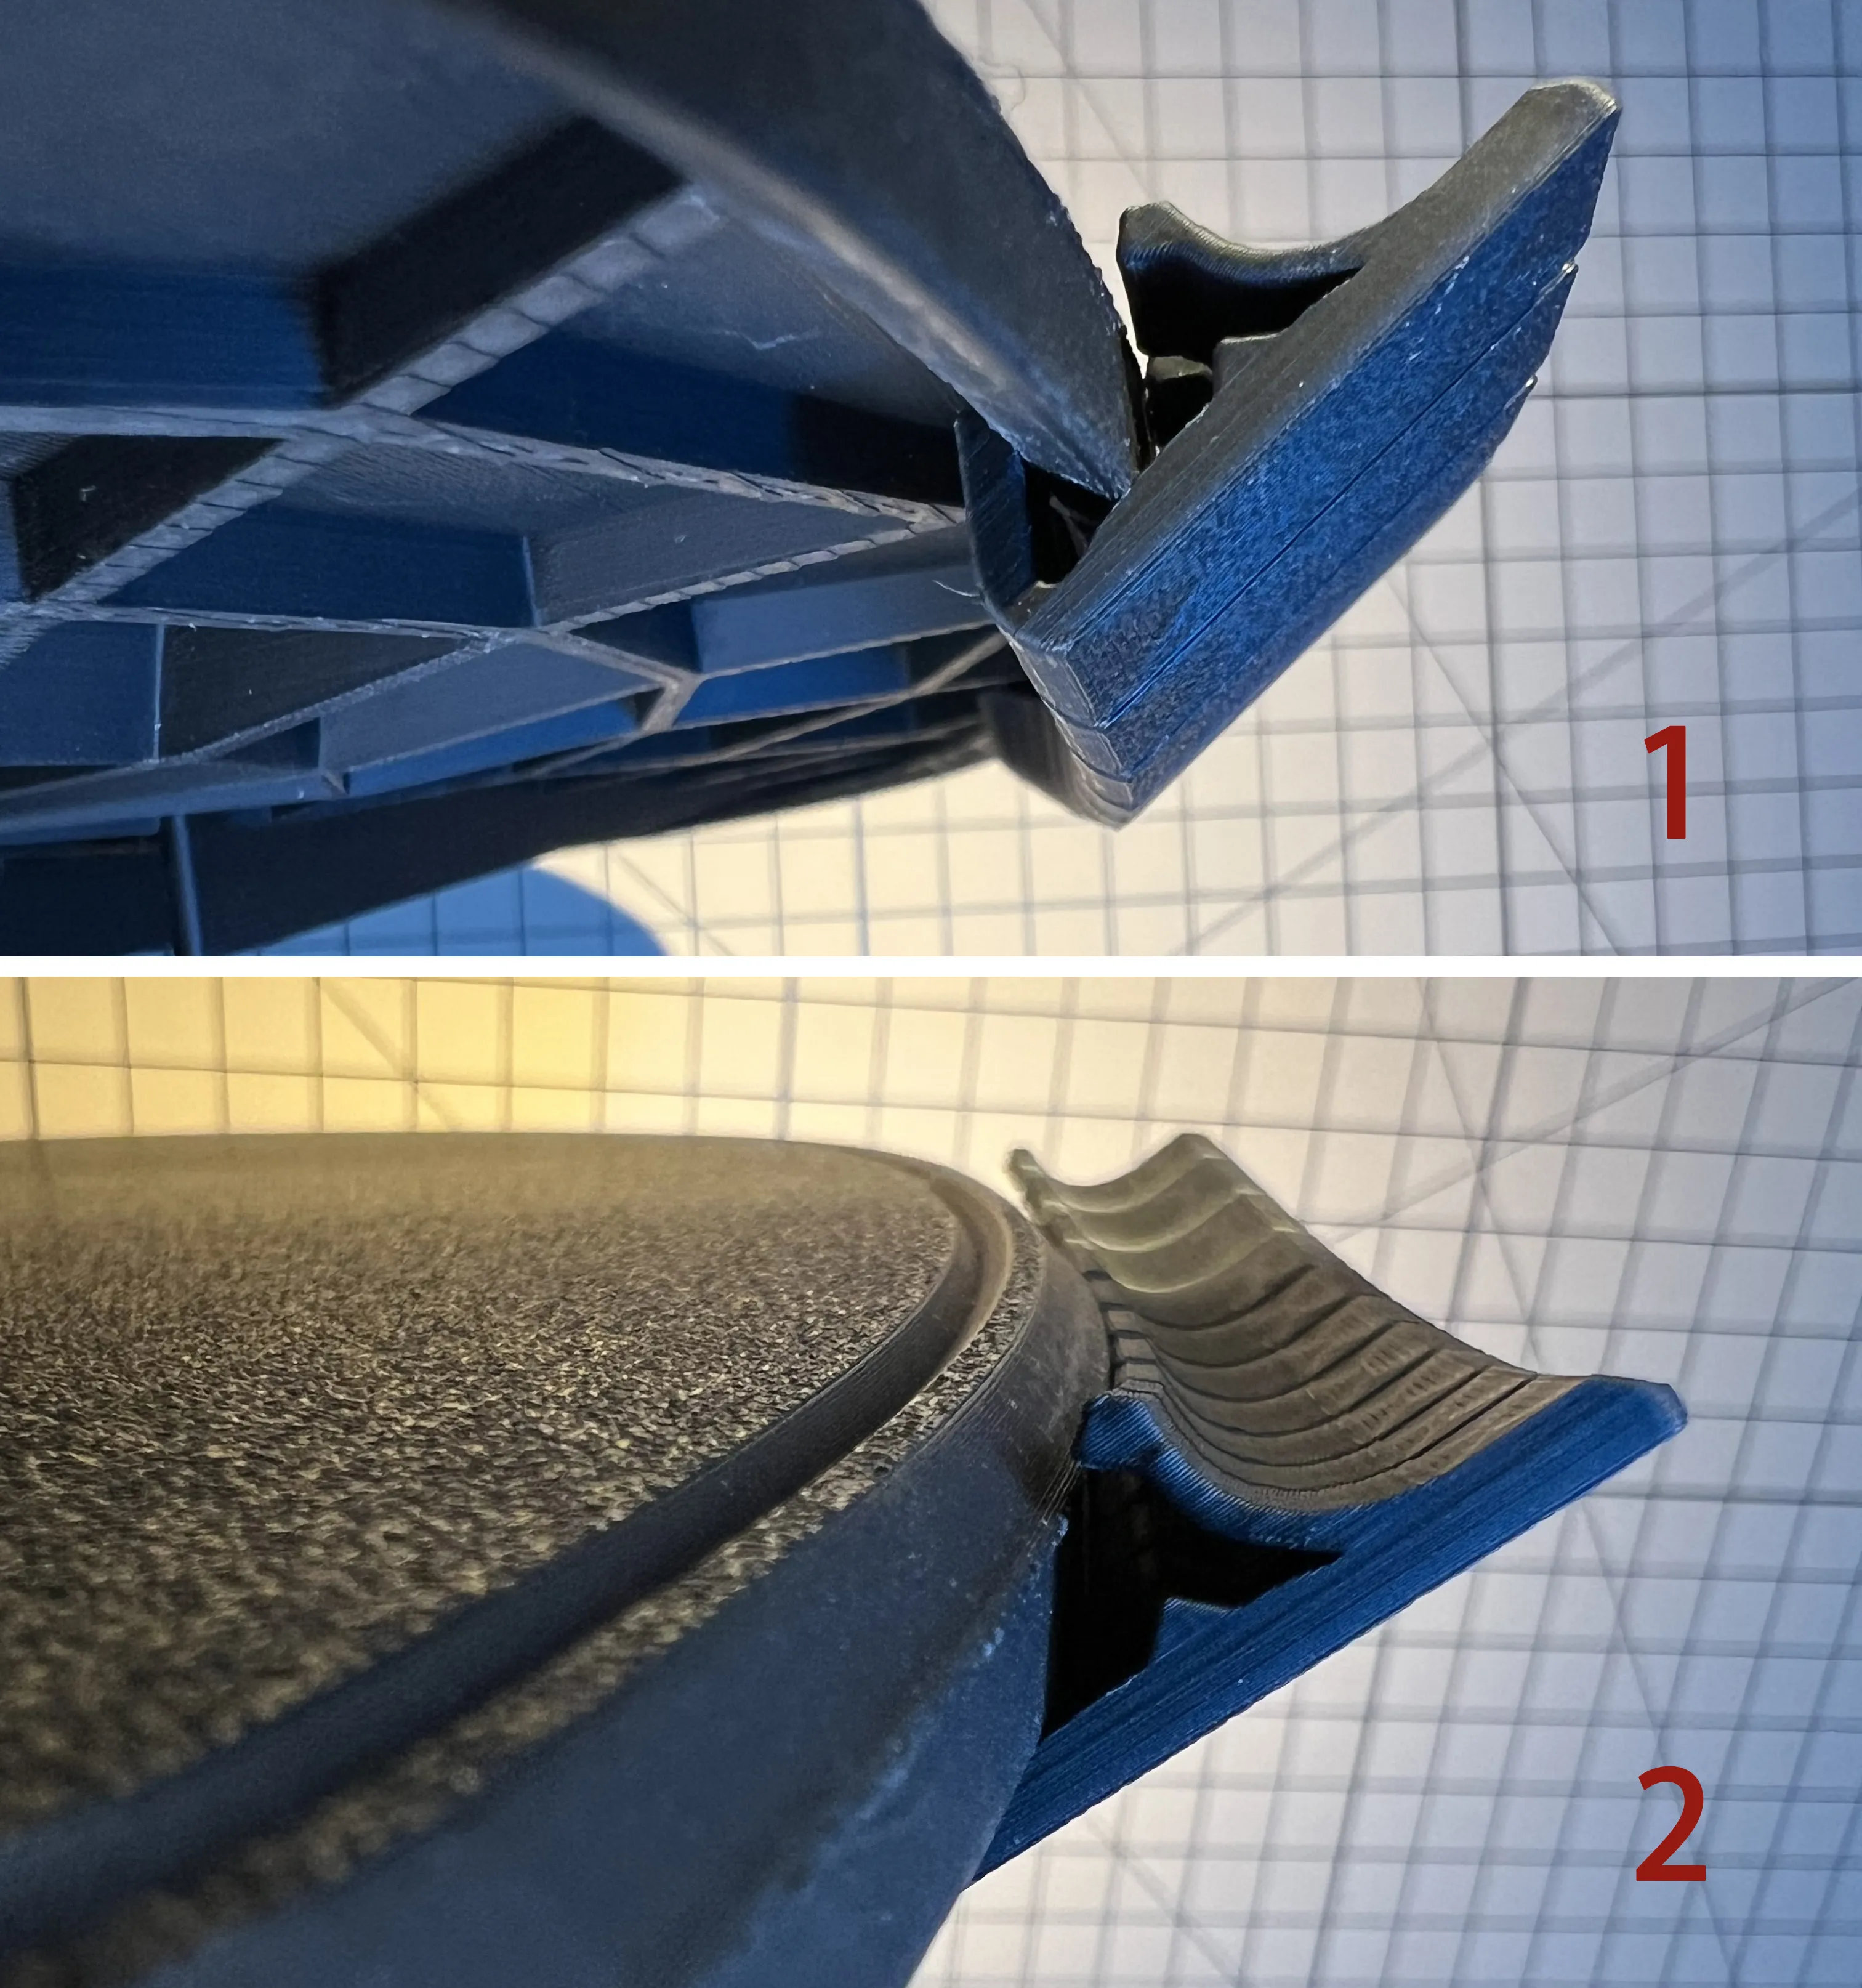
L-Mouse Anti-Drop Bar:
- Installed on the outer edge of the B tray, it helps reduce the risk of the mouse sliding off; decide for yourself whether to install it
- It is highly recommended to print the bar with PETG material; if printing with PLA, great care must be taken to control force and angle during installation, as it is prone to breaking or loosening (initially, after modifying this design more than ten times, it was still impossible to install easily with PLA, regrettably)
- In the file, I have divided it into strips of 10 segments each (this is the easiest length to install after multiple experiments; integrated long printing is not recommended); during installation, first insert the bottom slanted edge, then slowly push the front into the slot; this part is relatively fragile, and you need to gradually increase force to adapt; it is recommended to start installation from the flattest straight edge of the curve, snap it on, then slide it to the desired position; print as many copies as needed for the desired length of protection
- This is the most challenging part of the entire model to install; it requires a bit of patience; do not rush or use excessive force
Cup Holder Installation:
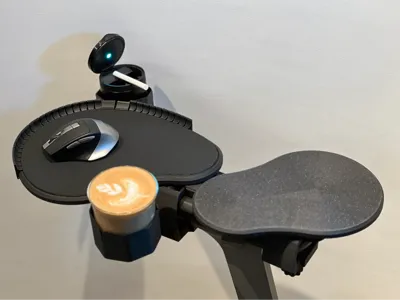
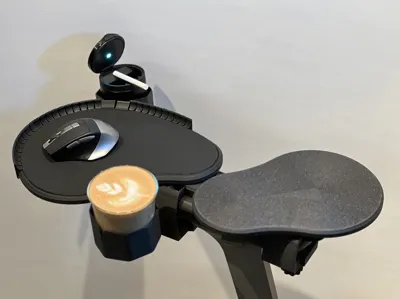
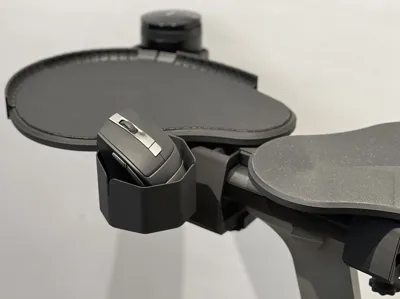
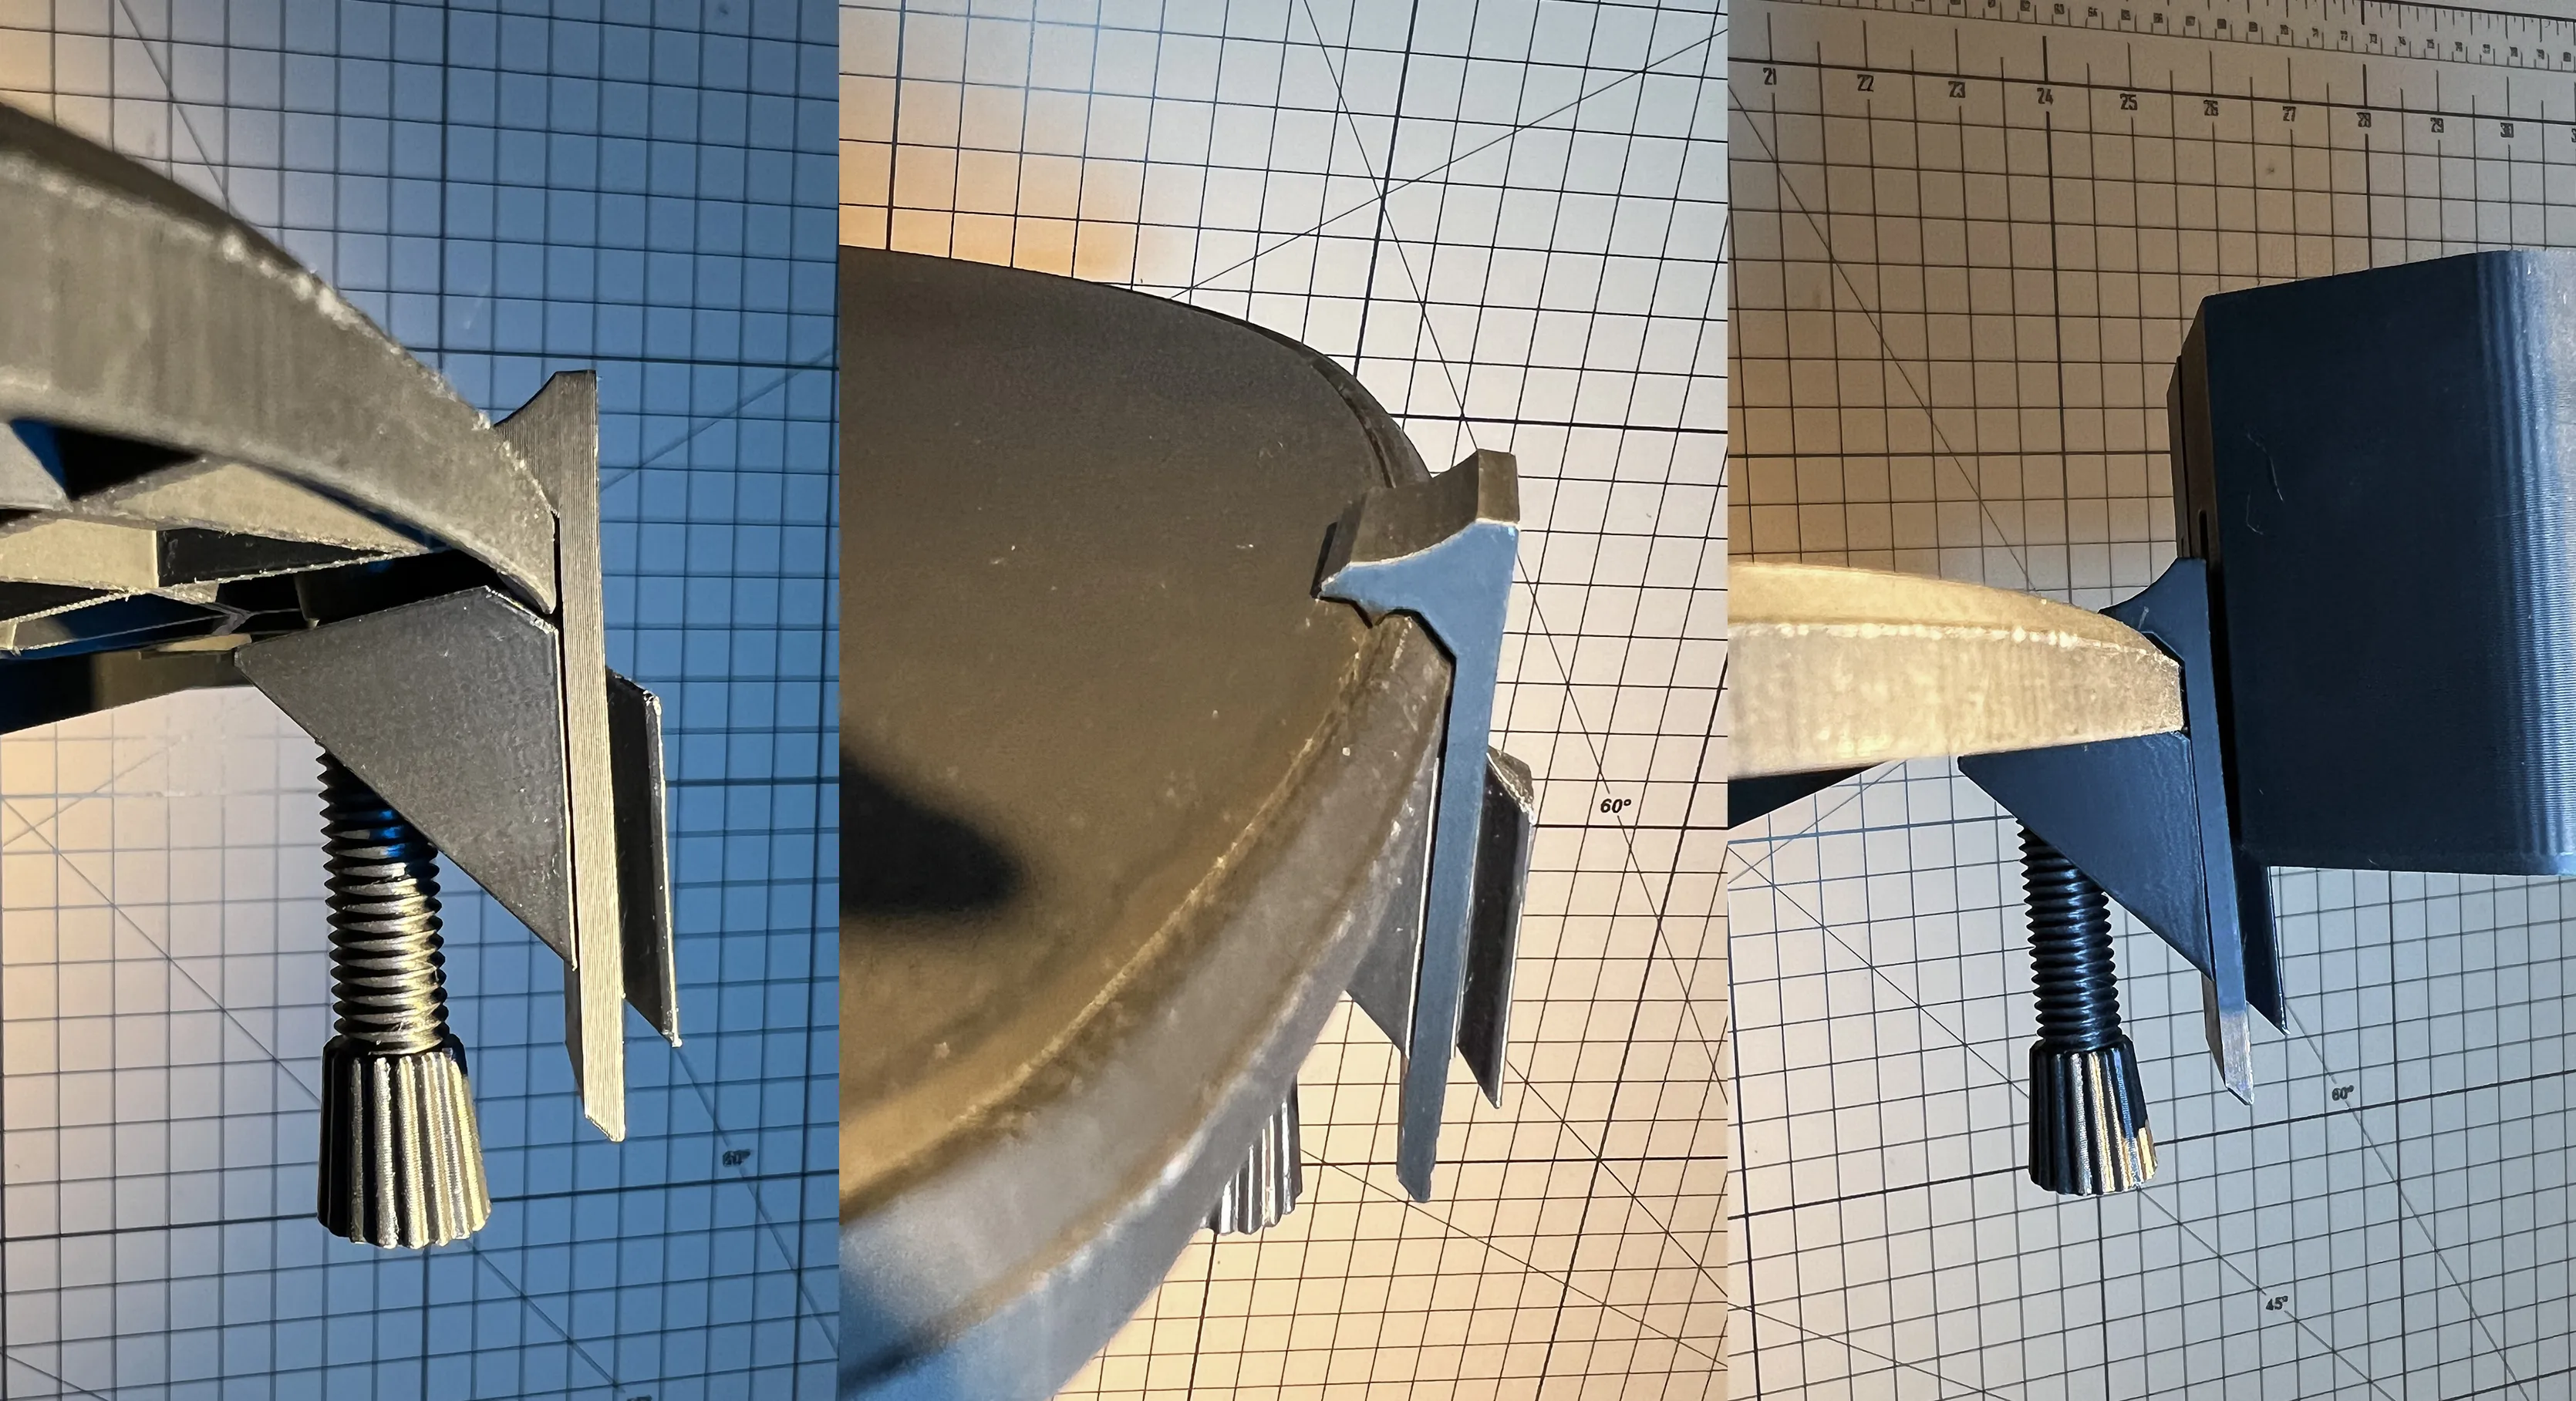
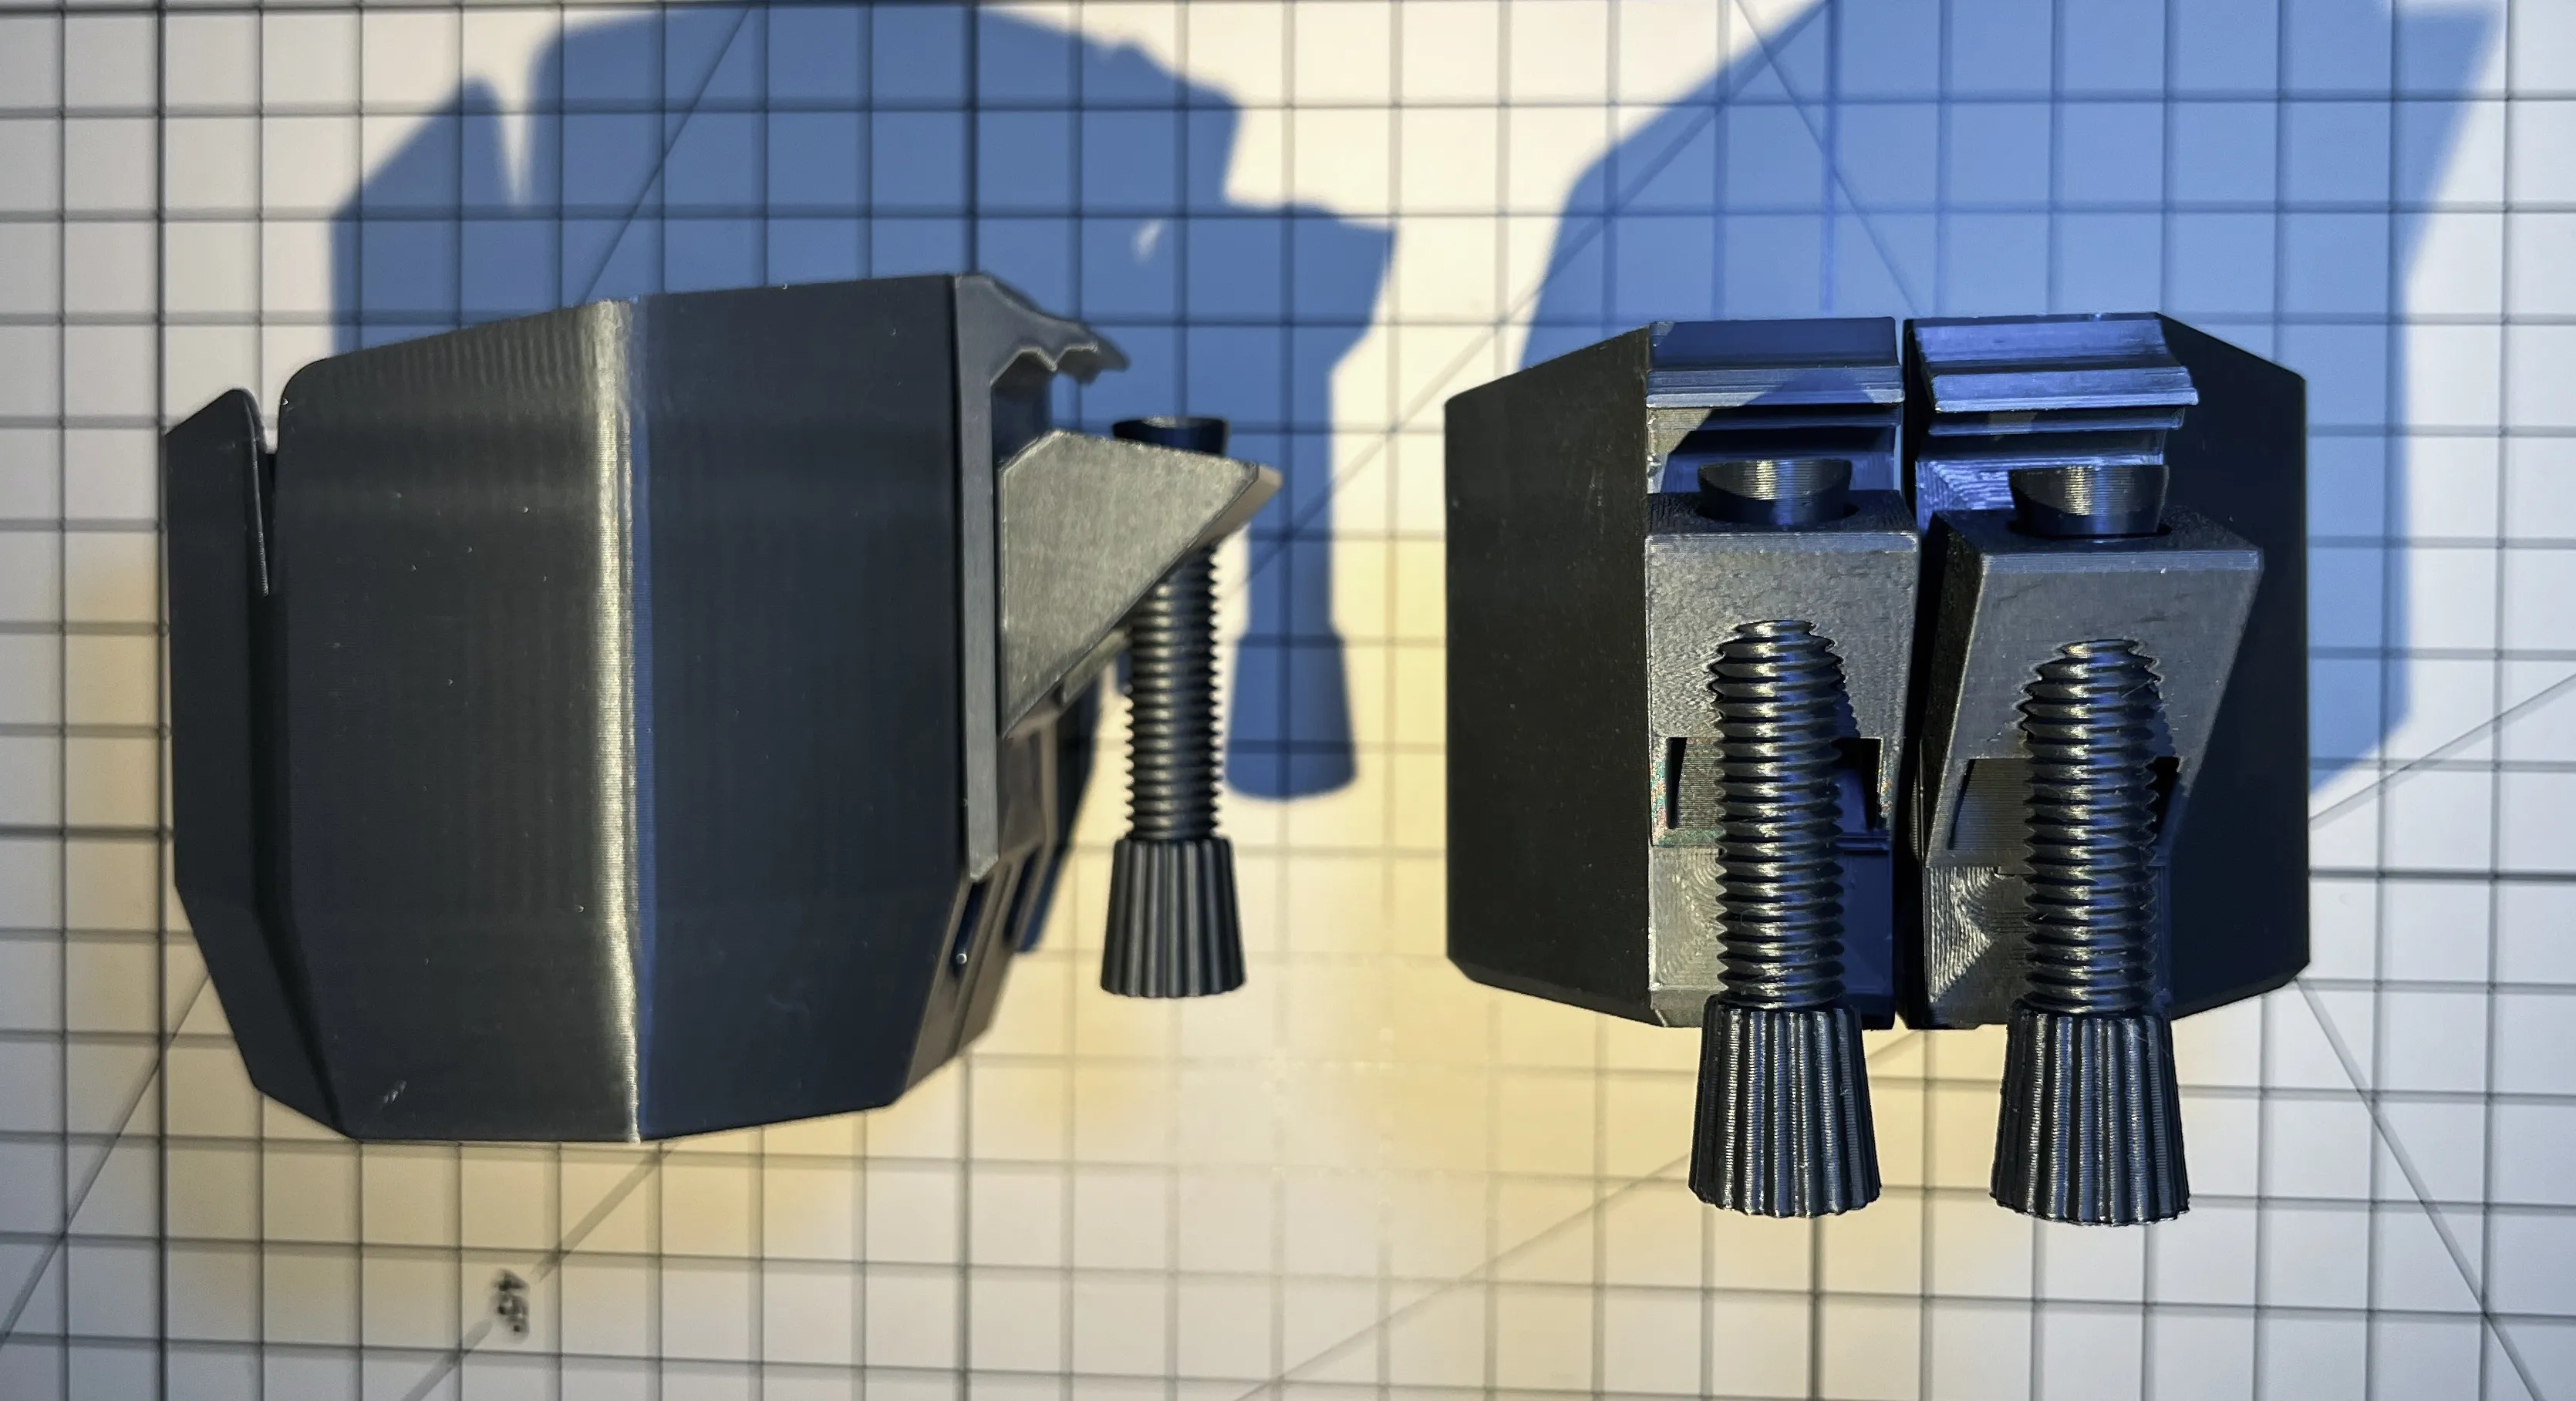
- The original intention of designing this was to place an ashtray next to it, so I casually made two specifications (inner diameter 77mm, N model depth 60mm, M model depth 78mm), which can hold water cups, pens, etc.; please choose for yourself (It is recommended to print with PETG; I also printed one with PLA, and no issues have been found so far)
- To avoid using supports and considering printing direction, this connector is divided into several parts for combined insertion; if you need to install the cup holder, it is recommended to try assembling it once before fixing the base, as this makes it easier to get started
- First assemble one P fastener, at this point do not tighten the bolt, hold it with your hand and then slide the back slot of the cup holder in a little, then snap the other set of P components onto the tray and insert it into the corresponding slot on the other side; this is difficult to describe in words, so please refer to the pictures and try a few times to get the knack; similarly, it is recommended to install it first on the smooth curved part of the tray, then move it to the desired position and tighten the bolt. M will be a bit tighter than N, so you might need to try a few more times when installing it into the slot
In the P series, there is a small round washer which is the bolt head; depending on the chosen installation position, check if it needs to be added; some positions might hit the reinforcing ribs at the bottom of the tray, in which case no washer is needed ((This model has been updated and differs slightly from the photos))
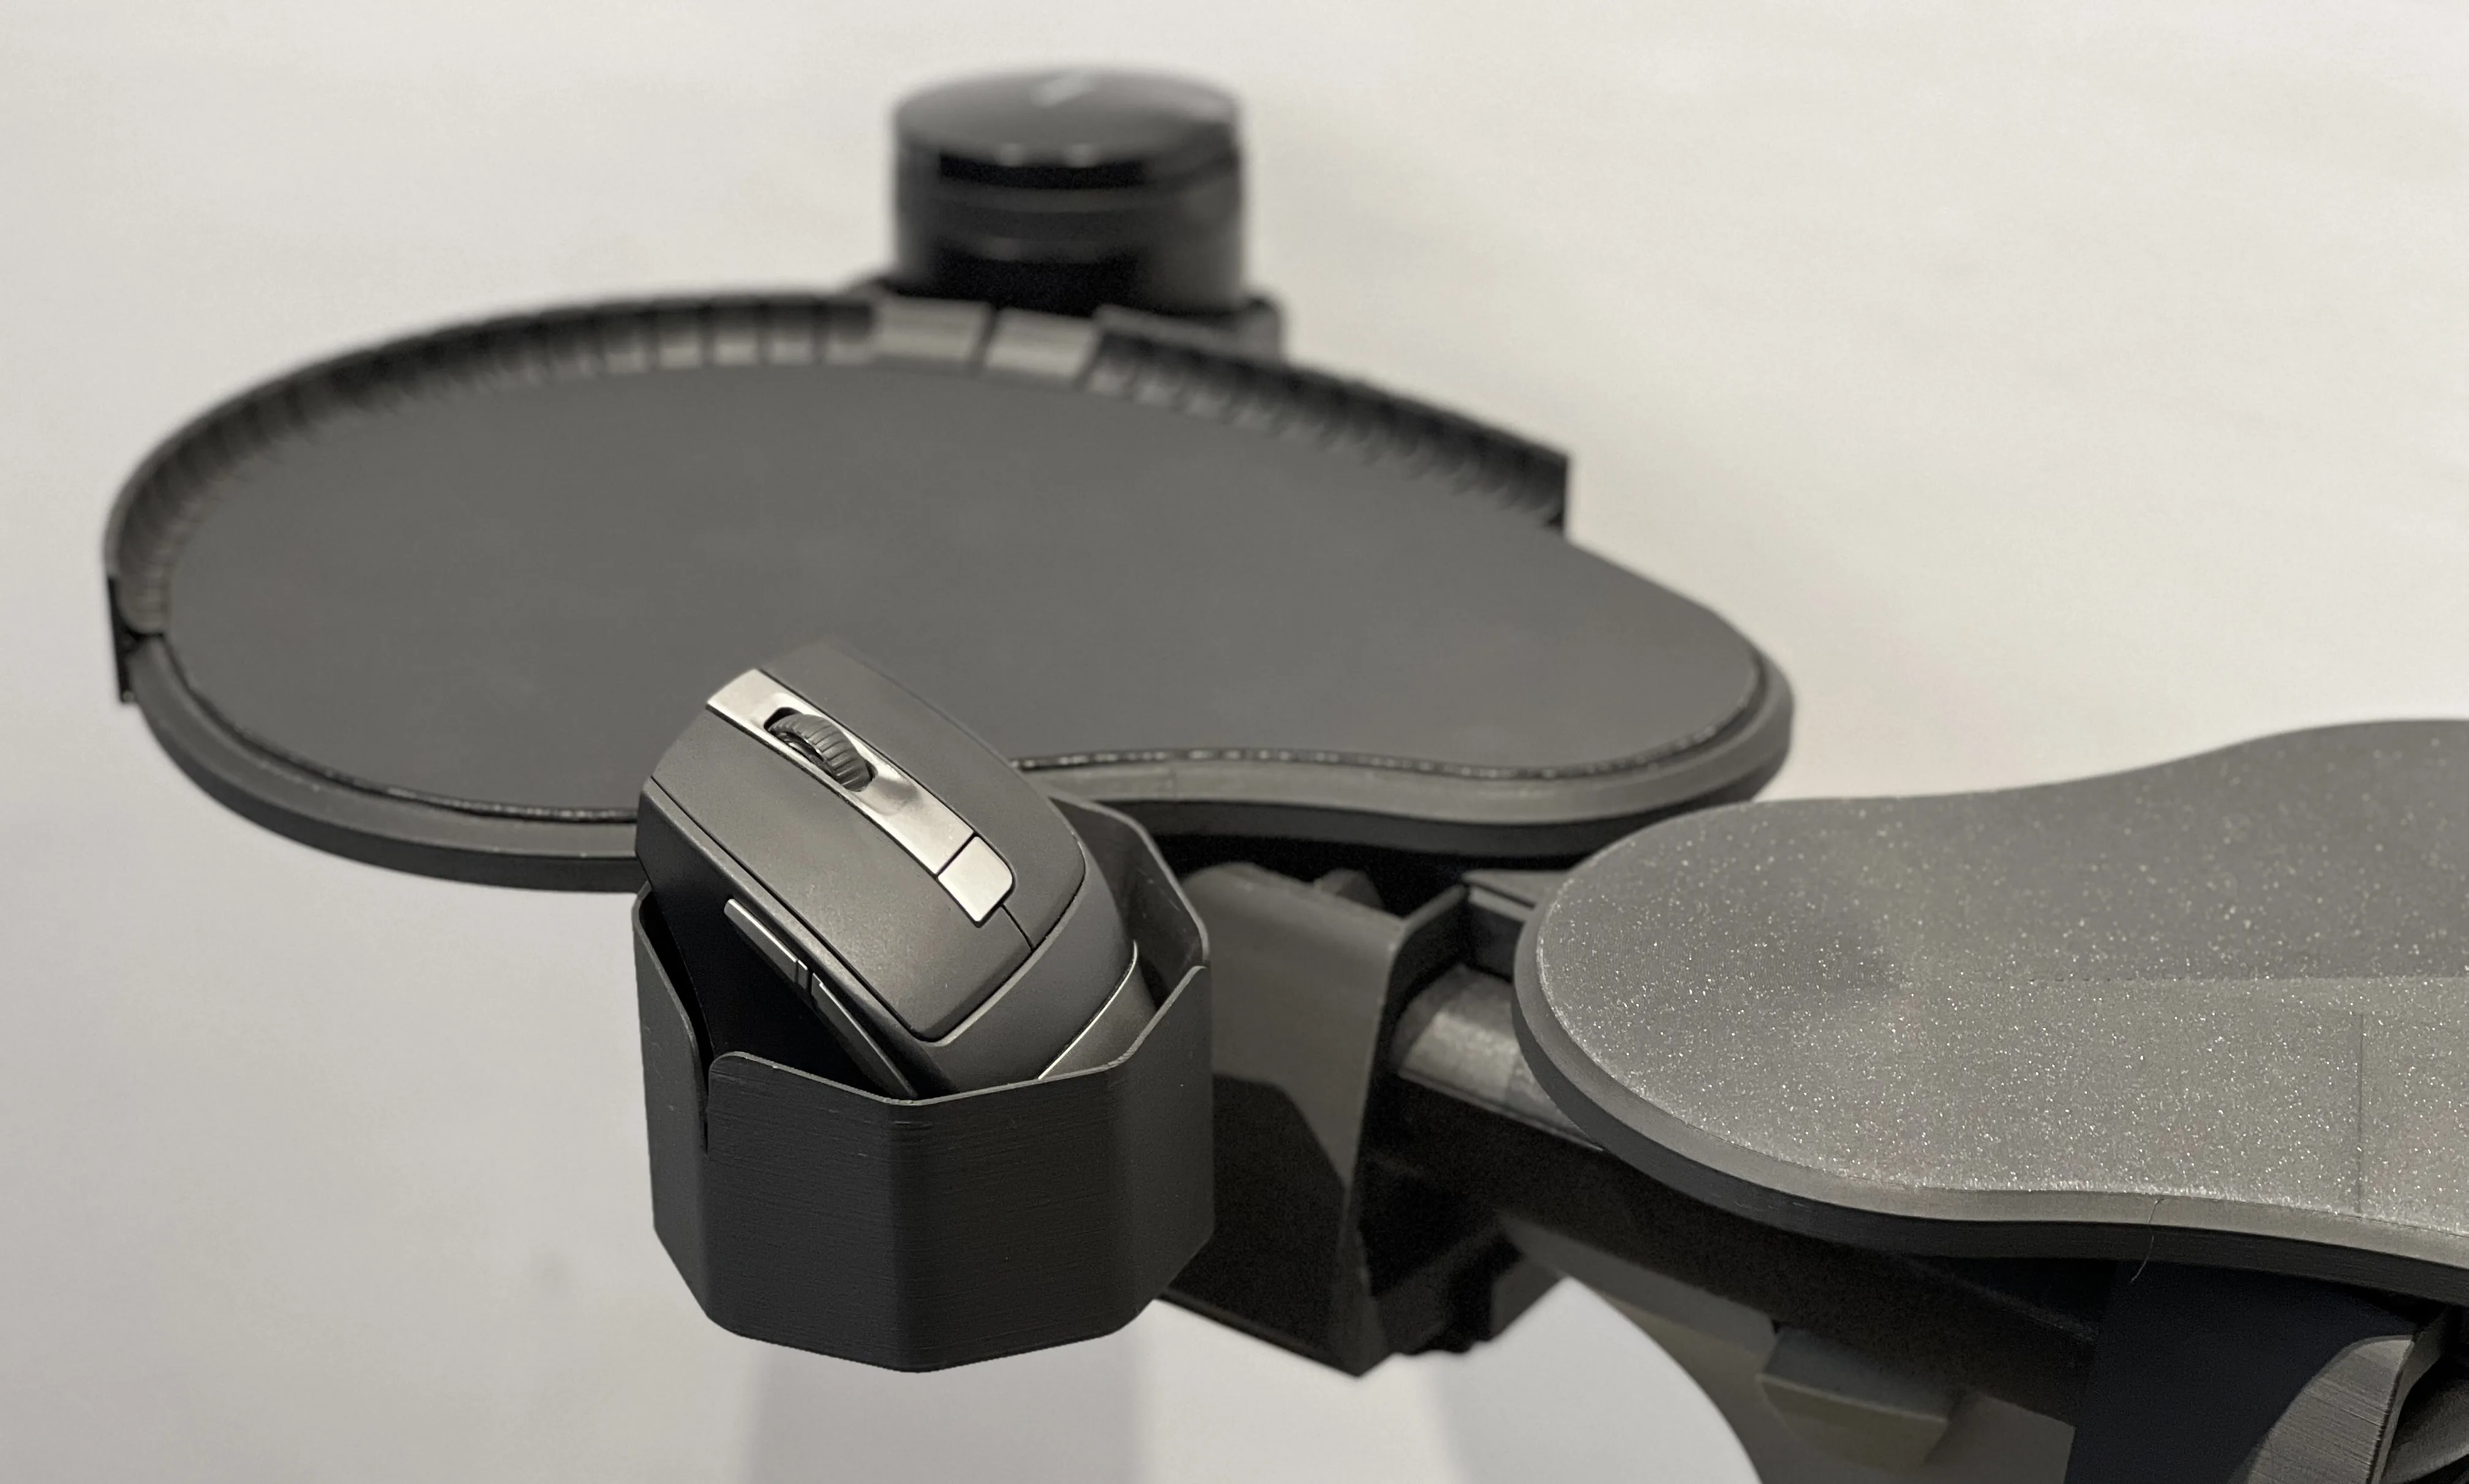
PS: An unexpected bonus, after two days of testing, I found it very convenient for placing the mouse, completely eliminating the risk of the mouse being knocked off
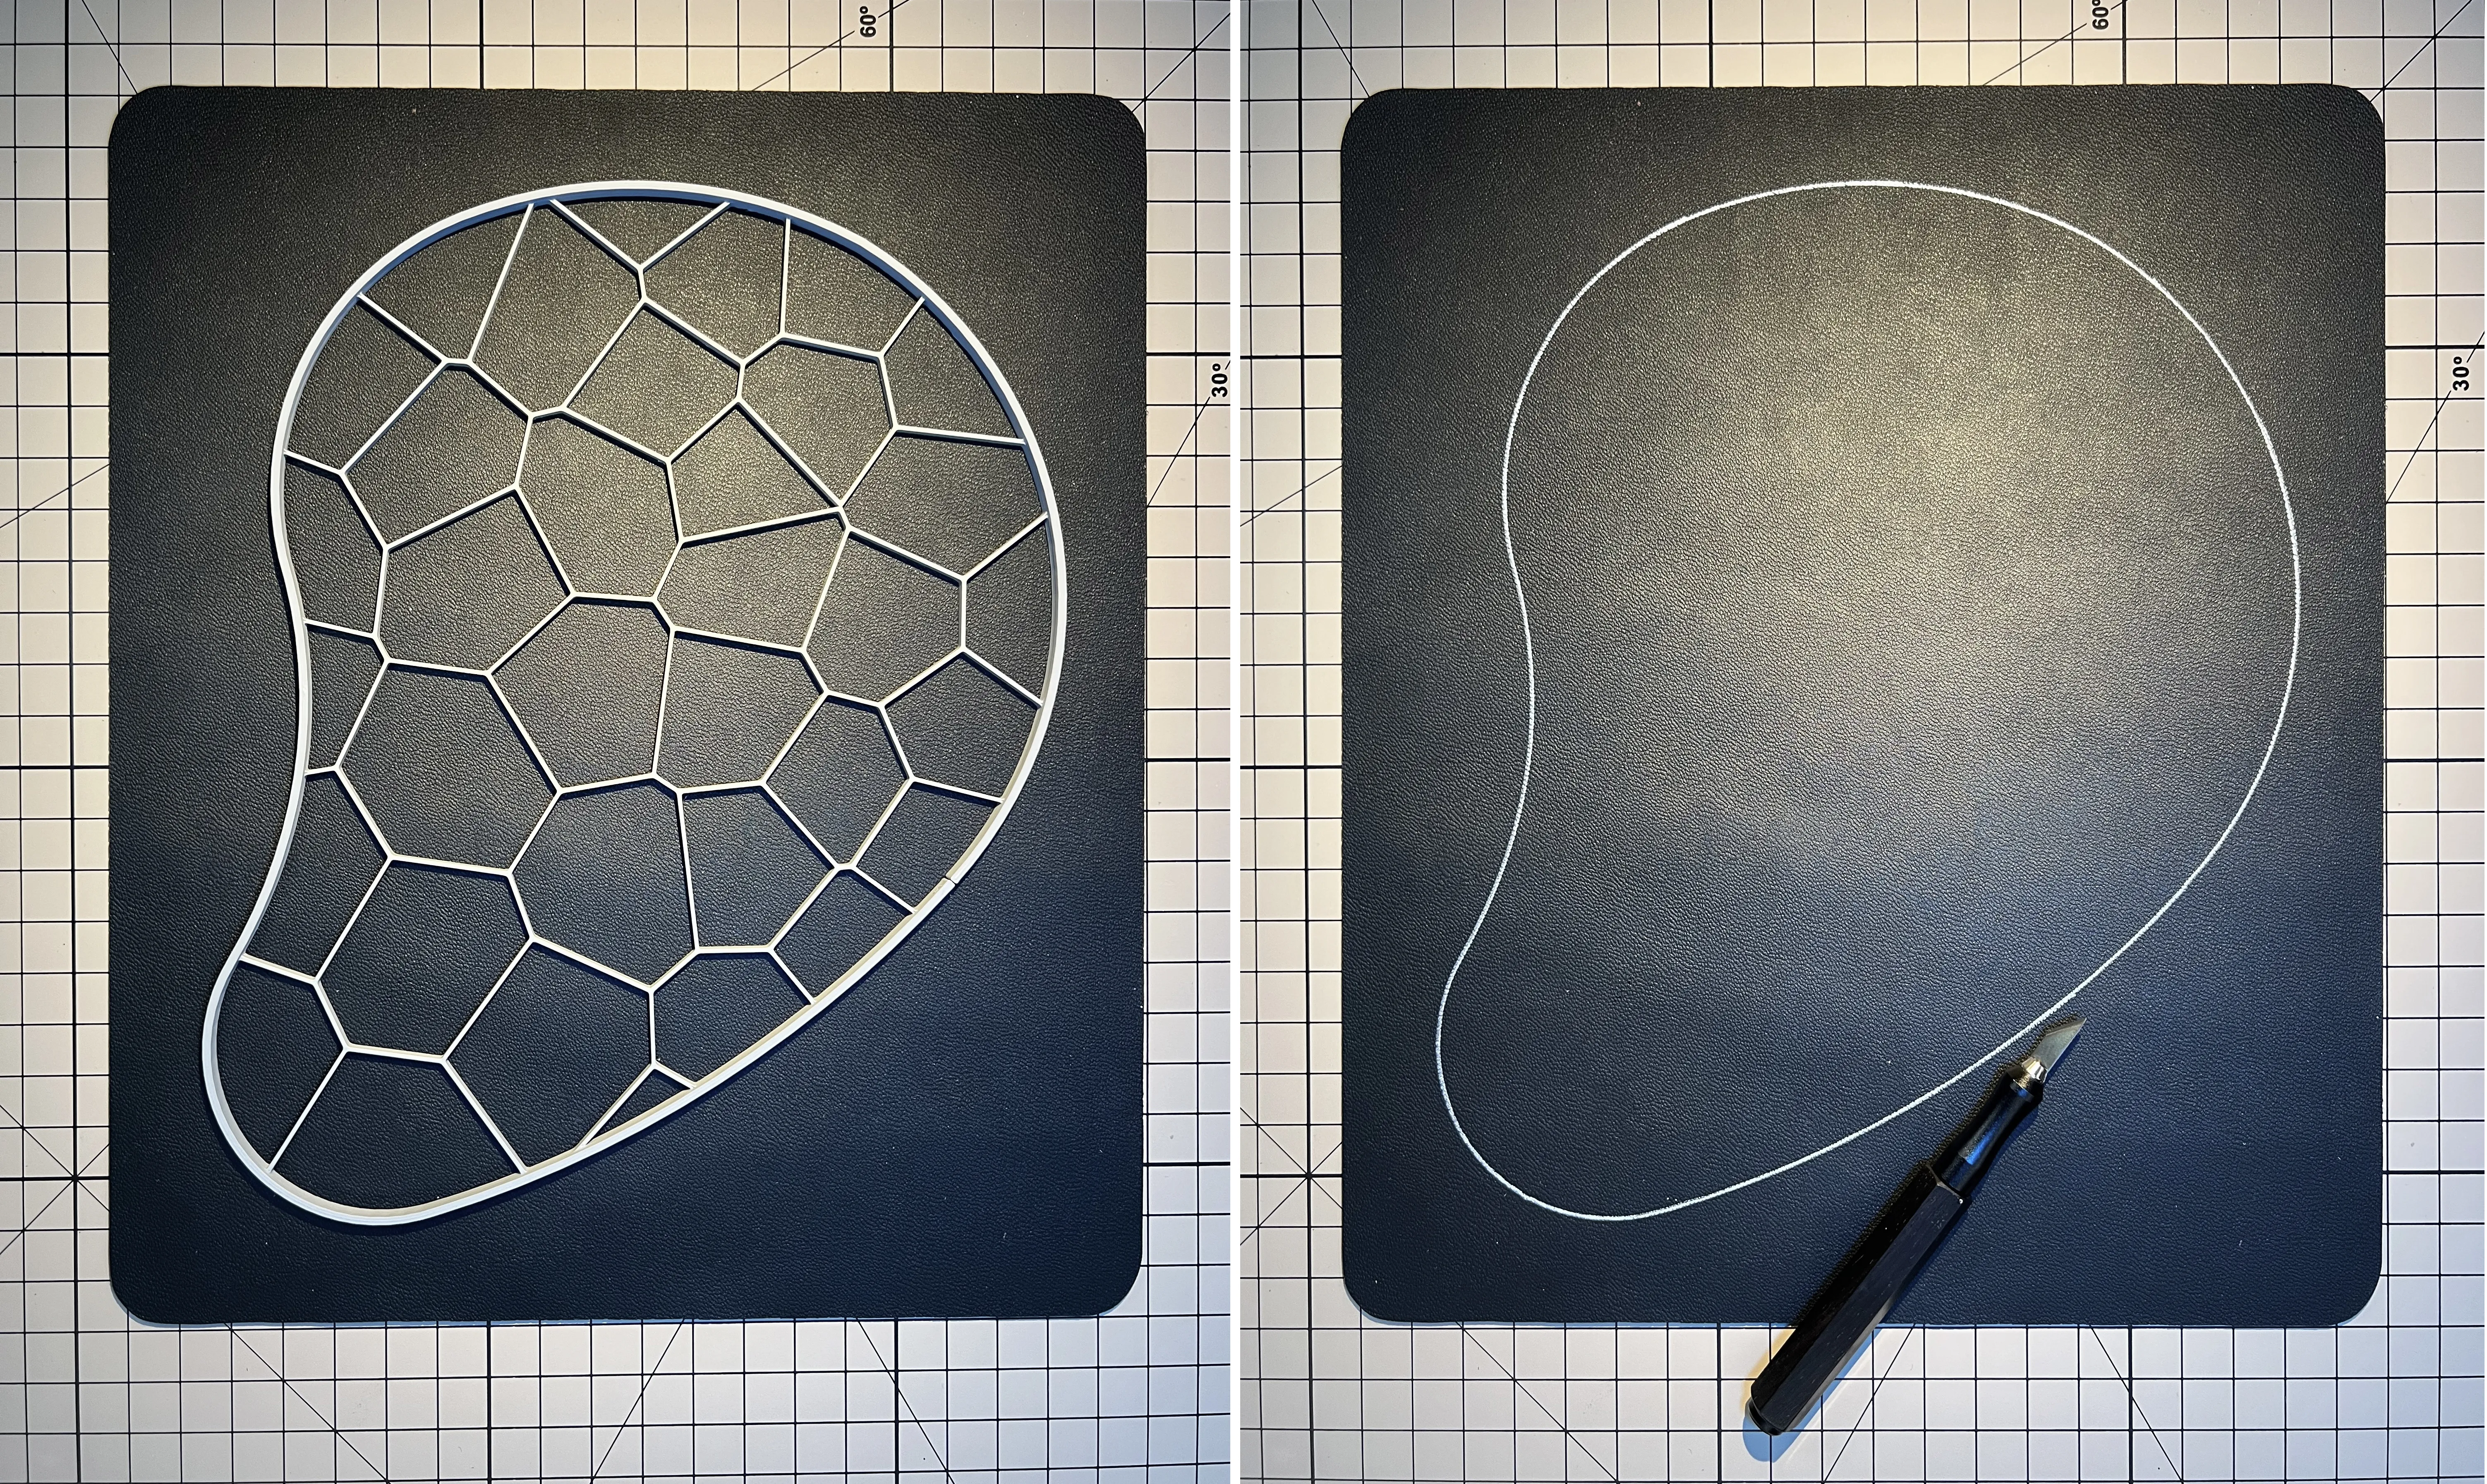
Finally, mouse pad cutting template
If you find the printed surface too slippery during use or experience cursor skipping, you can print the cutting template at the end of the file, then purchase a mouse pad made of edgeless silicone or leather and cut it yourself. I didn't encounter this phenomenon during the two days of testing, but I went ahead and created a template just in case; please decide for yourself, but pay attention to distinguishing between the front and back directions
Finally, an additional note on the shrinkage gaps left between fasteners: during test prints, both PLA and PETG were used, and the shrinkage difference was found to be too large; for general installation compatibility, most shrinkage allowances are 0.08 or 0.1; after assembly, if everything works fine during a trial, you can also directly apply model glue to fix the structural snap-fit locations (such as the two pieces of A1-2)
This concludes my lengthy explanation; I hope it meets your needs, thank you for your support and encouragement, and any suggestions for improvement during use are greatly appreciated
Boost Me (for free)
License

You shall not share, sub-license, sell, rent, host, transfer, or distribute in any way the digital or 3D printed versions of this object, nor any other derivative work of this object in its digital or physical format (including - but not limited to - remixes of this object, and hosting on other digital platforms). The objects may not be used without permission in any way whatsoever in which you charge money, or collect fees.


Comment & Rating (12)