RevoPoint Magnetized Turntable Extension


Print Profile(1)

Description
WHY THIS MODEL
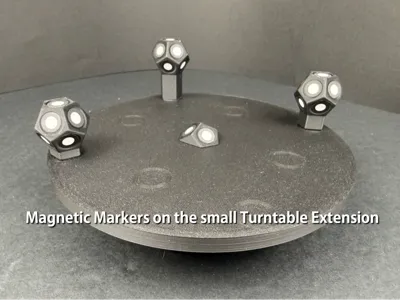
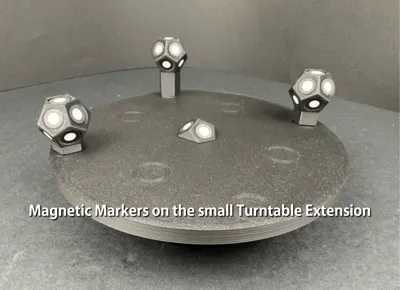
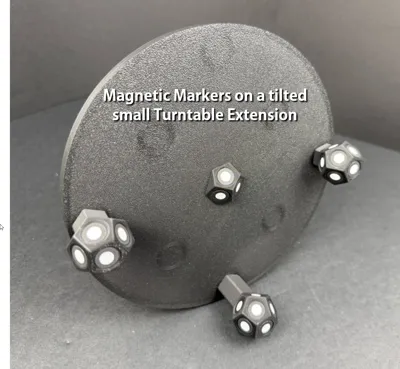
I wanted a way to ensure scanning marker stayed precisely where I placed them on my scanning turntable, so I designed RevoPoint scanning turntable extensions that have embedded magnets in them. The embedded magnets keep my magnetic scanning markers in place, which is especially important when using the tilt feature of the RevoPoint Multi-Axis scanning turntable. While I was at it, I maximized the plate sizes, giving approximately 25% more turntable surface to accommodate slightly larger scannable items.
THE PRINT FILE
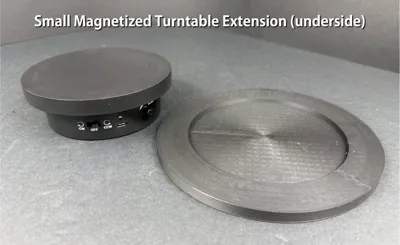
There’s one file containing both turntable extension plates, one for the smaller RevoPoint T-125 turntable and one for the larger RevoPoint Multi-Axis scanning turntable. The smaller plate can be printed on an A1-Mini, the larger plate requires an A1 or larger print bed.
EMBEDDED MAGNETS IN THE PLATE EXTENSIONS
Both plates use 10mm x 3mm magnets (which are actually 10mm x 2.74mm in size). The magnets have been placed 0.20mm from the surface ensuring a very snug magnetic draw to magnetized scanning markers. I remixed @Whity2K’s most awesome magnetic markers for scanning to include the exact same magnets used here, placed on the bottom and top of each marker style. You can find my remixed magnetic marker set HERE.
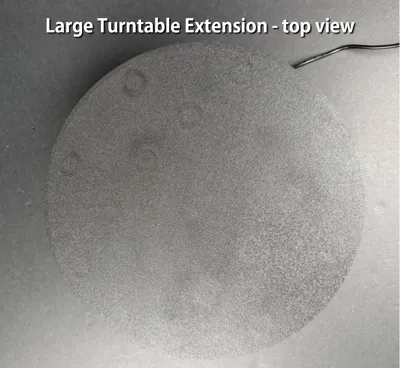
- The larger plate contains 16 magnets evenly spaced around the plate surface.
- The smaller plate contains 9 magnets evenly spaced around the plate surface.
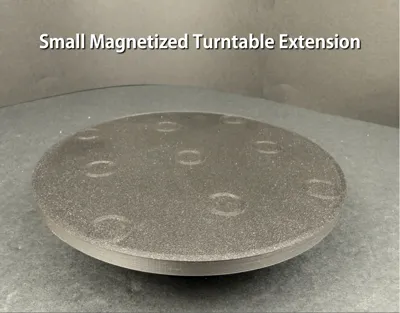
Another advantage to having the embedded magnets so close to the plate’s surface is the way Bambu Studio encircles the magnet locations, showing you exactly where the embedded magnets are, very subtly of course. Looking at the scanning plate from the side will reveal each magnet location, while looking more straight down hides the subtle 3D-printed rings.
RECOMMENDED FILAMENT & MAGNETS, AND TIPS
I have purchased these 10mm x 3mm magnets from Amazon many times over and find them to be dimensionally consistent, which is very important with embedding magnets in designs. They are inexpensive and you get more than you need.
If you have magnets of a different size, I have kept the magnet cutouts as part of the model (versus merging them) so you can edit the sizes of the cutouts to fit the magnet sizes you wish to use.
I also recommend using a matte filament to print the turntable extension plates. Even still, a matte filament will have some sheen when printing them on a textured PEI plate, so slightly buffing the plate’s surface with some extra-fine steel wool will knock off the sheen quickly.
I have found using a textured PEI plate holds the first layer of the turntable extension much better than a smooth plate, so consider that when printing the larger turntable extension especially. The larger turntable is a 3 hour print, which is a long time to keep filament evenly affixed to a print plate, so ensuring you have a very clean and solid first layer is essential for this print.
I’ve also included a small magnet-fitting test block. I strongly recommend printing the test block to ensure your magnets fit snugly before printing the turntable extension. The test block takes about 10 minutes to print and only uses slightly over 1g of filament. It is meant to test 10mm X 3mm magnets. You may have to change the magnet cutout to fit your specific magnet size.
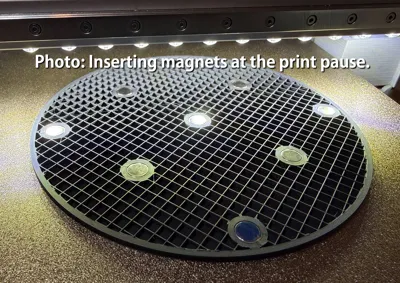
CAUTION: ENSURE THE MAGNETIC POLARITY IS IN SYNC!
If you have magnetic markers, test the polarity of the magnets in the markers with loose magnets and mark the side of the magnet that connects with your scanning markers with a permanent marker. Then, when the layer pause occurs, place the marked magnets with the marked side facing the plate, or DOWNWARD. This will ensure your turntable plate will attract your scanning markers and not repel them! If this is a struggle to follow at first, just test a few loose magnets with your magnetized scanning markers and you’ll find out what I mean!
Good Luck!
(Don’t forget to give a like or a boost if you feel inclined!)
Thanks for looking at my model and good luck on your prints. Be sure to post a photo of your awesome completed prints to share with others!
License
You may create derivative works based on this object, provided that all such derivative works are published exclusively on the MakerWorld platform and include proper attribution to the original creator. You may not share, upload, host, distribute, or publish this object—or any derivative work of this object—on any other digital platform, marketplace, or distribution channel. Commercial use of this object and any derivative works is strictly prohibited. This includes, but is not limited to, selling, renting, sublicensing, or using the object in any context in which you receive monetary compensation or other financial benefits.
Comment & Rating (0)